
As I’ve been talking about organizing a master closet, I have shown you many pictures of mine. I am definitely happy with my recent improvements and feel like adding a simple stack of drawers has given me a brand new closet! As promised, I’m moving on to ideas for storing jewelry… and for that pictures of my closet are less than sufficient!!! My jewelry collection is rather small and unimpressive!
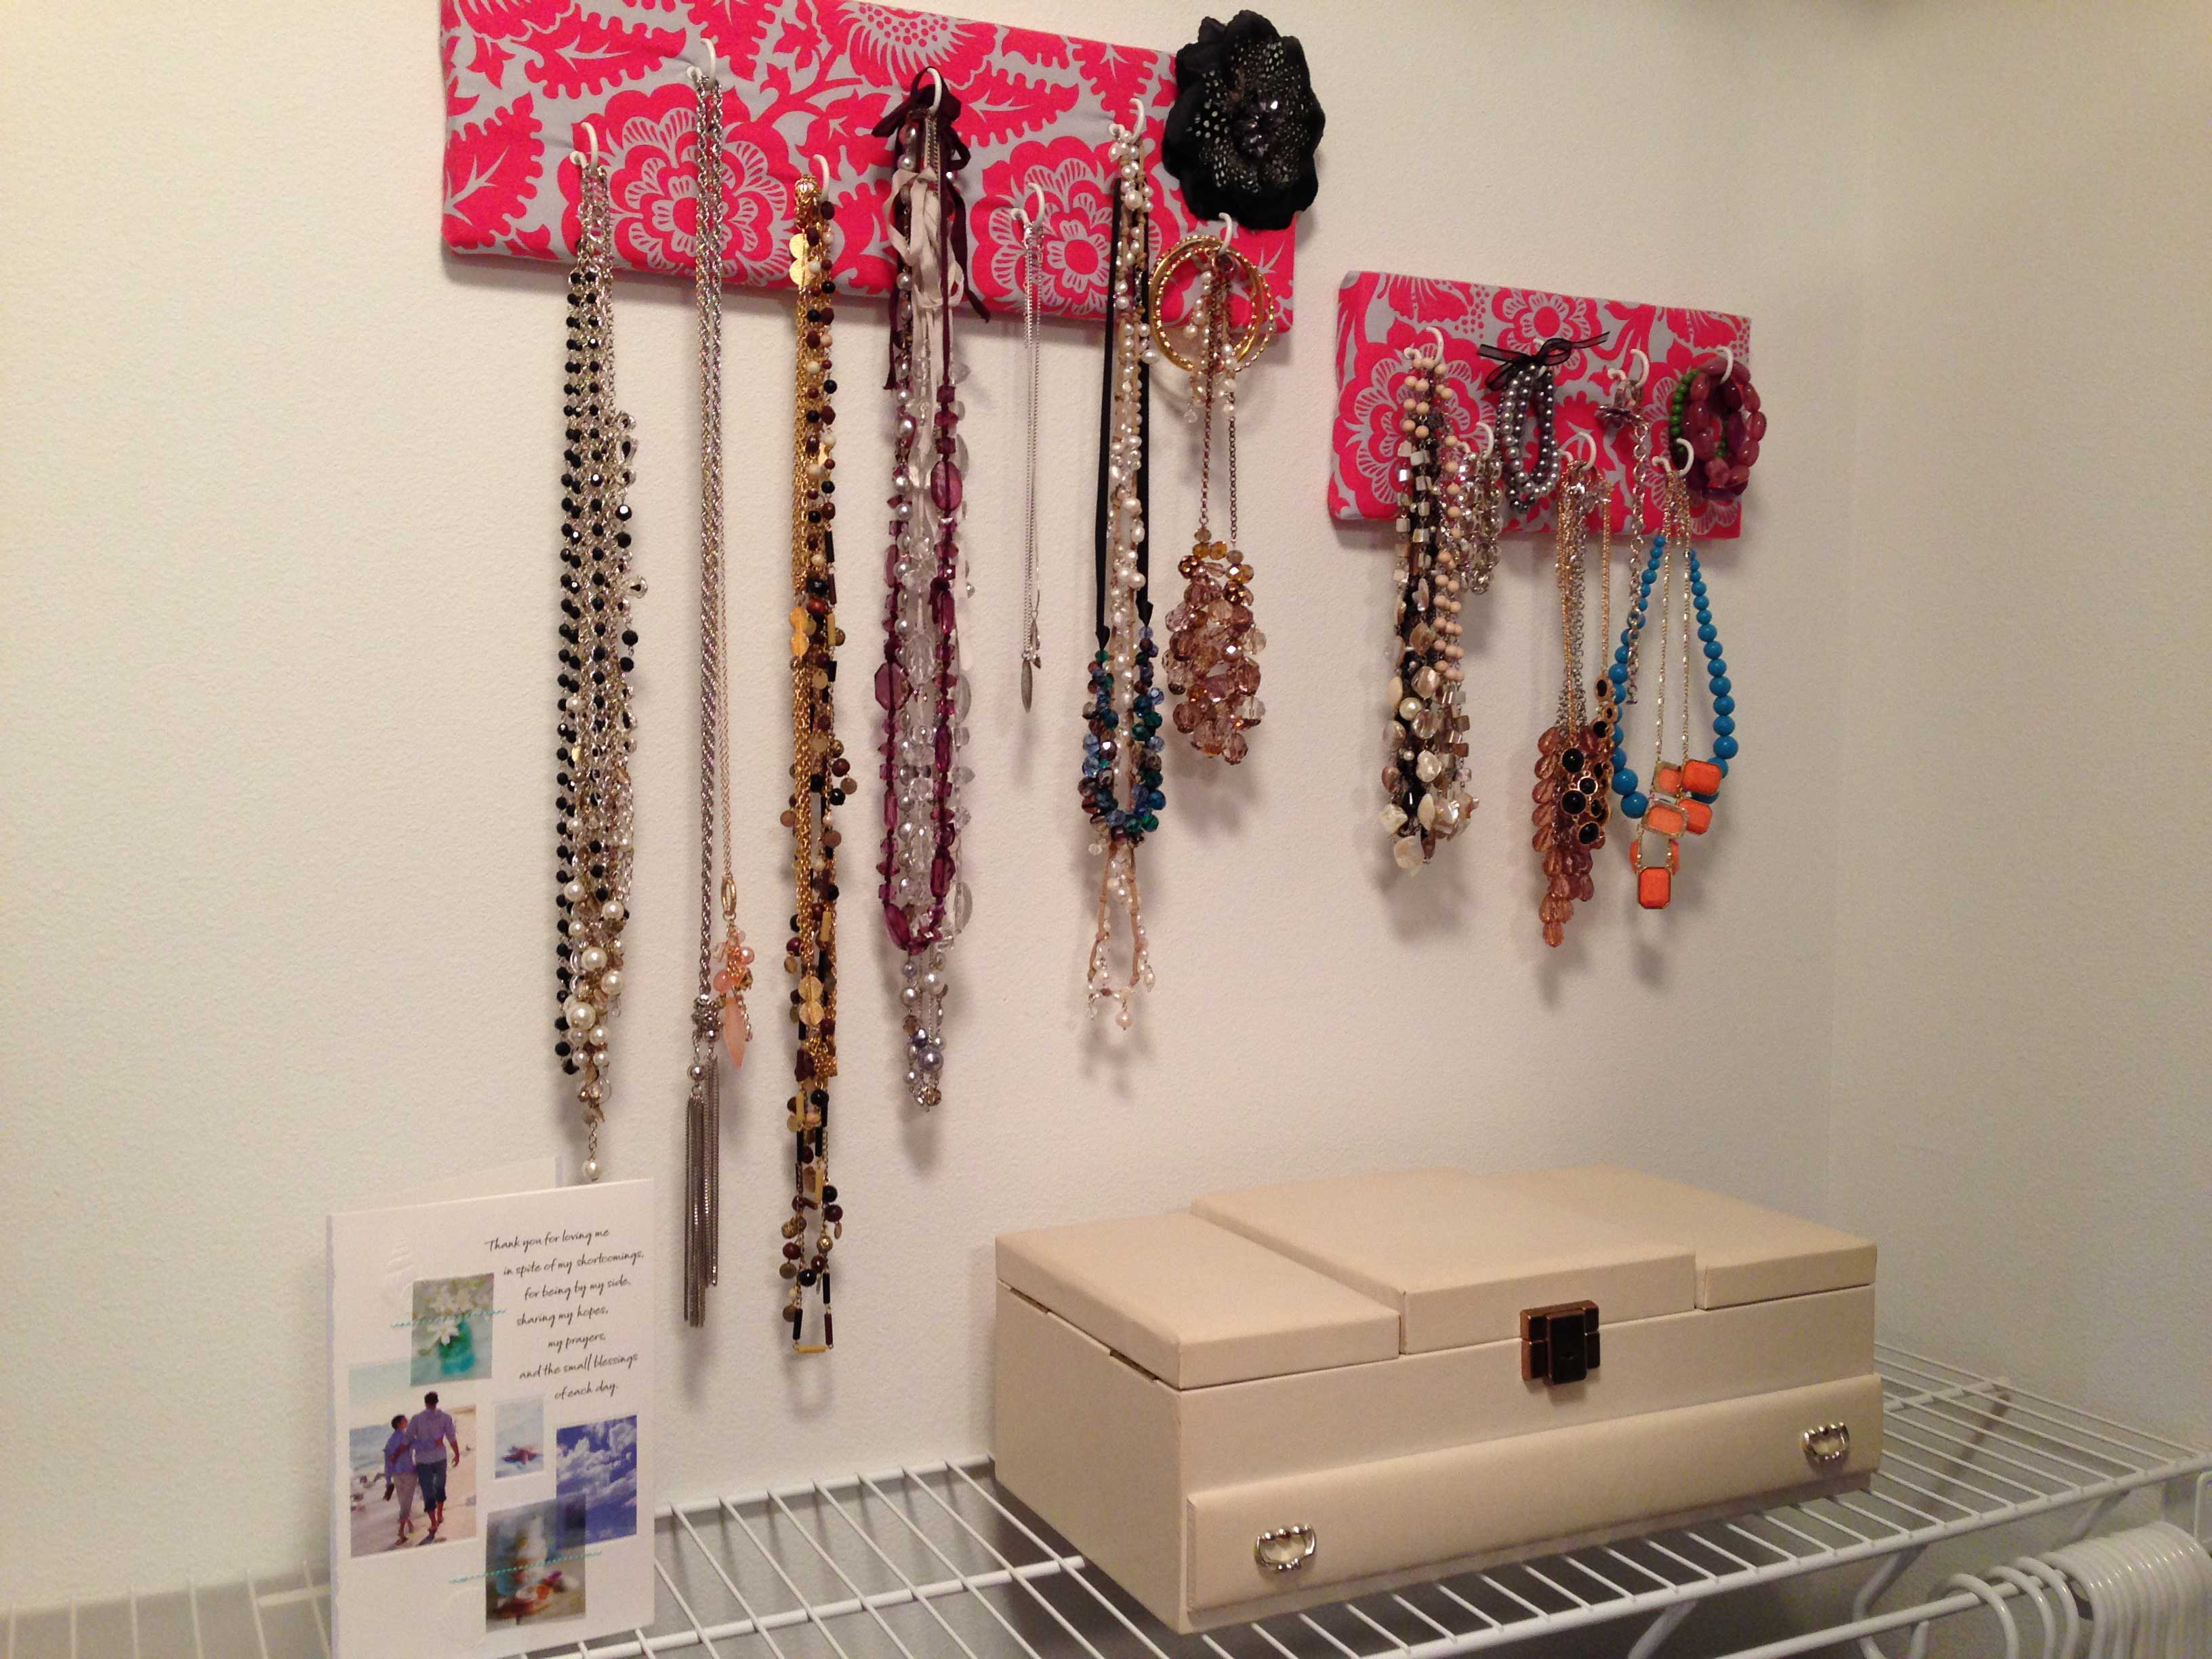
I love my pop of pink fabric, and find my display very functional but I wouldn’t really say it is inspiring! The cream jewelry box has all of my earrings, rings, a couple of broaches and a few necklaces. (yes, my collection is very small!) The box belonged to my great aunt, and it reminds me of my grandparents – two of the best people in the world! So, I will have that jewelry box for a REALLY long time… probably until I pass it along to Addison some day.
Fortunately, I recently helped a client create a storage display for her closet that is functional, and cute! It’s a little closet bling!!!
Yes, she has a big closet with a perfect wall at the end for the display. Even if you have a small closet, I bet you have a wall, door or other area where you could do something similar – even if it has to be scaled down a bit. If you have TONS of jewelry or chunky pieces that take up a lot of space, you might want to focus more on function and less on style when creating storage for your jewelry.
In fairness I also have to say, she has this nice big wall for her jewelry because she does not have an excessive amount of clothes and shoes that pack her closet to the gills! Hopefully you have purged, sorted, folded, and ordered your closet and have a little new found space too!
The mirror in the photo is the only thing my client originally owned. I created the rest of the display using things easily found at local craft and home improvement stores. Here are some details on each frame.
This frame is chicken wire, pressed against linen.

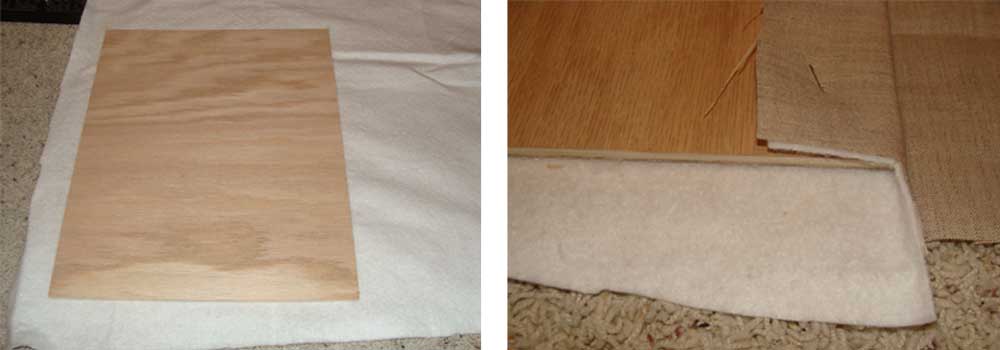
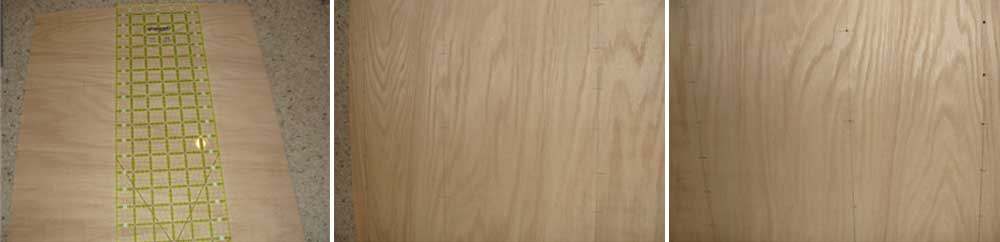
I started with an open back frame, a piece of 1/4 inch plywood cut to fit inside the frame, quilt batting, linen fabric and some chicken wire.

After ironing the linen I laid it out wrong side up, then added quilt batting and finally the piece of plywood. I wrapped the fabric and batting tightly around the plywood and used a few staples to hold it in place. My staple gun uses heavy duty staples that were too long for the 1/4 inch plywood, so I simply used my regular office stapler and it worked just fine!
Next I flipped the frame over and used tin snips to cut the chicken wire to the size of the frame. The fabric covered plywood was laid on top of the chicken wire and pressed into the frame. I had to tap it lightly with a hammer, and everything fit nice and snug! Last, I used push type glazier points (available at home improvement and craft stores) to secure everything in the frame.
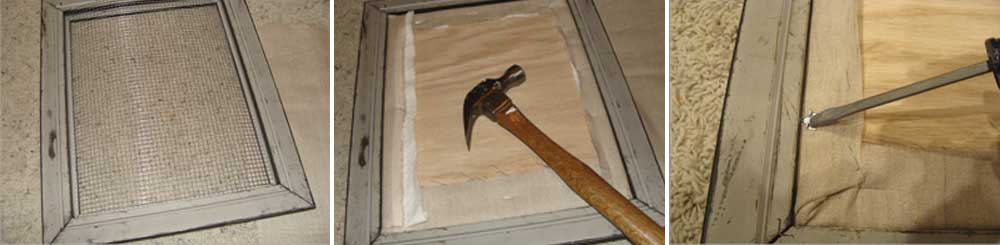
Done! I later added small “s” hooks to hang jewelry that would not hook through the wire openings.
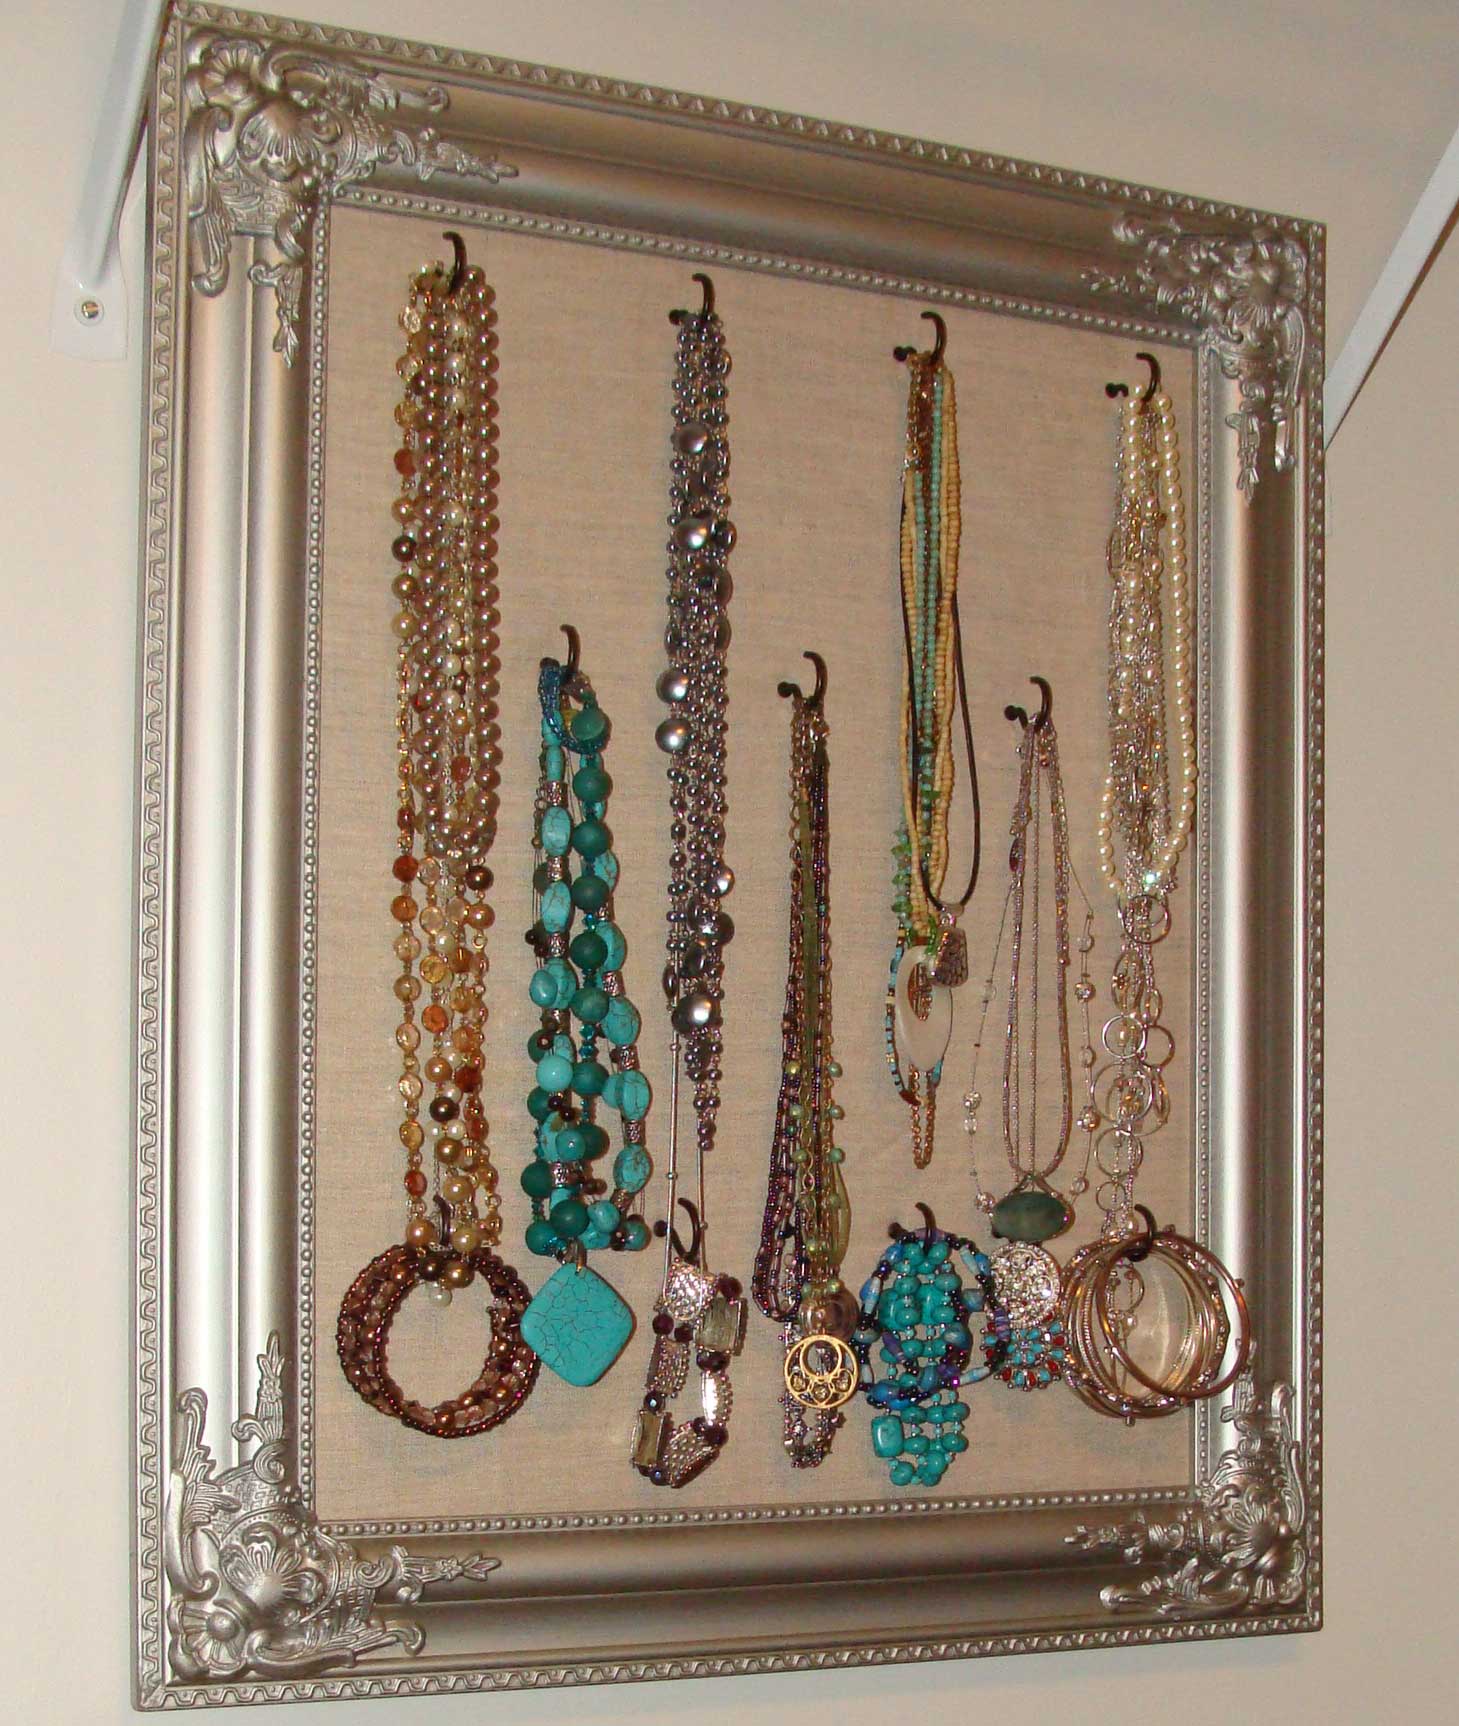
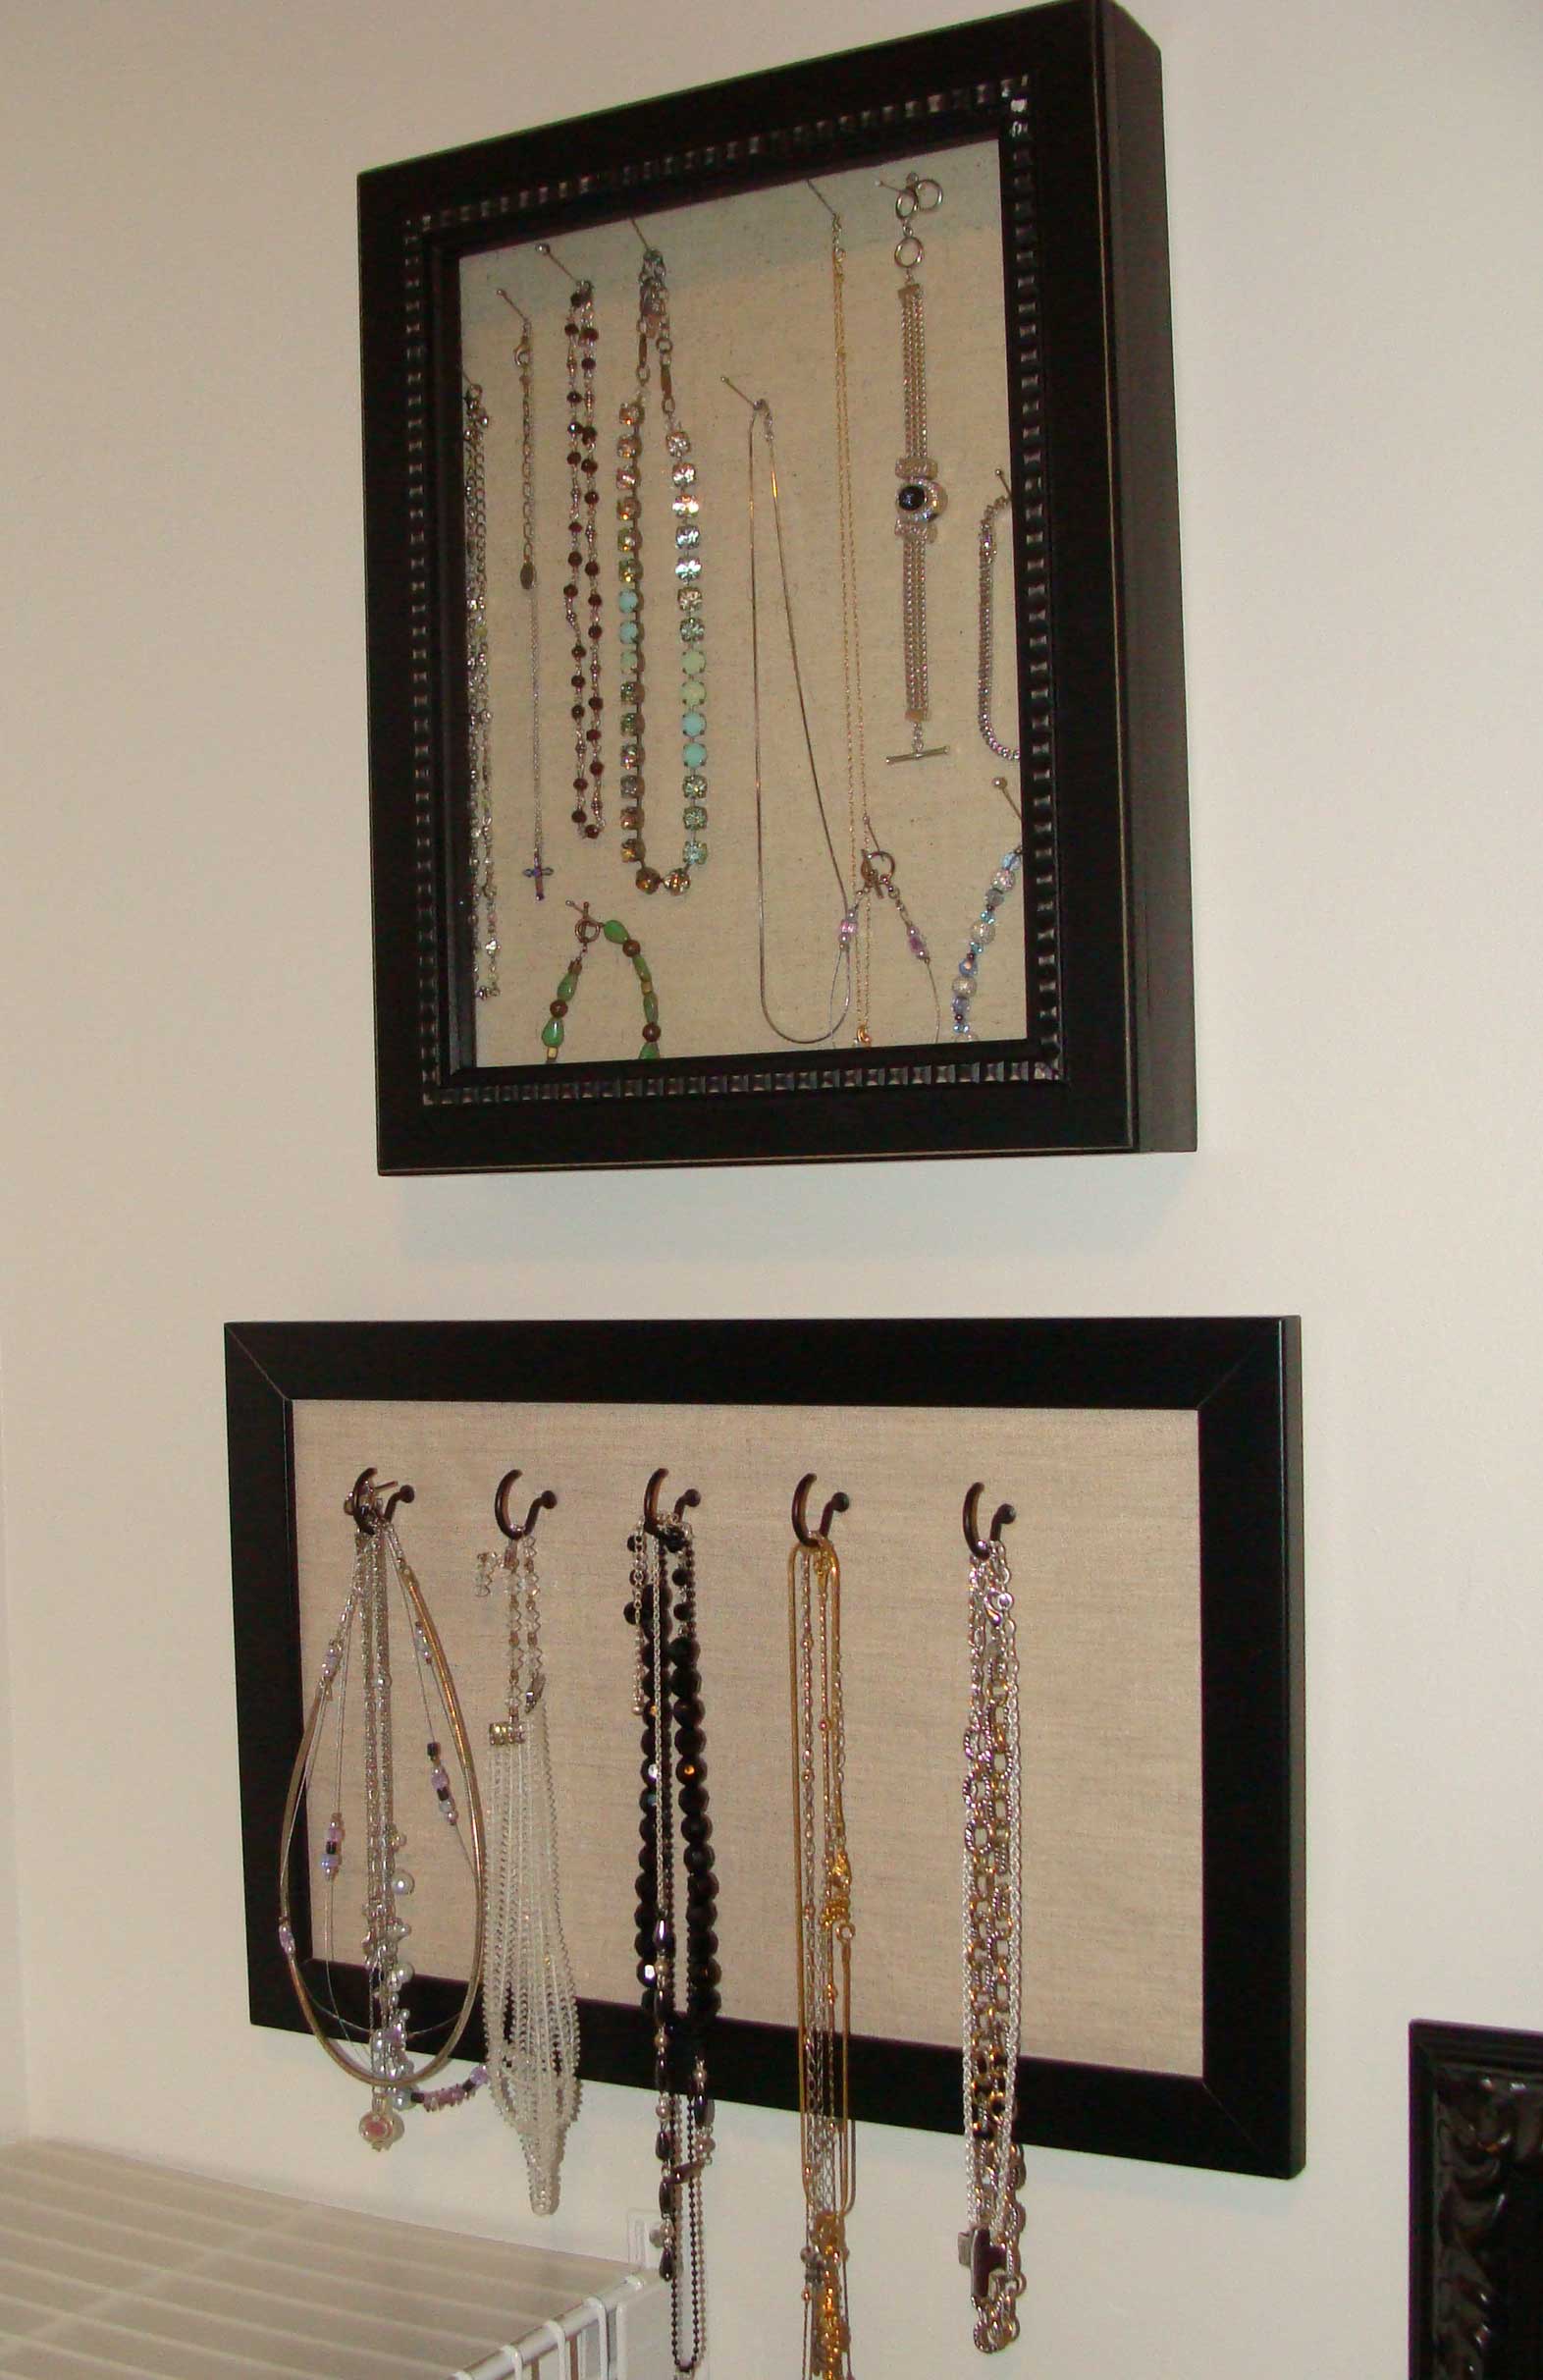
The next frame was metallic with a linen covered backing and “c” hooks. This frame is my favorite – I think it is so pretty!
As you might assume, I used the same process to cover 1/4 inch plywood for the backing. However, for this frame I wanted to screw “c” hooks into the plywood. I have found the you really need to pre-drill for the hooks, and drilling through batting is a terrible idea – trust me I’ve tried!! The batting just winds around your drill bit and makes a terrible mess!
I started by laying out how many “c” hooks I would use and determined their spacing. Using a straight line to keep the hooks level, I measured across in equal increments for the hooks. I would recommend about 2 inches apart for necklaces and farther spacing for bangles. However it depends on how chunky your jewelery is. Last, I pre-drilled each of the holes through the plywood.
I covered my plywood and popped it in the frame, using my glazier points to secure it in place.

Oops! I forgot to take a picture with the “c” hooks, but I screwed those in from the front! I also pre-drilled a few extra holes for the “c” hooks that I did not use, so that the frame would be flexible in the future to add or move hooks a bit.
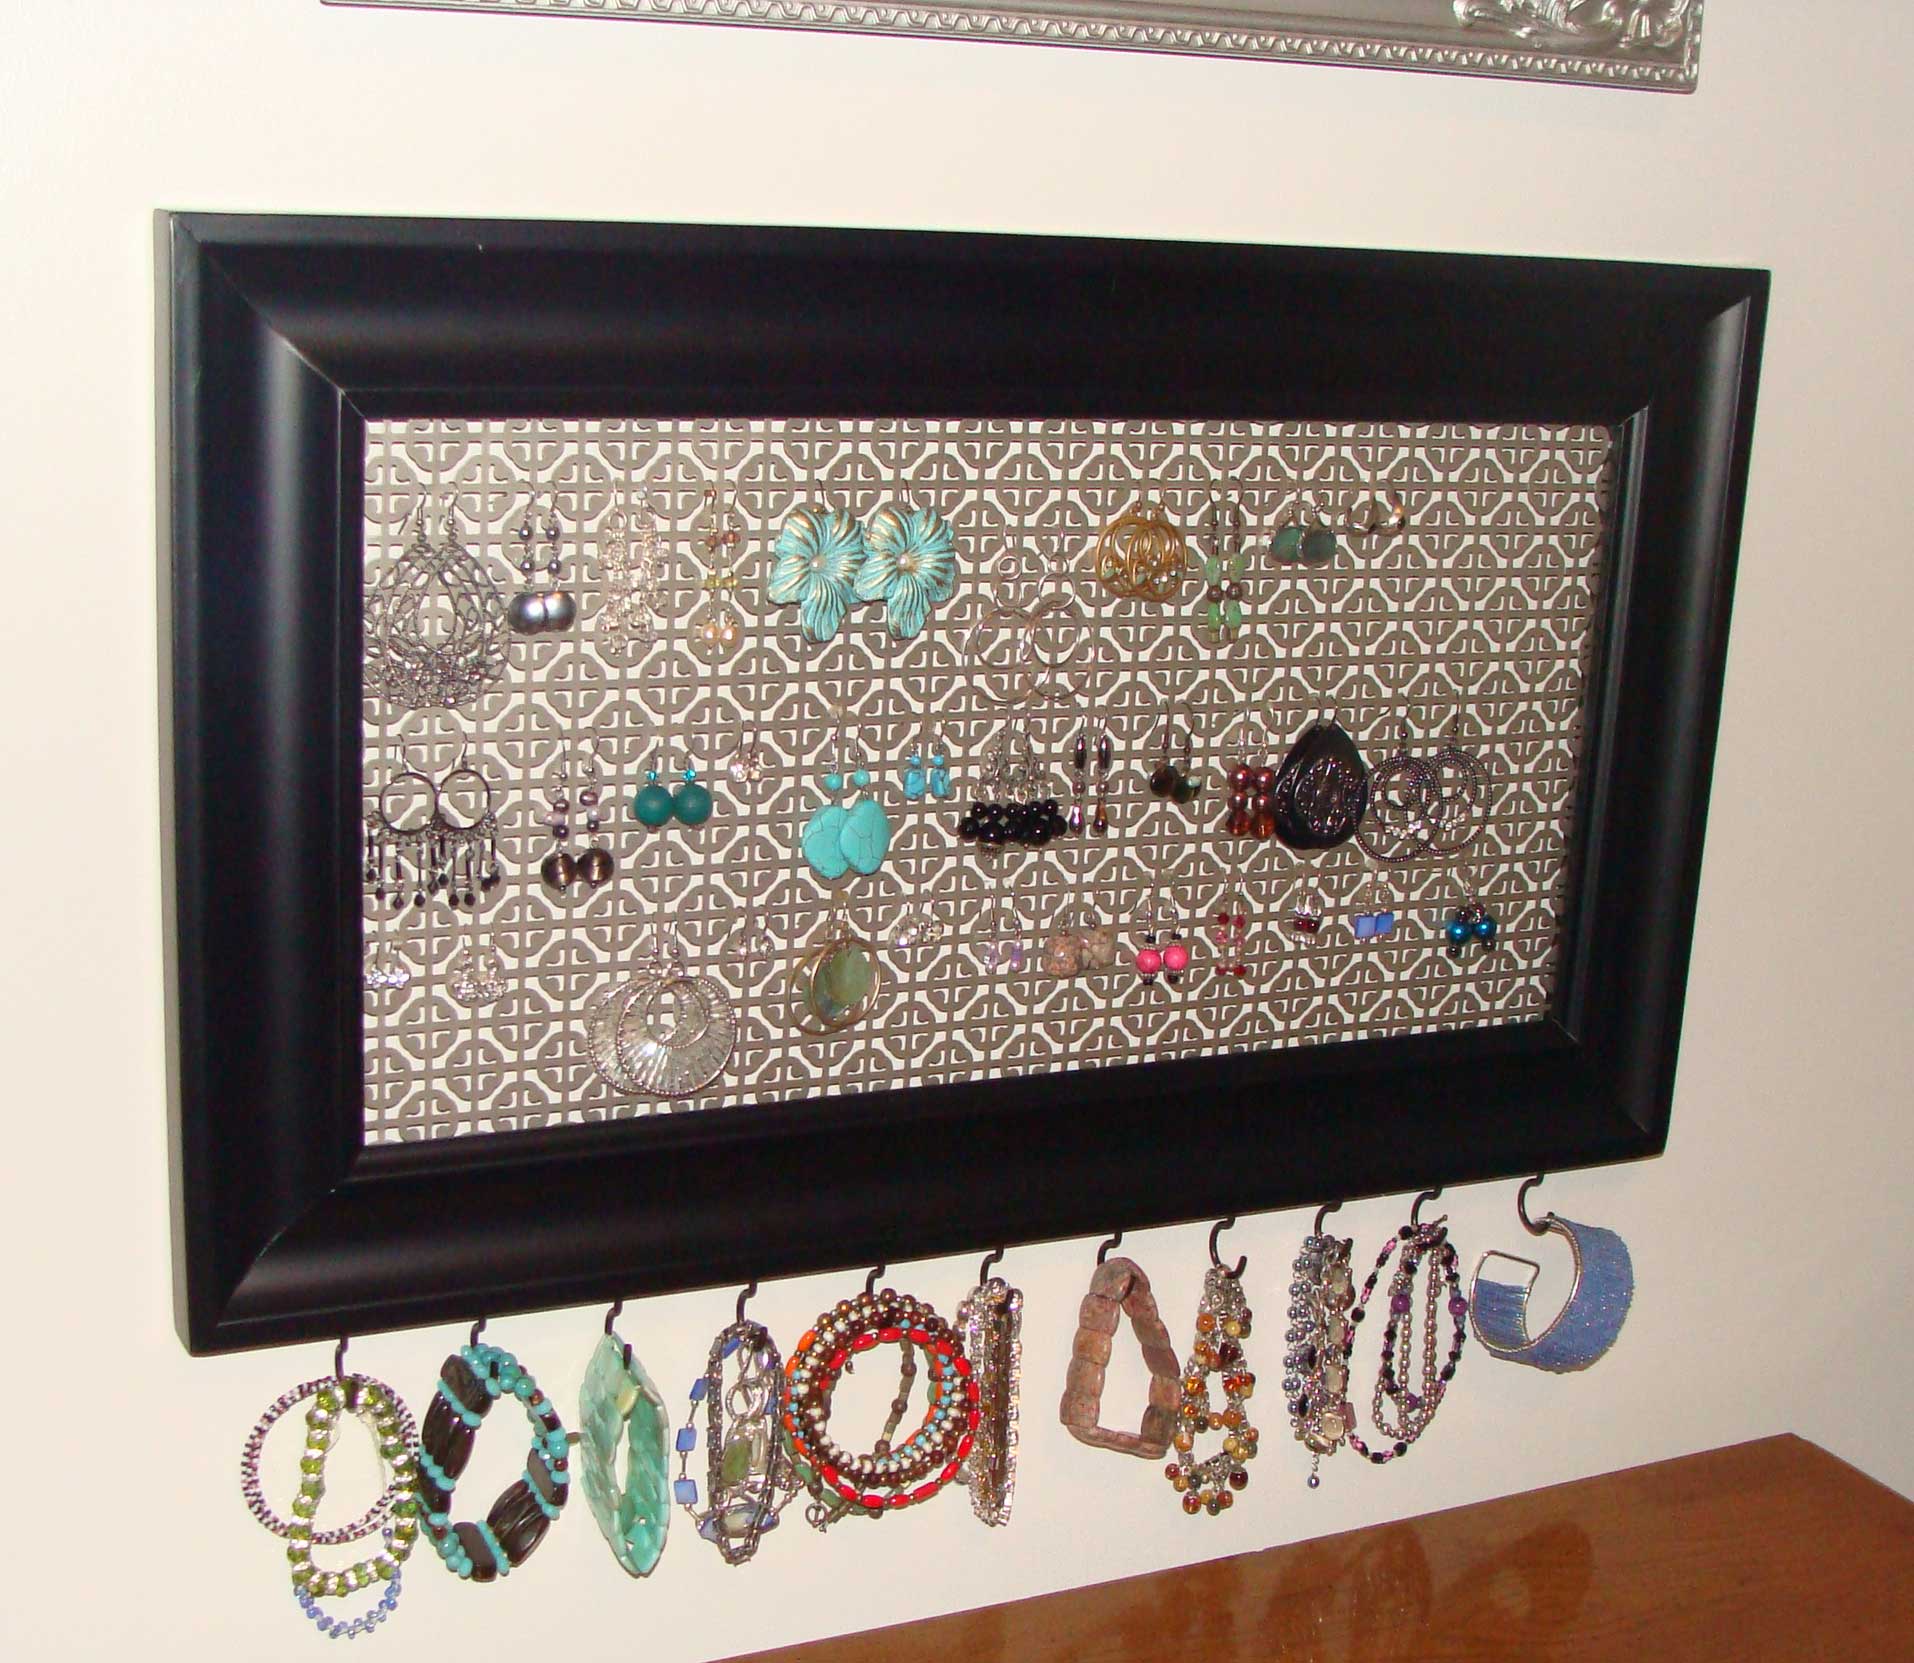
Last I used sheet metal (from the home improvement store) to create another frame with openings for hanging earrings. Additional “c” hooks on the bottom of the frame created space for bracelets.
Using my tin snips, I cut the decorative sheet metal (LOVE this pattern!) to fit inside my frame. The glazier points secured the sheet metal in place.

I also added “c” hooks, which hang down, instead of out – like the hooks I used on this piece for hair accessories. Again, I always mark and pre-drill for “c”hooks to keep them straight and evenly spaced, and to prevent the wood from splitting when I screw them in.
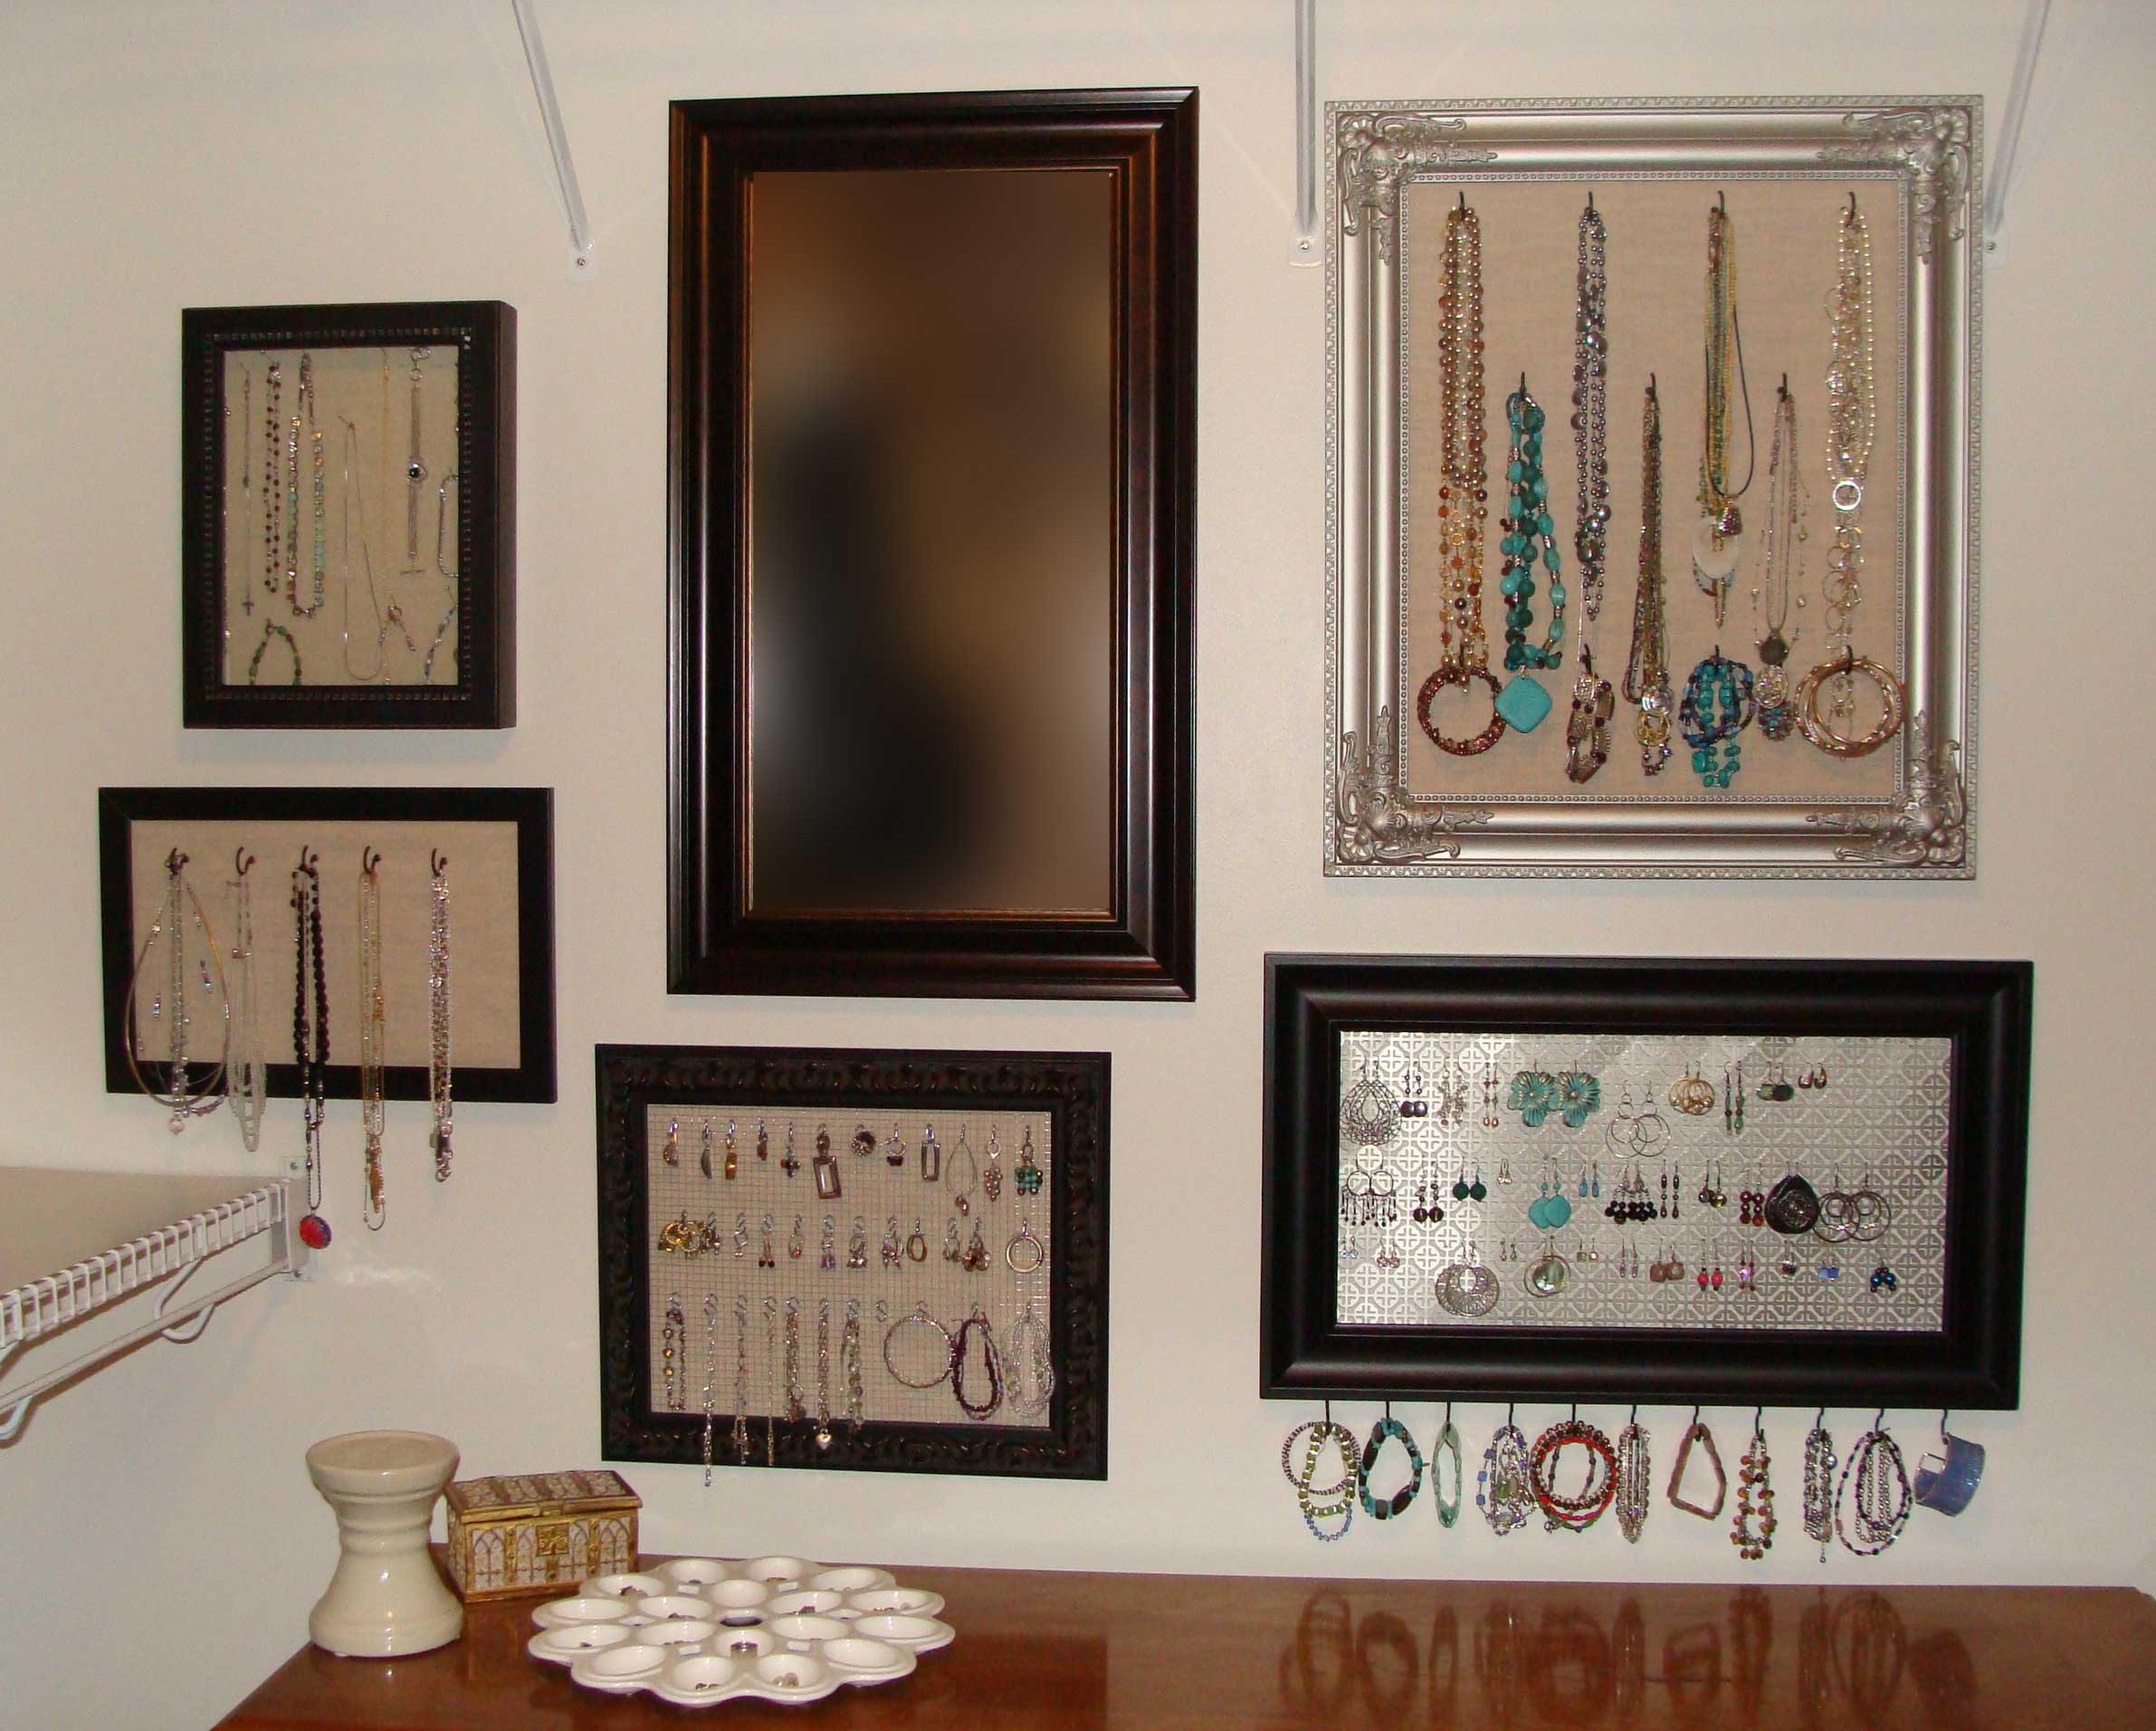
Here is the display again!
We used a shadow box in the top left corner for pieces of greatest value to her. Below that is a small frame (with linen covered plywood and “C” hooks) that we added at the end of the project to make room for a few additional pieces of jewelry that weren’t fitting well. This also allowed us to leave some space for her collection to grow!
Here is my favorite piece again – I love the formal metallic frame, with the natural linen and antique brass hooks. The pops of turquoise from her jewelry adds just enough color, and there is no shortage of sparkle. Functional and feminine – LOVE!!!
I also LOVE the pattern of this sheet metal. I have wanted to use a piece of this on a project for so, and it definitely lived up to my expectations!
A white egg dish provides room for rings and a few more earrings. She will most likely add another white dish or two to her dresser top for additional space in the future.
Scarfs add a great pop of color, and seamless transition from accessories to clothing. You can see the acrylic scarf hanger I told you about in my last post in the top right corner too!
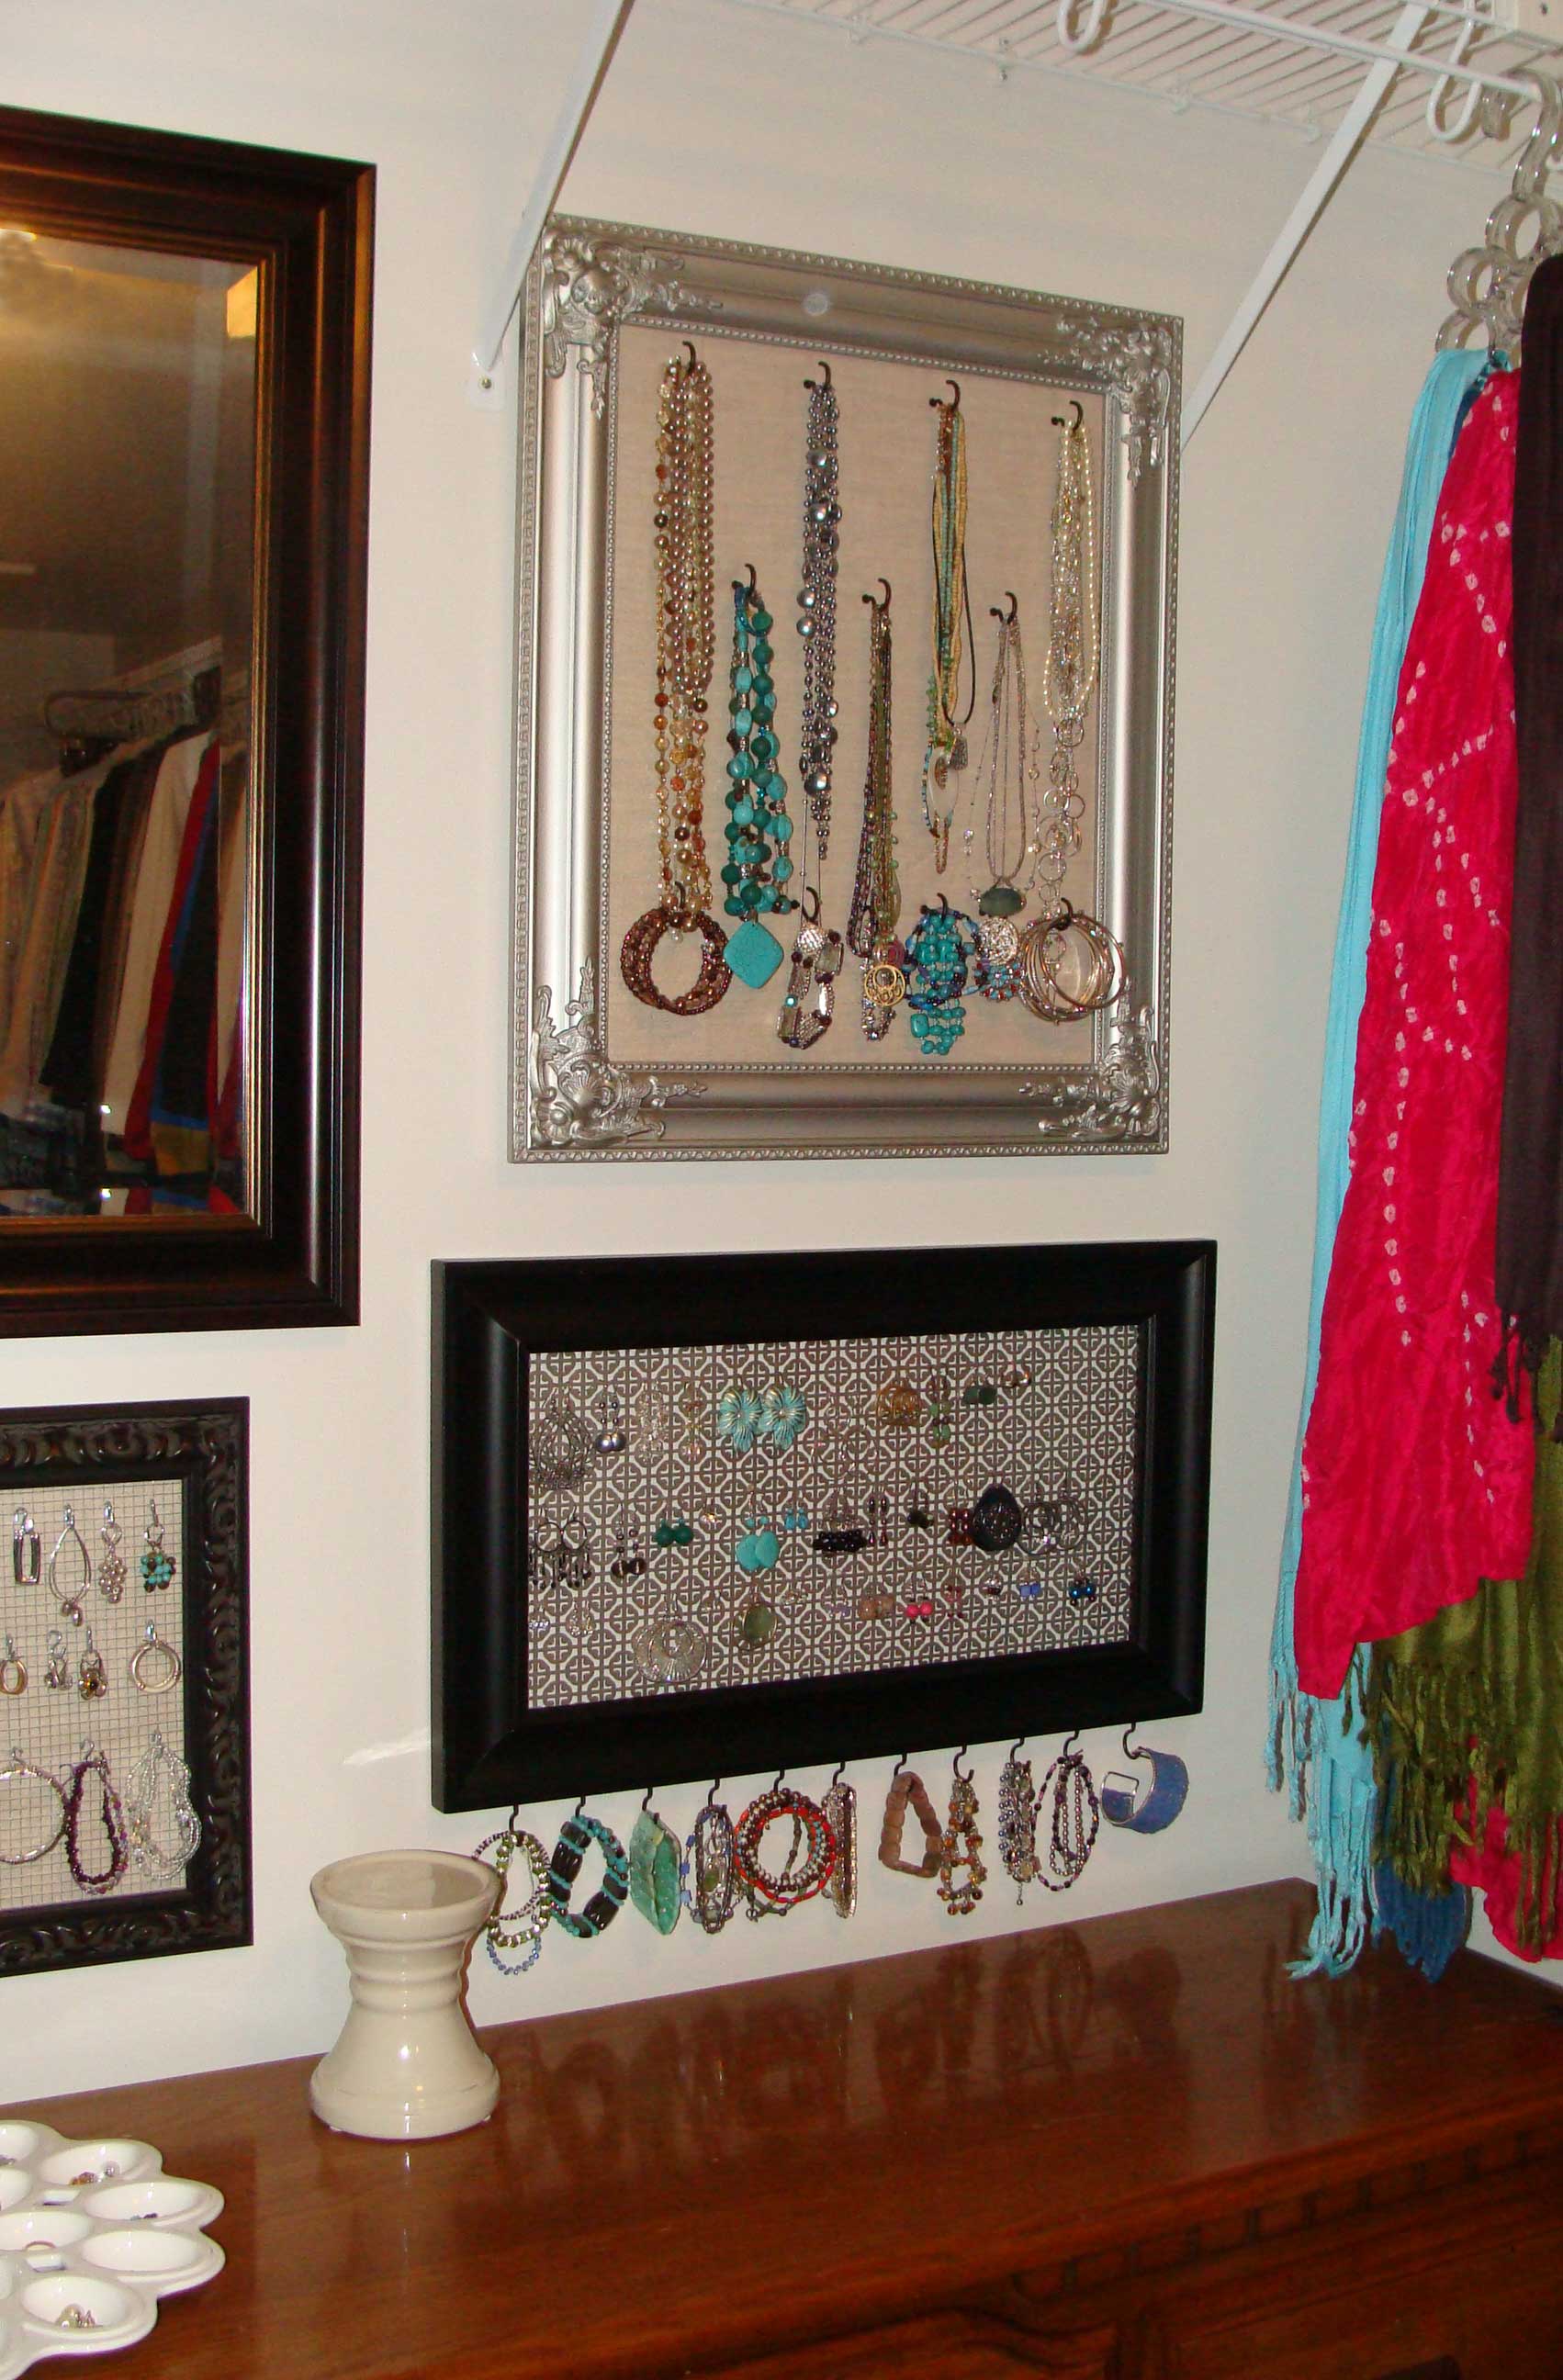
I could look at this wall every day, couldn’t you!
As we arranged each piece of jewelry on a frame in a way that it would look orderly and function well my client commented, “I can remember when and where I got each of these pieces (of jewelry)”. I love that now she can see her pieces to more easily access and use them, but more importantly she can look at them daily and remember the important people, places, and memories that she associates them with. To me that is the true beauty of an orderly home… when we have less so that we are able to see, use and appreciate what we choose to keep and display!