
You know how I said I would breeze through the dining room update in a quick series and move on to organization? Well, that hasn’t happened now has it!! Hopefully I’m back on track now, but I’ve been doing what a lot of you have probably been doing too…. regaining order now that our kids are back in school! It’s amazing to me how much I can get done around the house when my kids are in school. Even I know life is not all about being productive, but sometimes just feeling like life is under control is SUCH a good feeling!
Before I get sidetracked talking about my new projects and organizational undertakings, let’s get back to my updated dining room – I am SO enjoying it!!!
As I mentioned in one of my previous posts, I knew I needed some new chairs as I was making changes to our dining room. The chairs we had been using go with the nice dining table set we moved to the basement, and I wanted to be able to use those downstairs too. Also, they really didn’t go with the style I am moving towards, so it was a great opportunity for a little Craigslist stalking and a DIY project.
I shared in a previous post how I never would have thought of wicker backed chairs until my friend Caroline suggested them. But, once I started looking at inspiration pictures I knew I would love them! I began watching Craigslist for a good set of wicker-backed chairs and discovered these…
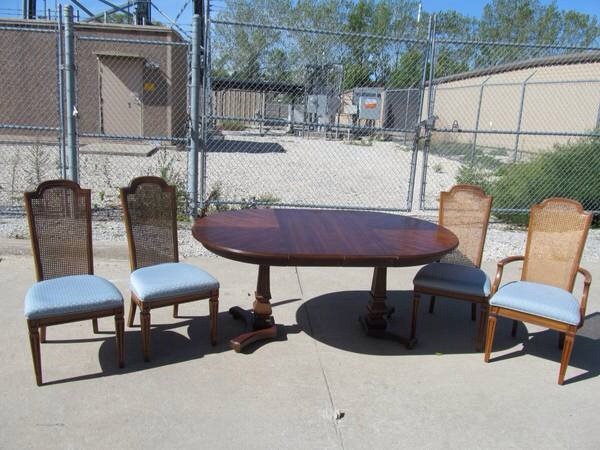
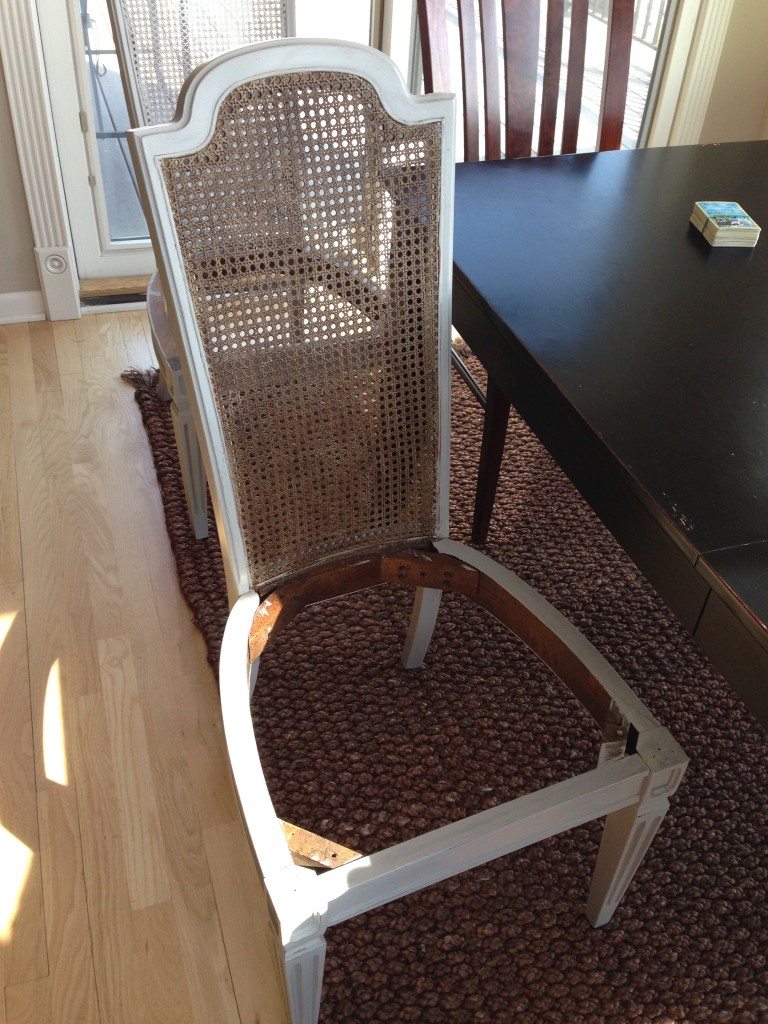
They were listed for $100 with the table – a great deal! I know they look a bit ragged and dated in this photo, but I could see some potential. Can you? Or do you just think I’m crazy? 🙂
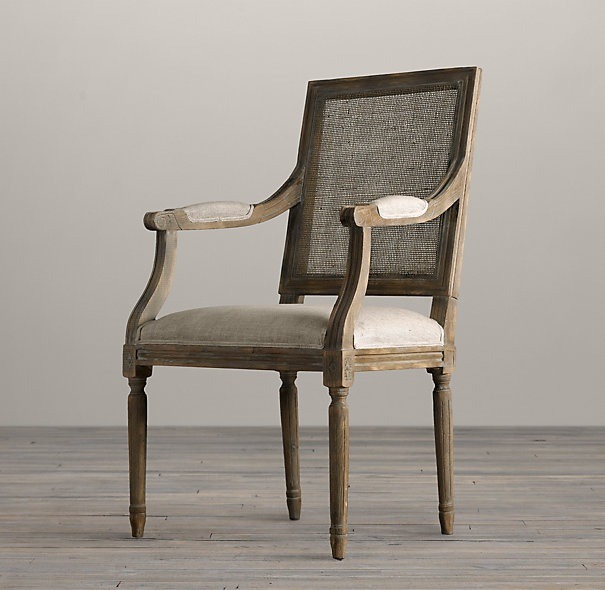
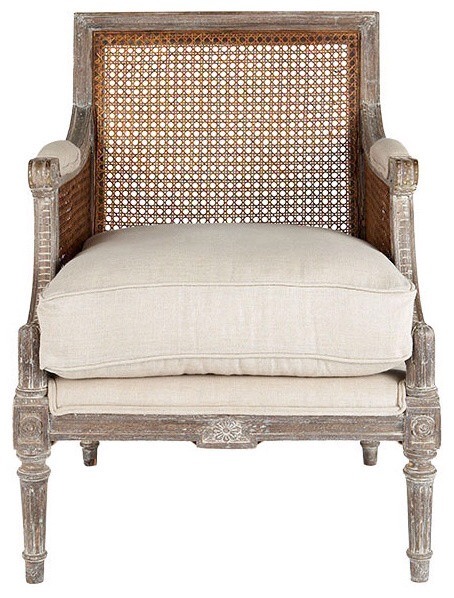
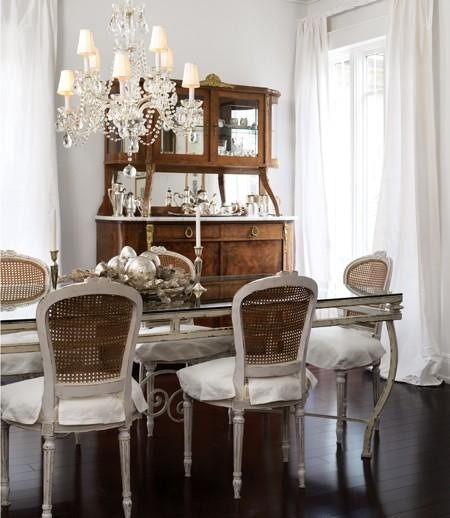
I found some good DIY and before/after examples of what I was envisioning in my mind that gave me some optimism about what my Craigslist find could become. Gorgeous…
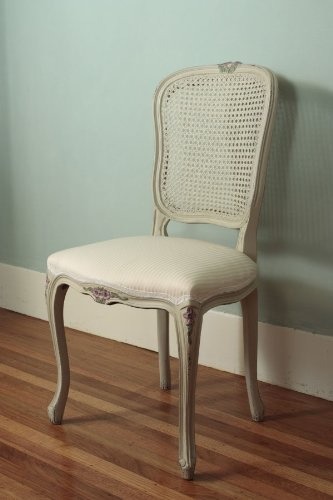
Evidence of the potential amazing transformation…
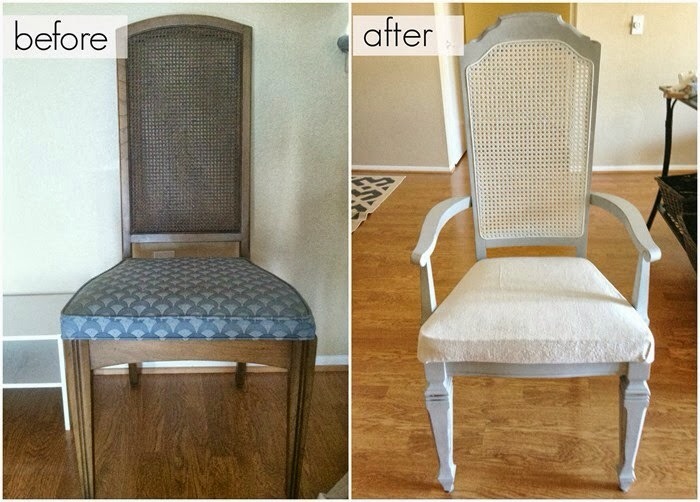
And even without the before this after is impressive!
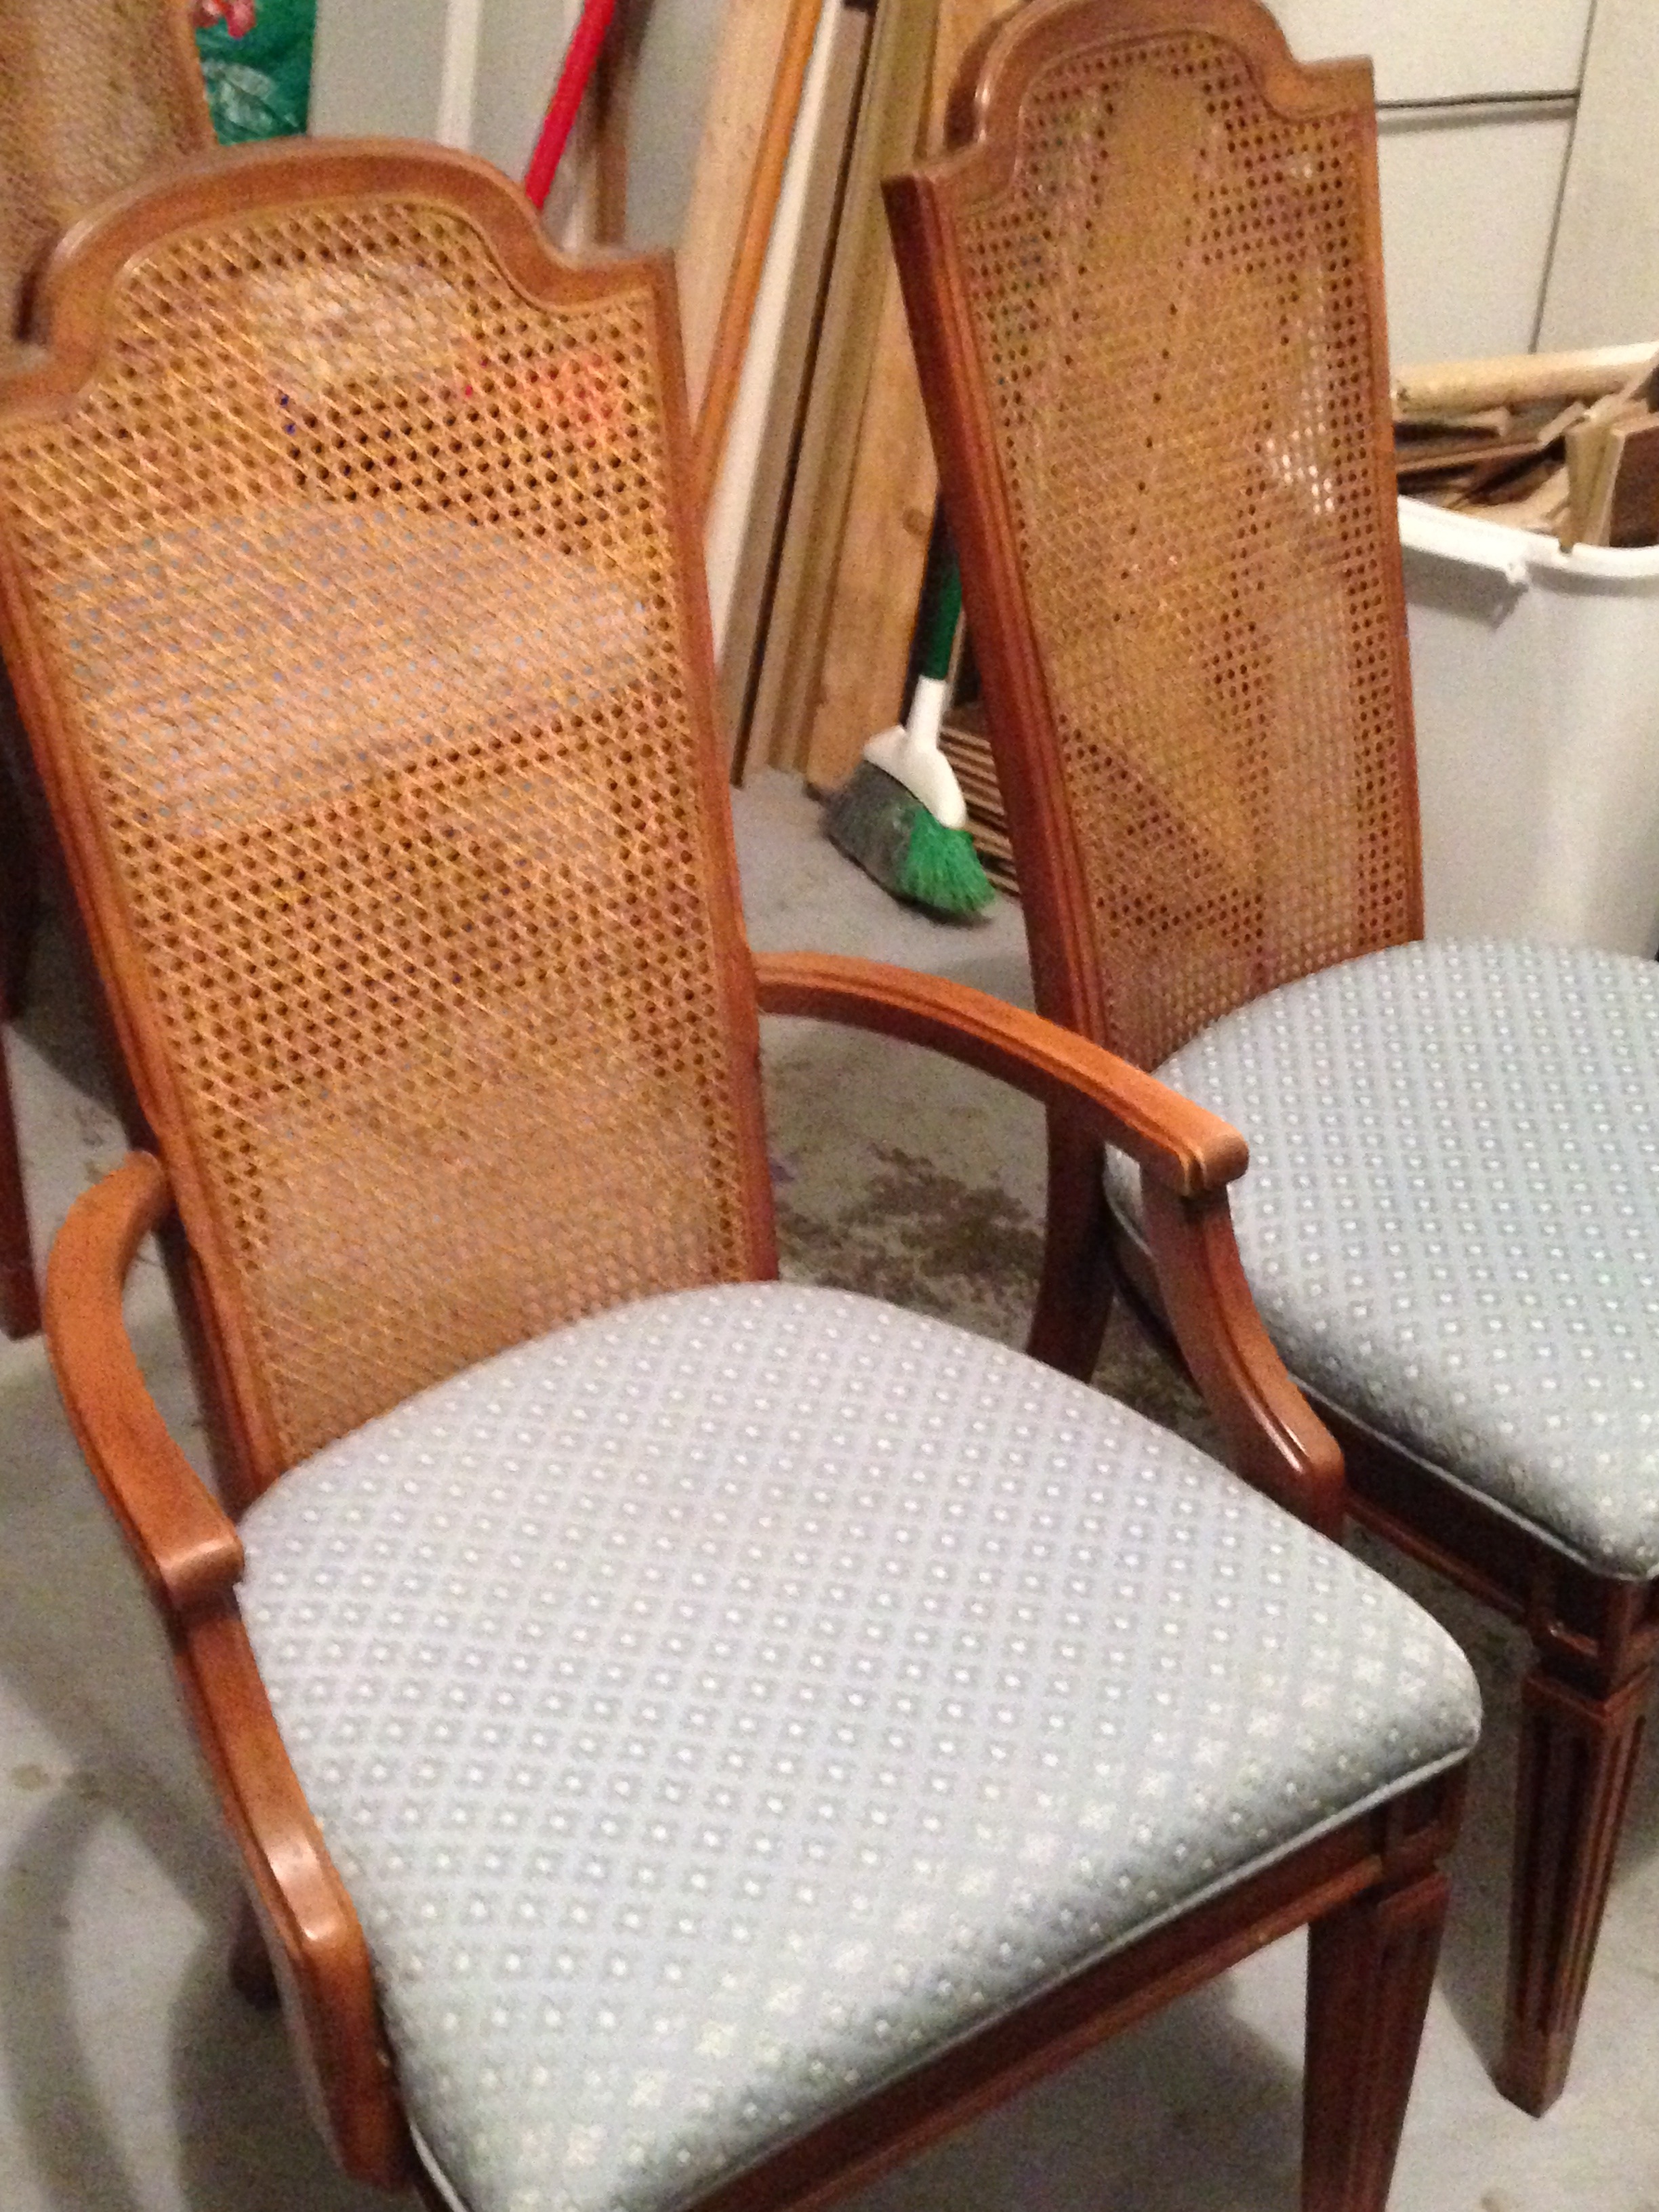
When I went to pick up the chairs I really just tested them for comfort and stability. I also made sure the cane was in good condition, as there is no cheap way to fix cane.
I was able to get the table and chairs for less than $100, and then resell the table for $100. I then had extra cash to cover paint and fabric – free chairs!!!
I started by removing the chair cushions to protect them from the paint, which is really easy to do. I simply removed four screws from the bottom of the chair to remove the entire seat base from the legs. I had checked to make sure the cushion could easily be recovered before purchasing the chairs as well.
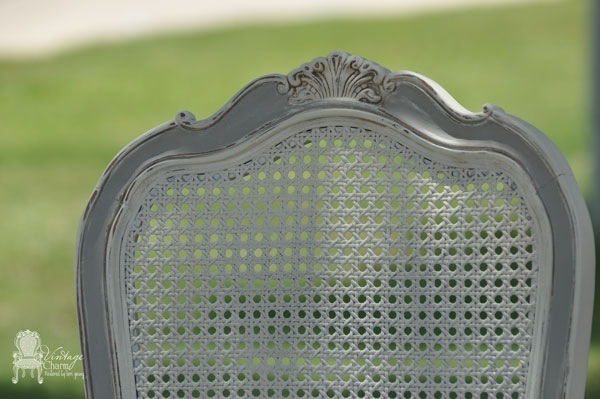
With my first attempt I put Annie Sloan Paris Gray paint on the wood frame of the chair as well as the cane. I didn’t like the light color on the frame of the chair or the monotone color scheme – it looks white! It just seemed too washed out….

I didn’t want a REALLY shabby chic look, but the chairs needed some character. I tried white cane with the gray paint – which looked great in online photos, but it was just too washed out for my house.

I was struggling with exactly what that should look like!!! Finding photos of something you love is one thing, making it work in your house is not always so easy. With DIY, you can’t just buy 3 styles and see what you like best, returning the ones that don’t play out the way you imagined in your mind. This was one of those times that the challenges of DIY were driving me a bit nuts!
I did a little inspiration photo hunting on the internet for reassurance and here are some gorgeous chairs I found…
The more natural color of the cane really appealed to me, but I researched online and found that there really is no way to re-color or stain cane. The original color of cane on my new-to-me chairs was not pretty – it was clearly dated. So I decided to rely on the trusty Annie Sloan products that have worked so well for me on every “un-paintable surface” I’ve painted. Since the cane was now the Paris Gray color, I just used a little Annie Sloan dark wax on top of it.
It was getting better, but still seemed to be too light of a gray.
I decided to try the dark wax over the Paris Gray paint on the wood parts of the chairs too. LOVED it! until I took it upstairs. Again, I just didn’t feel like the rest of my house could handle the really distressed style – it seemed like it took the look just a little too far for my house and its Midwestern bones!
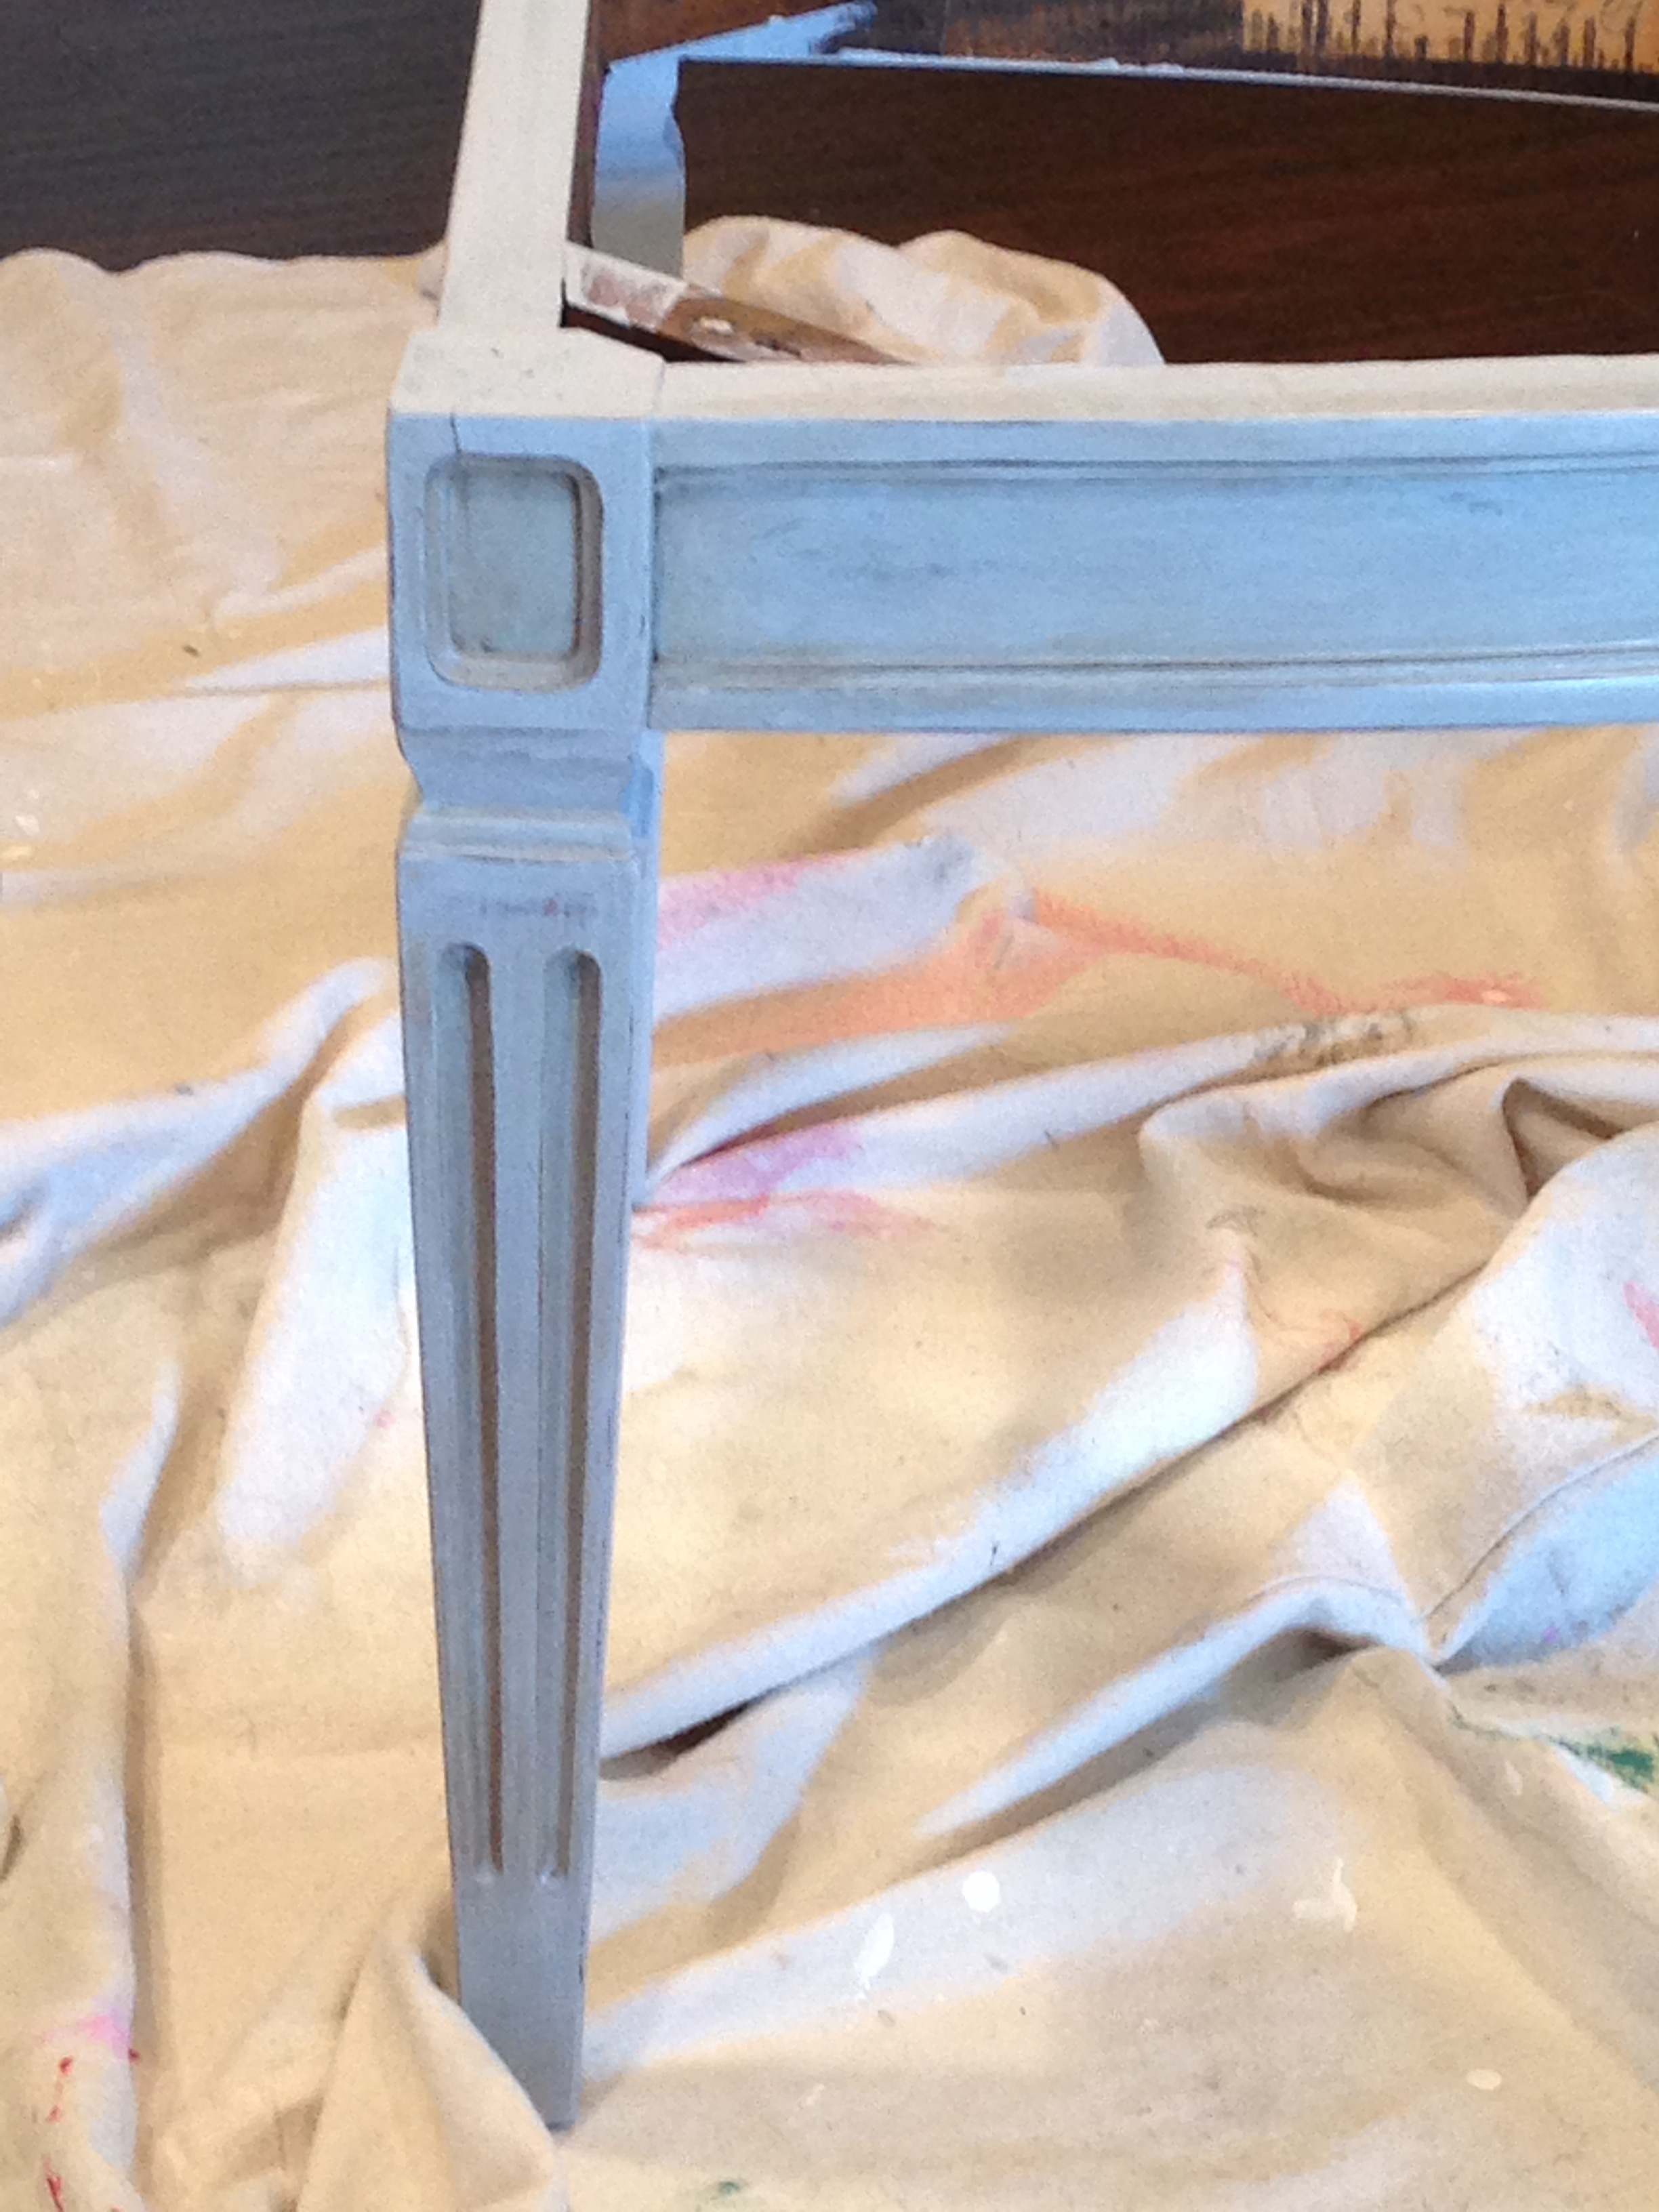
So, I went to Home Depot and bought a charcoal gray latex paint sample and mixed it with the Annie Sloan paint. Did you know you can mix latex paint with Annie Sloan paint to make custom colors without destroying the amazing chalk paint properties of Annie Sloan paint? Awesome!!!!
I liked the more intense gray, as it was clearly not white now! With the dark wax on the cane as well, there was a contrast without it looking too shabby chic.

After using the dark wax on all of the cane and repainting the chairs with my new custom dark gray color, I just needed to recover the cushions!
I picked a linen type fabric with a bit of a sheen or sparkle to it. I liked the natural texture it added, keeping the chairs from looking too formal or stuffy.
I had removed the original piping from the chairs, and since my sewing machine is still broken I decided to omit the piping for now. Way easier too!!
I measured and cut fabric pieces to cover the seat cushion and then sprayed each piece of fabric with 3 coats of scotch guard.
I then simply stretched and stapled the fabric to the original cushion.
I decided to be somewhat lazy and not remove the original fabric. That process is tedious, because it means removing a ton of staples. I was also concerned however about the condition of the foam or cushion under the original fabric. I did not want to have any damage occur to the padding by removing the fabric, as I didn’t want any added expense with adding new foam or batting.
Since doing those chairs I have seen a great tip on FleaMarket Flip – simply cut the old fabric off, right along the edge of the staples. This prevents the old fabric from looking bulky under the new fabric, but takes WAY less time.
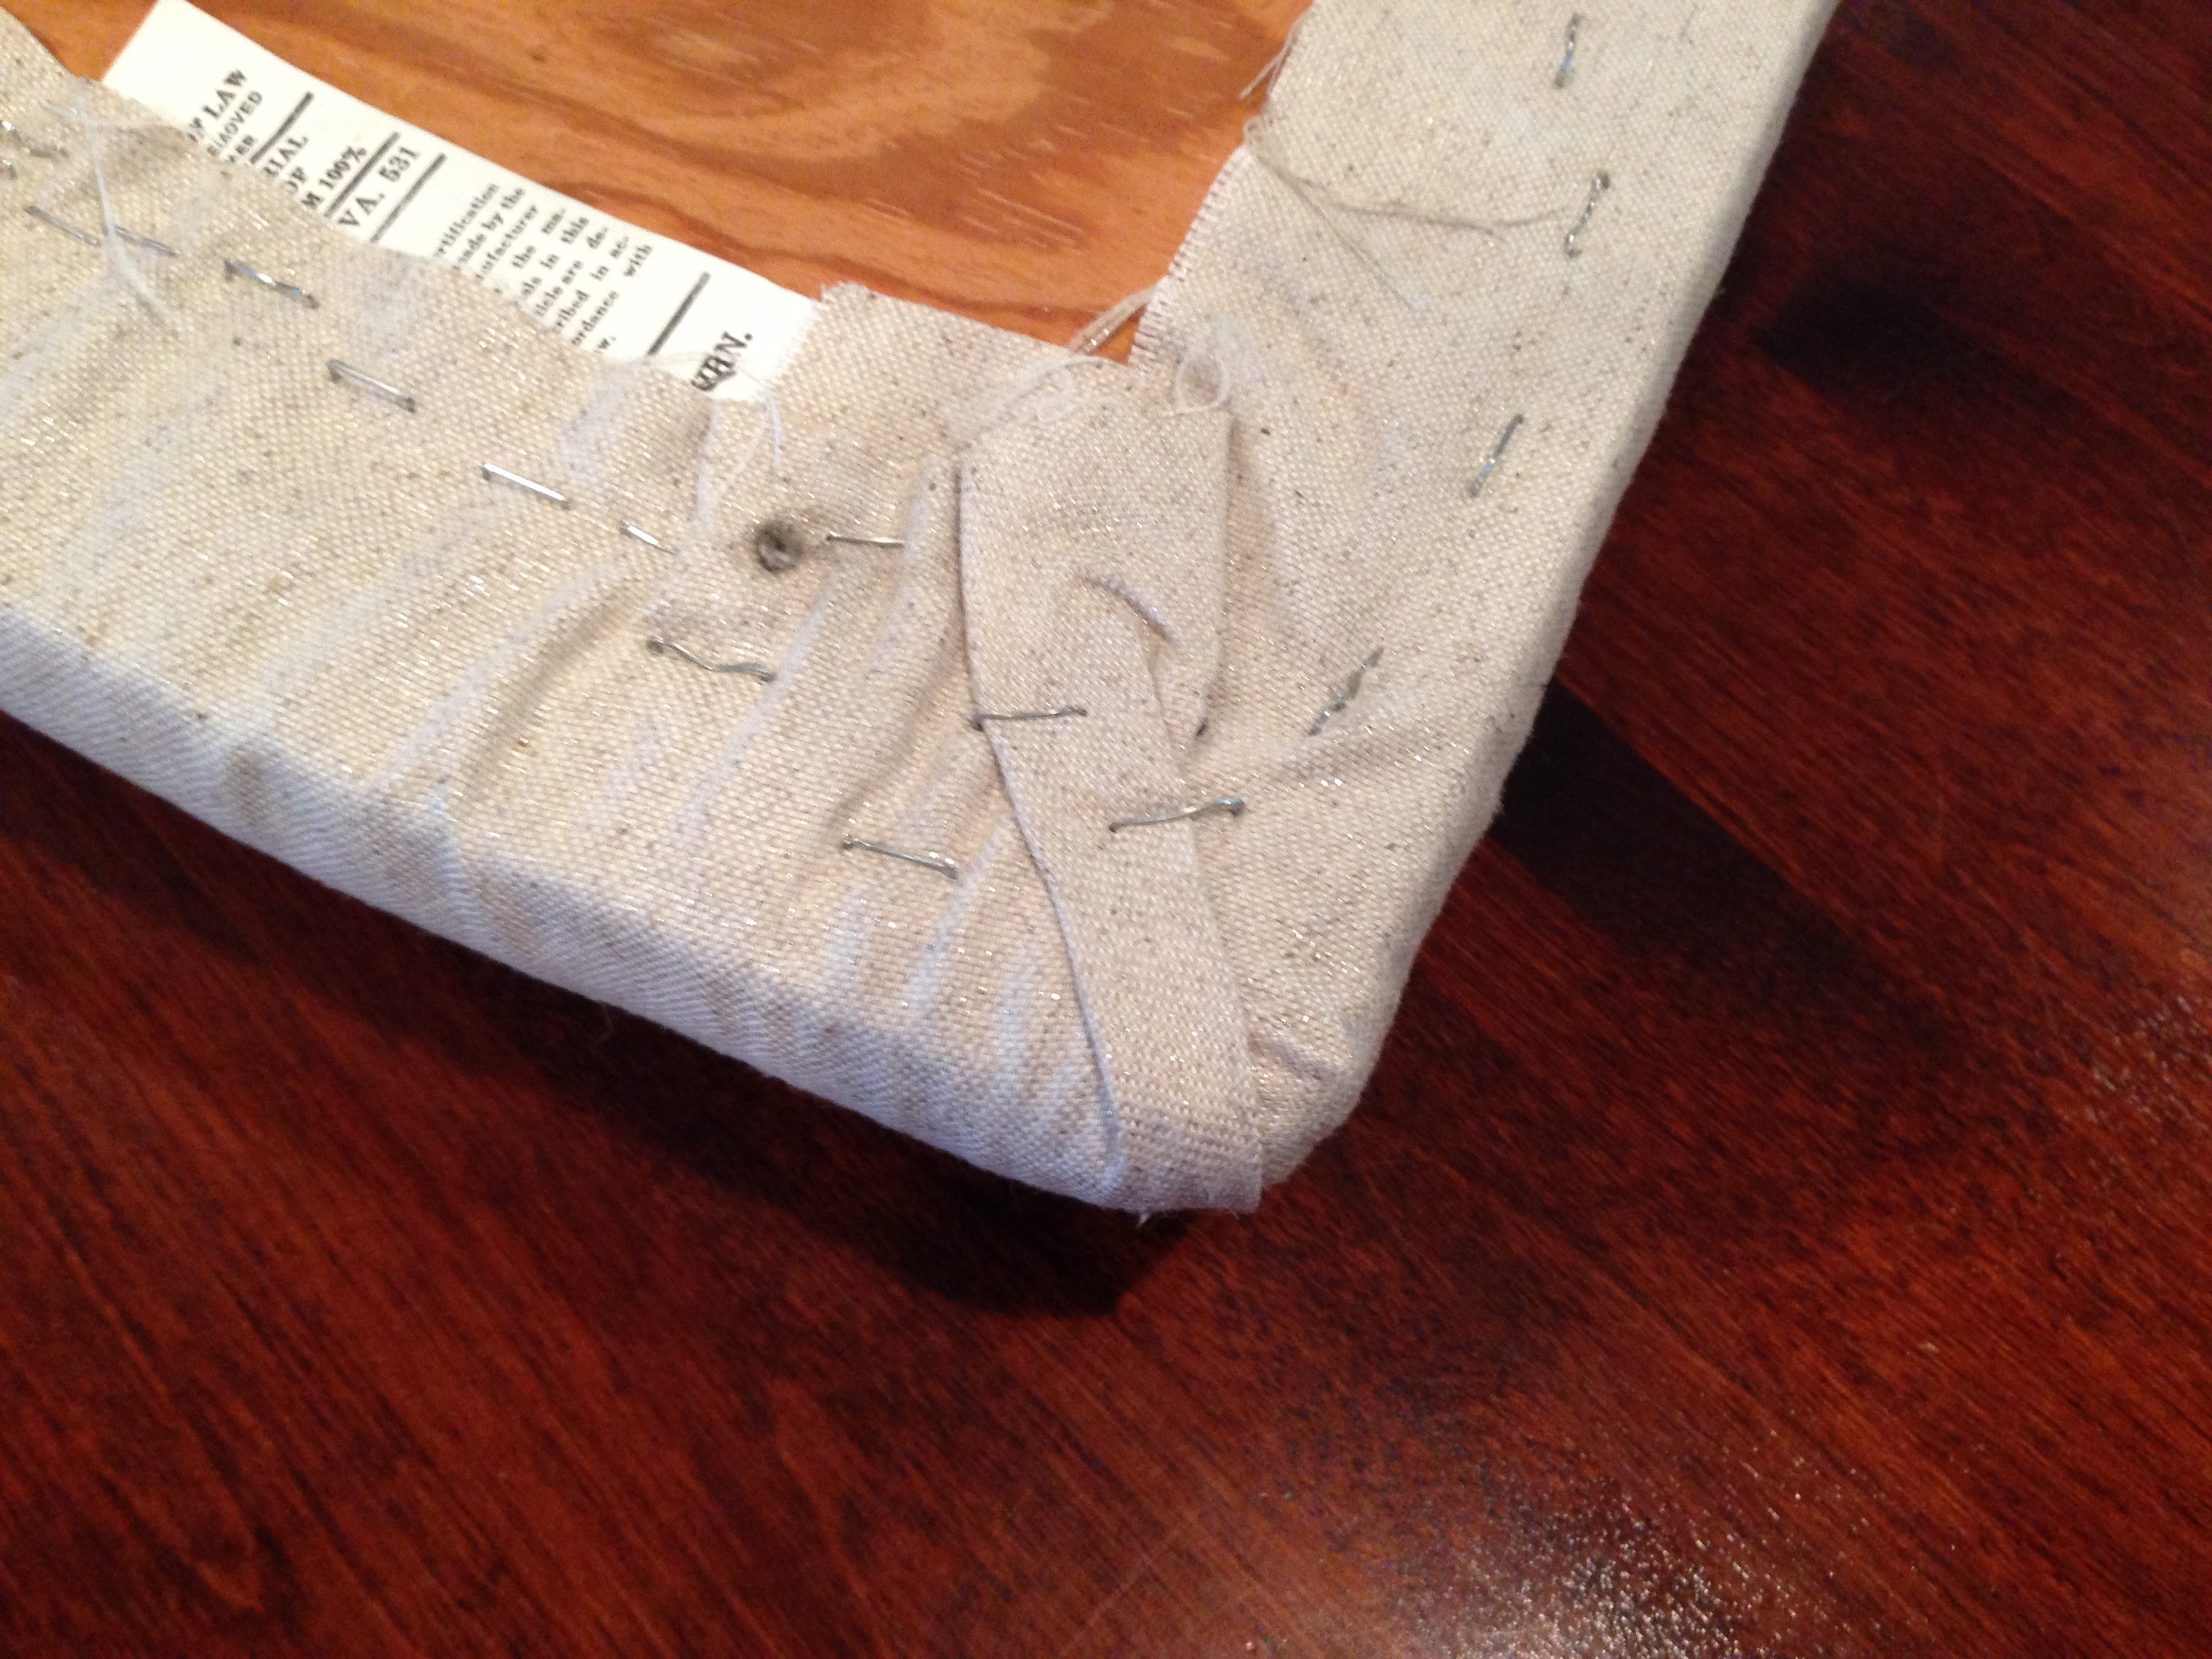
The hardest part of a chair cushion is the corners. These sharper corners required a little folding and tucking to get the fabric tight and smooth. There is no way around the small crease though. You can see here that I pull the fabric in from the sides, and then do one fold in the center of the corner to deal with the excess fabric. It may look a little messy here, but once you turn the cushion over, it looks great!

The other corners were a bit more of a slow round curve – which sounds easier, but ended up being a bit trickier.

The more gradual curves required some strategic tucking of the fabric where no one would see it and I was left with only two small pleats that anyone will ever see. A little more challenging, but still looks good when you flip the seat cushion over…

Here is a better view of the gradual tucking to prevent a clump of excess fabric in one spot, and the careful tucks in the corners.

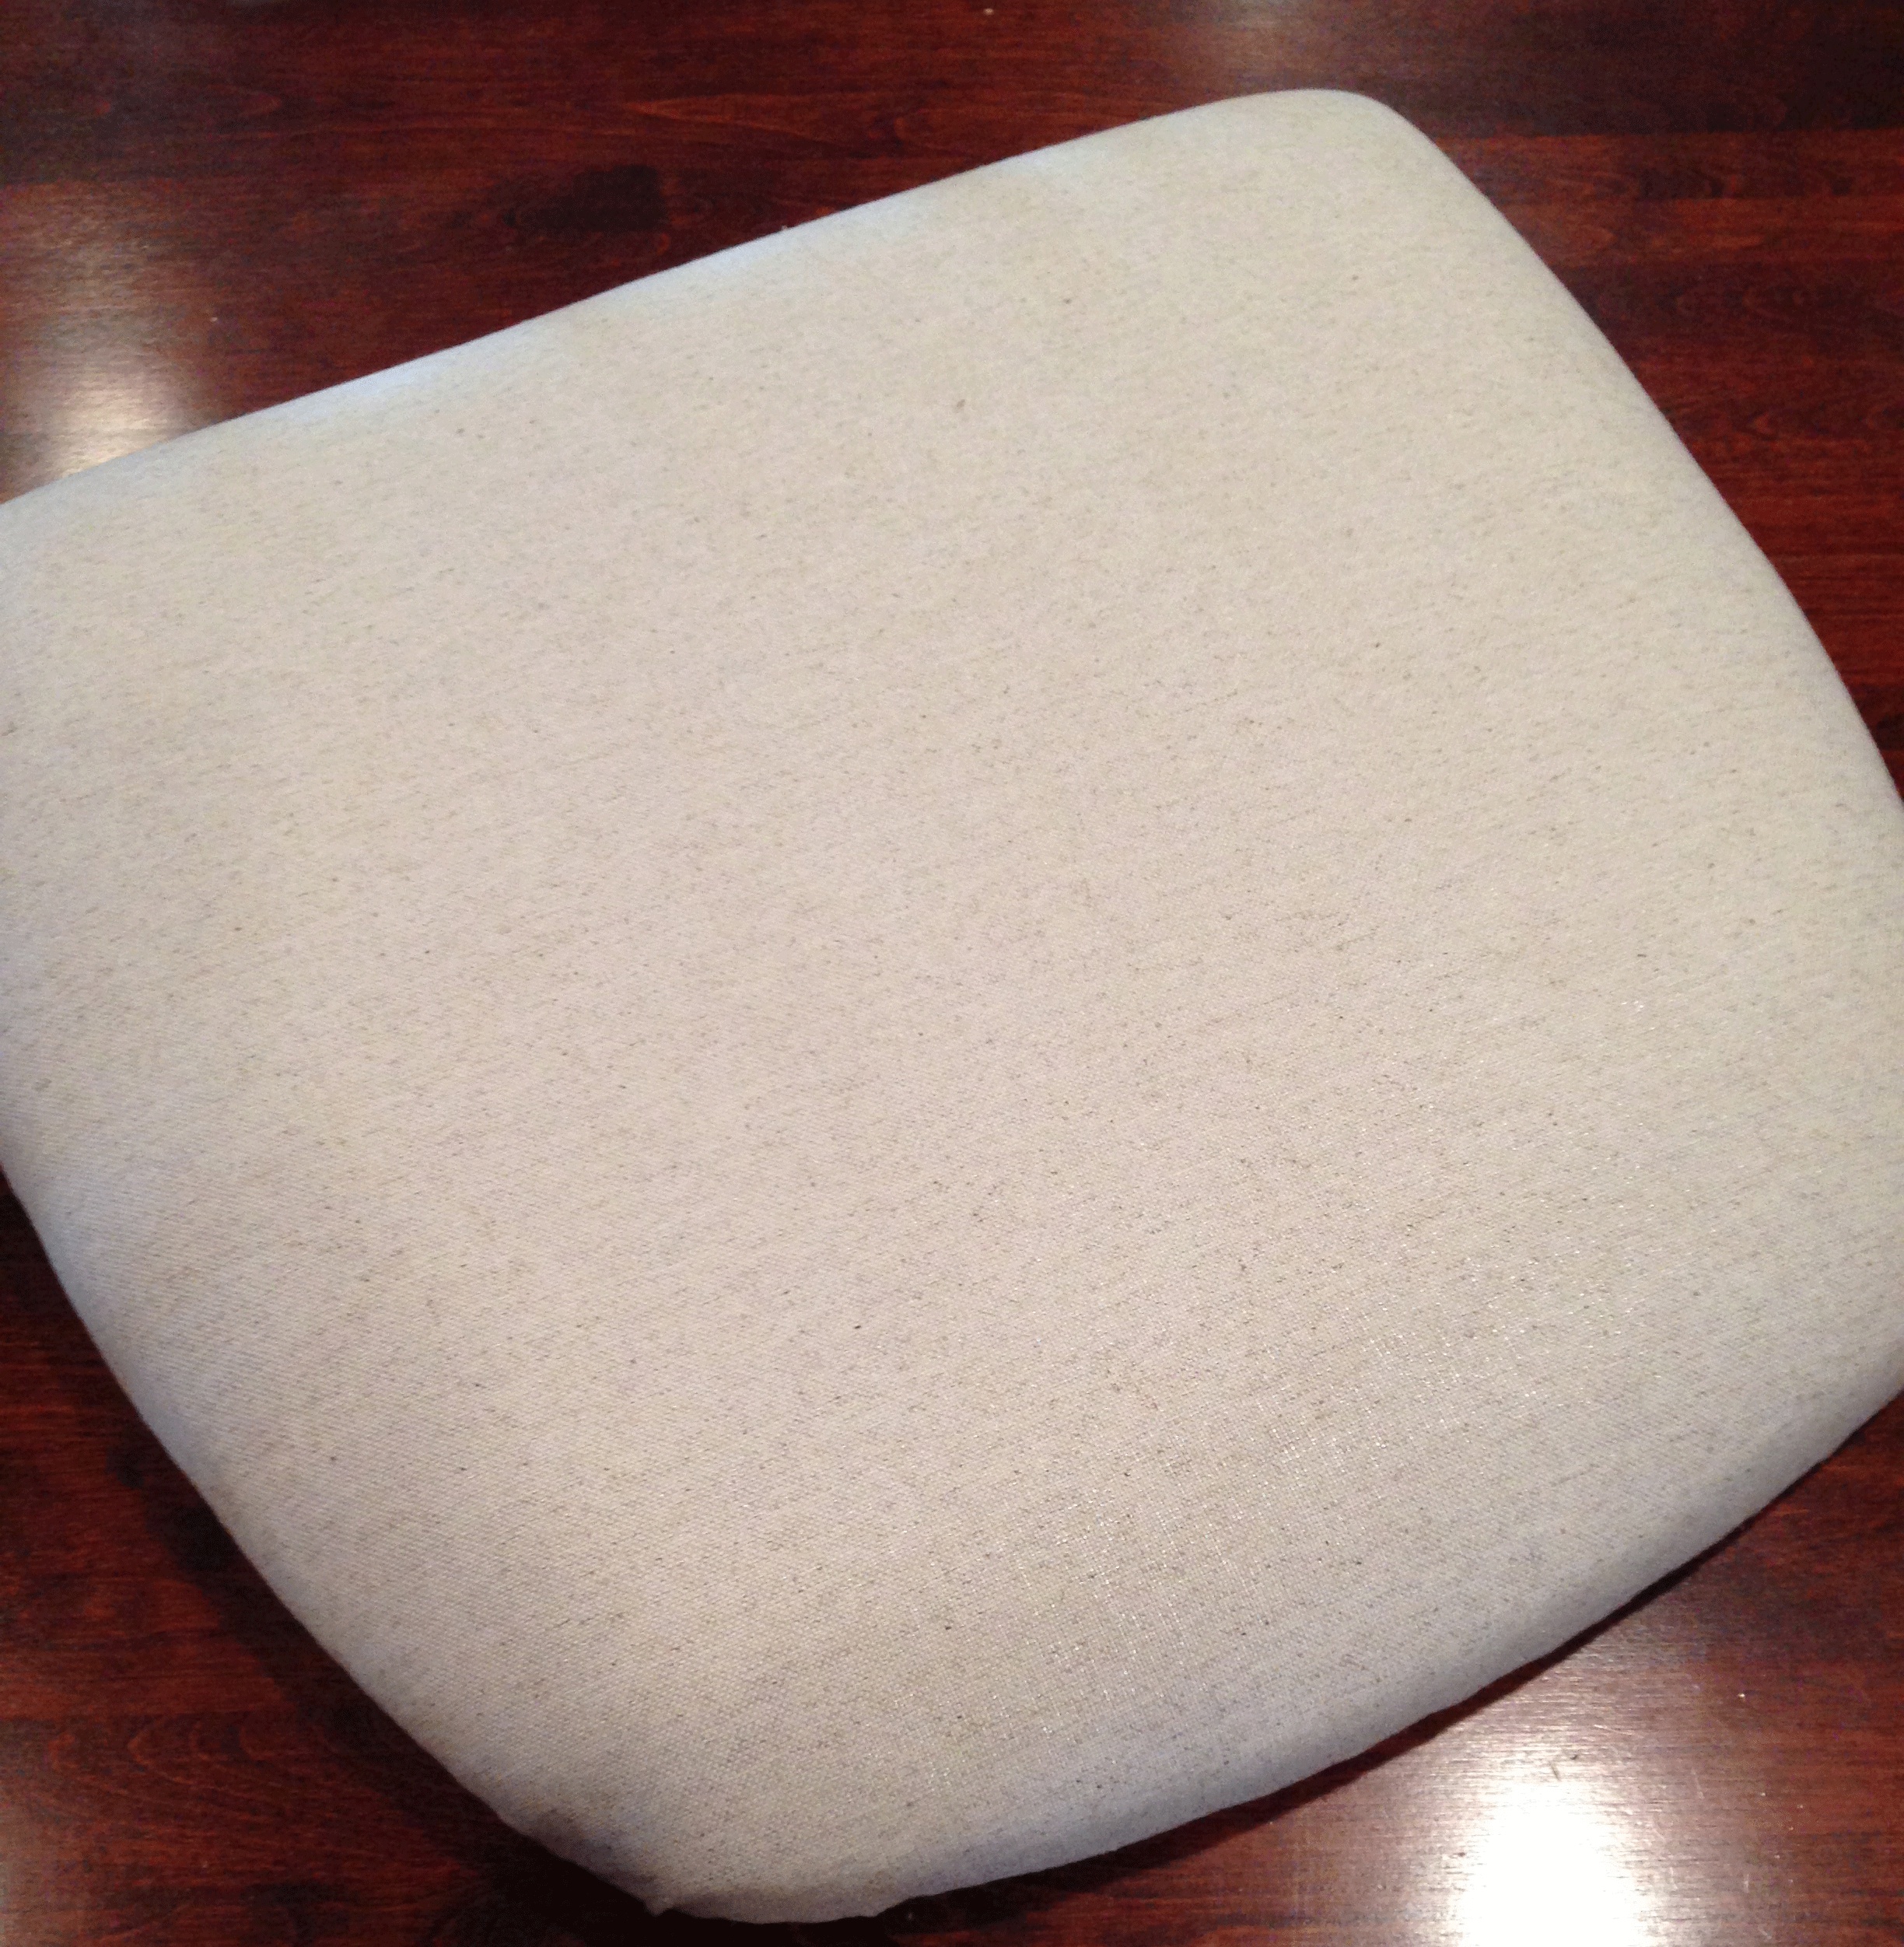
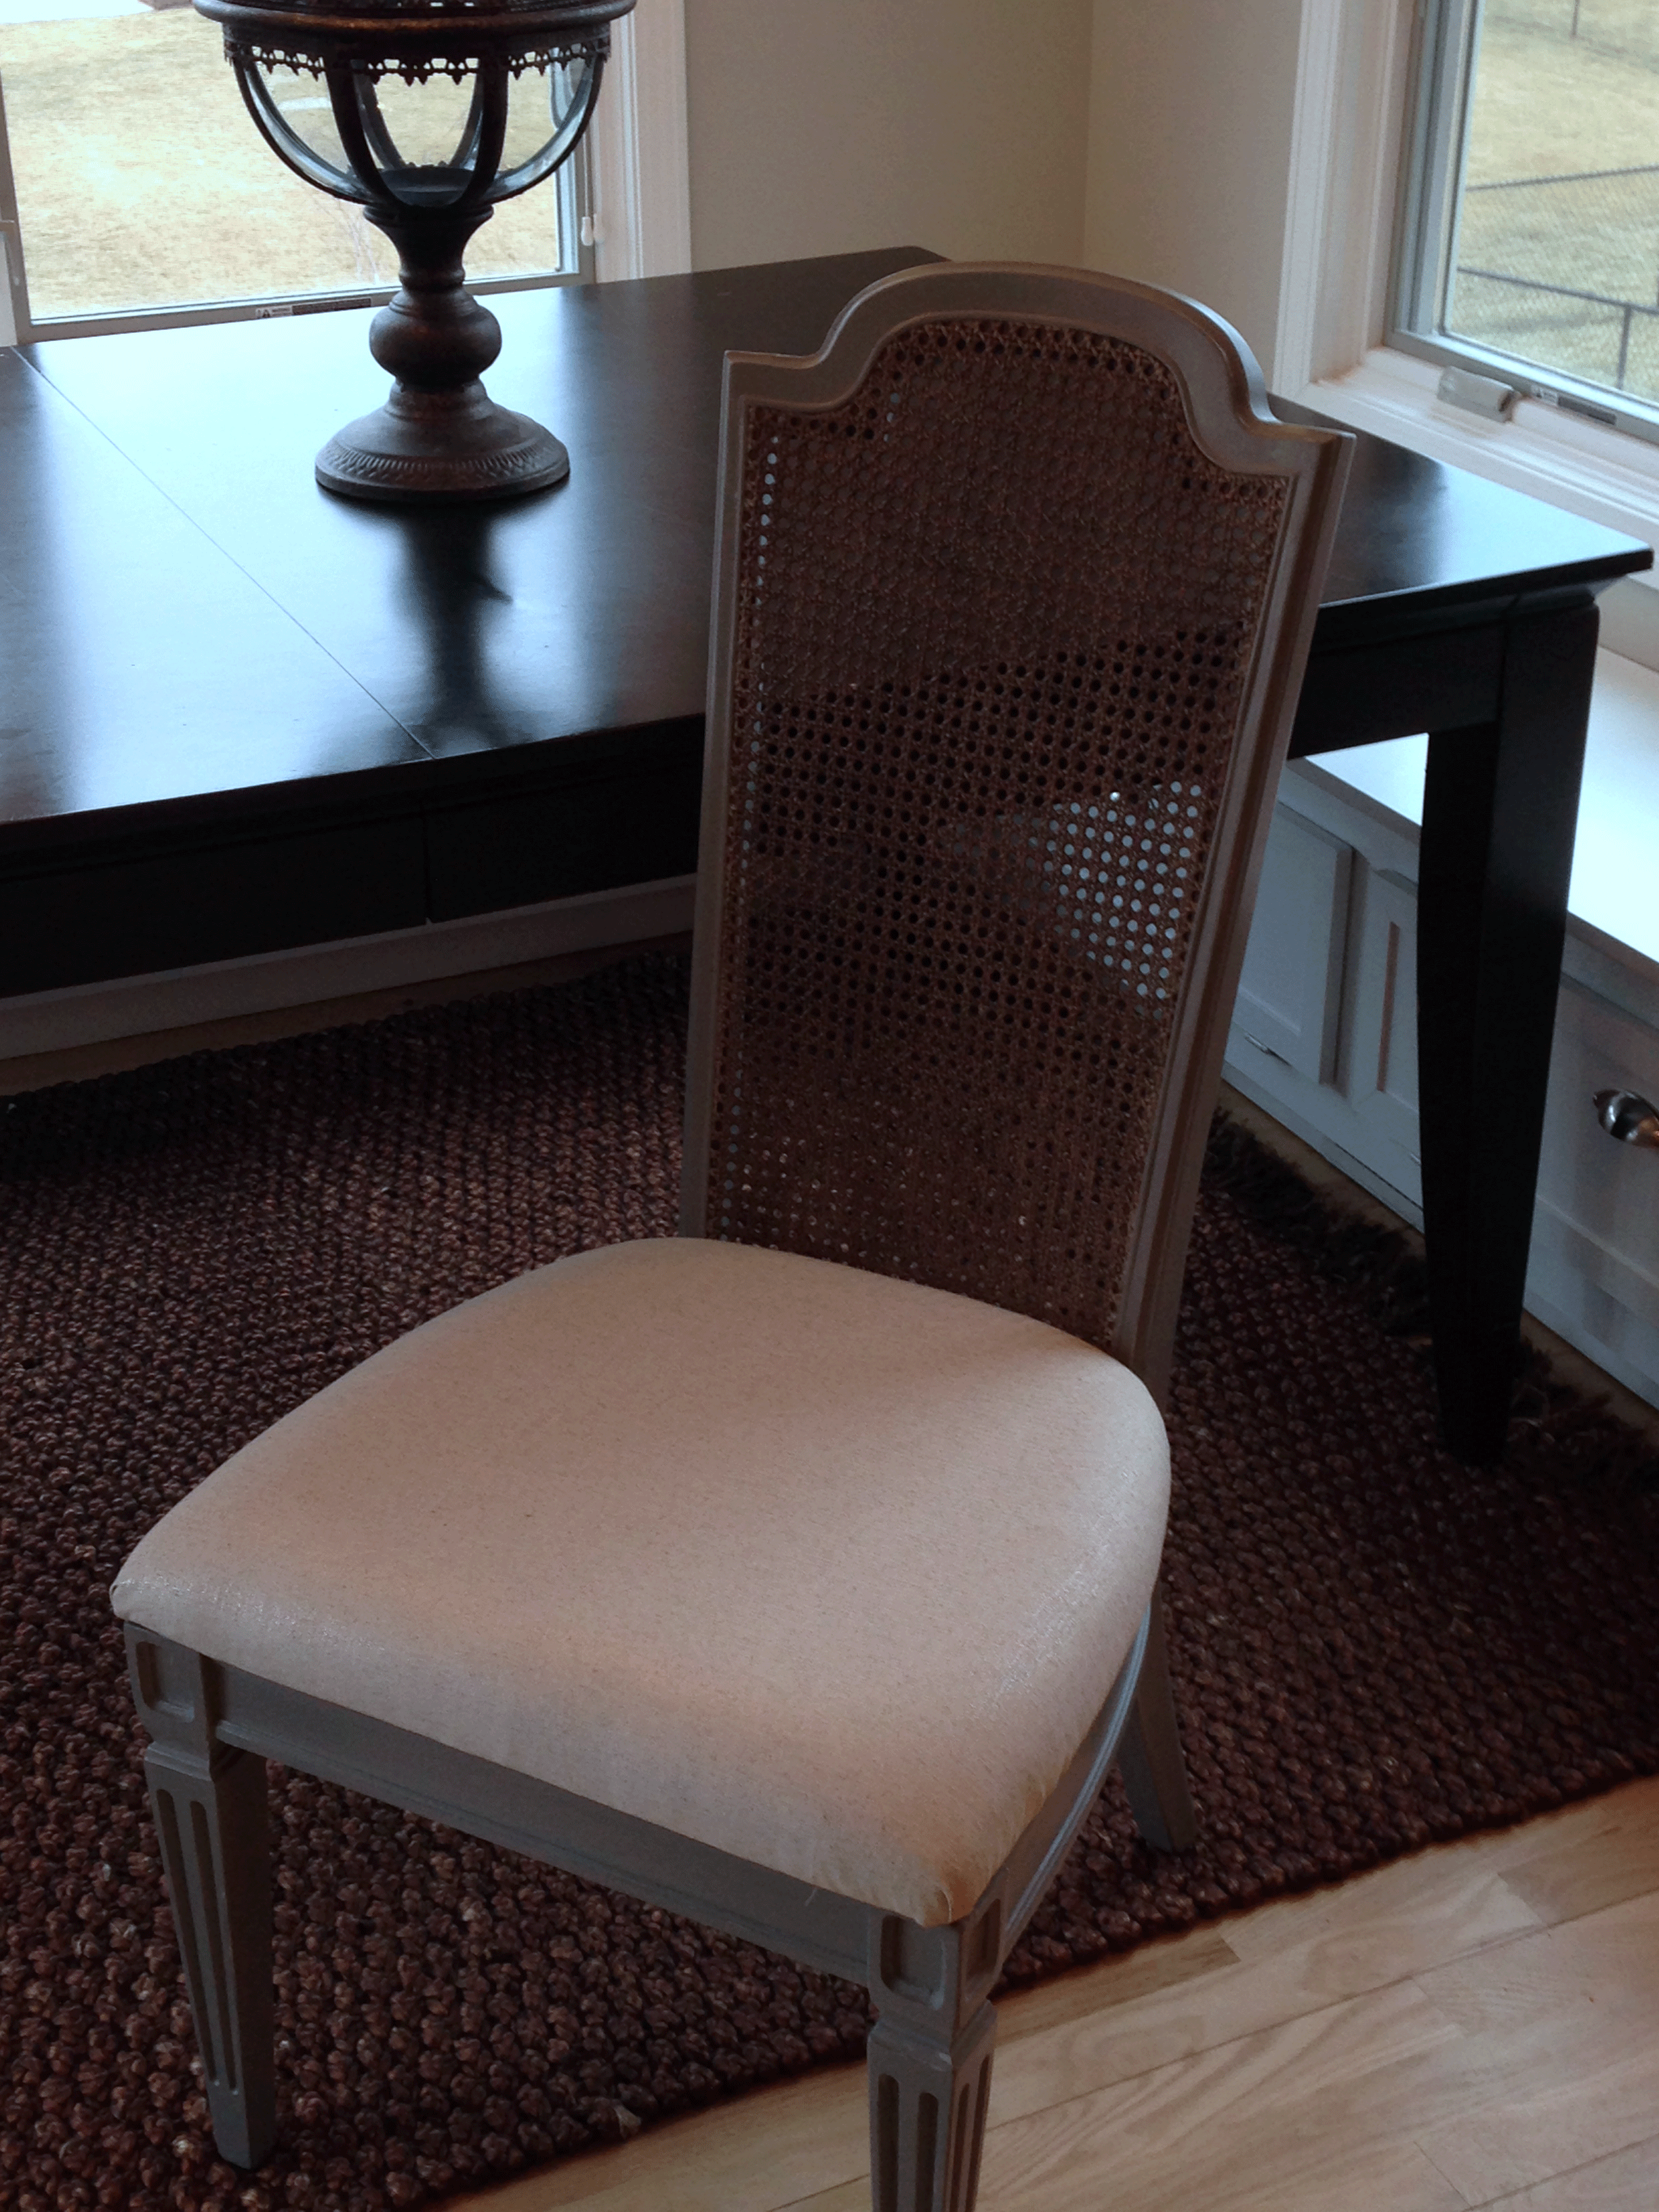
And here is the finished cushion…
And here is the finished chair….
And of course we all want to see the before and after!
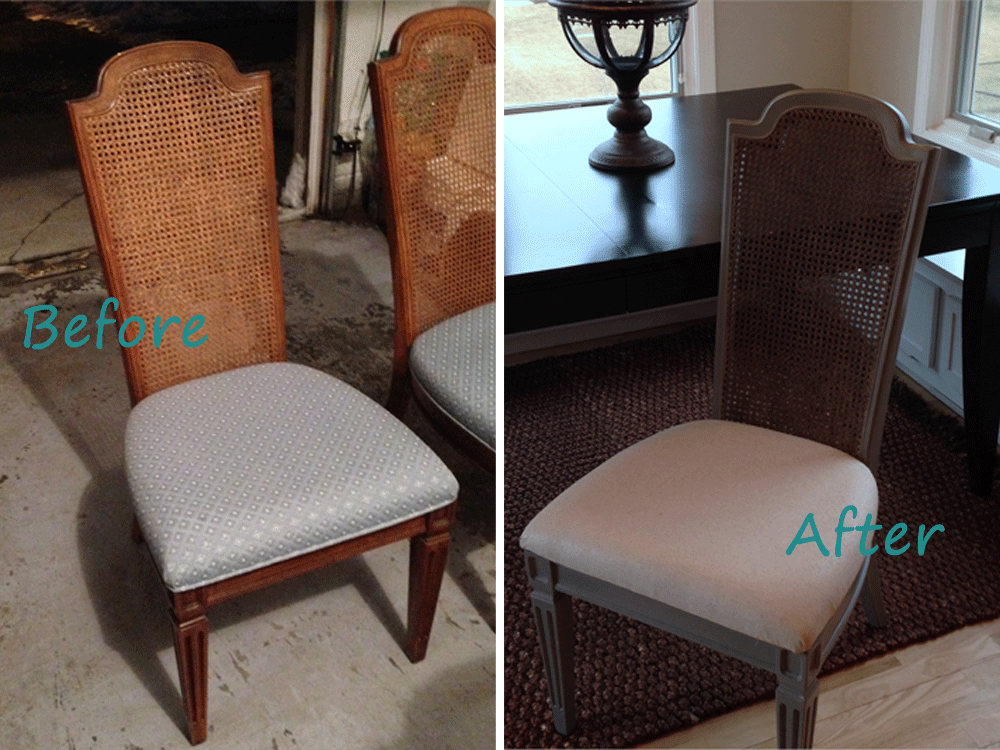
I think it’s a keeper! All 4 of them that is!