
Wow! February sure was busy month around my house! I’ve continued with some fun projects, left town for a long weekend with my hubby, had some crazy medical mishaps, enjoyed a weekend with a good girlfriend, and celebrated another birthday! After December and January, which left me dizzy from the hustle and bustle, I finally got to slow down and enjoy some leisure in February!
The long weekend away was a much needed break from real life, something Jason and I try to do one or two times a year. We stay in a hotel, eat yummy food, and shop leisurely with no munchkins in tow! I’ll share more about that in an upcoming post.
I also got to enjoy a weekend with my good friend (Diane) from my days in Chicago, the one that introduced me to Annie Sloan Paint! She always gets my brain spinning with new project ideas, and of course this trip was no different! It started off by us picking up some new-to-me chairs from Craigslist for my dining room, we started painting a Christmas sign, (inspiration for a much larger project), and we (I mean she) finished a sewing project I have been dying to do… We are always so busy when she is here, and it’s so much fun!
Diane hadn’t been to my house in over a year, and so I had lots of fun new things to show her throughout the house. It’s a funny thing though, because she is one of my readers that shares how much she is inspired by my blog, yet I’m 99% sure her house looks ten times better than mine on any given day! As we walked around my house she was inspired by things I do (she would say), but she was also really encouraged to see some of the lack of organized living that is a part of my busy life. We thought I should share some of my chaos with you all, before I show any progress I’ve made this month. Hopefully it will encourage you all to embrace the lack of perfection in your homes, and enjoy those that are in it!
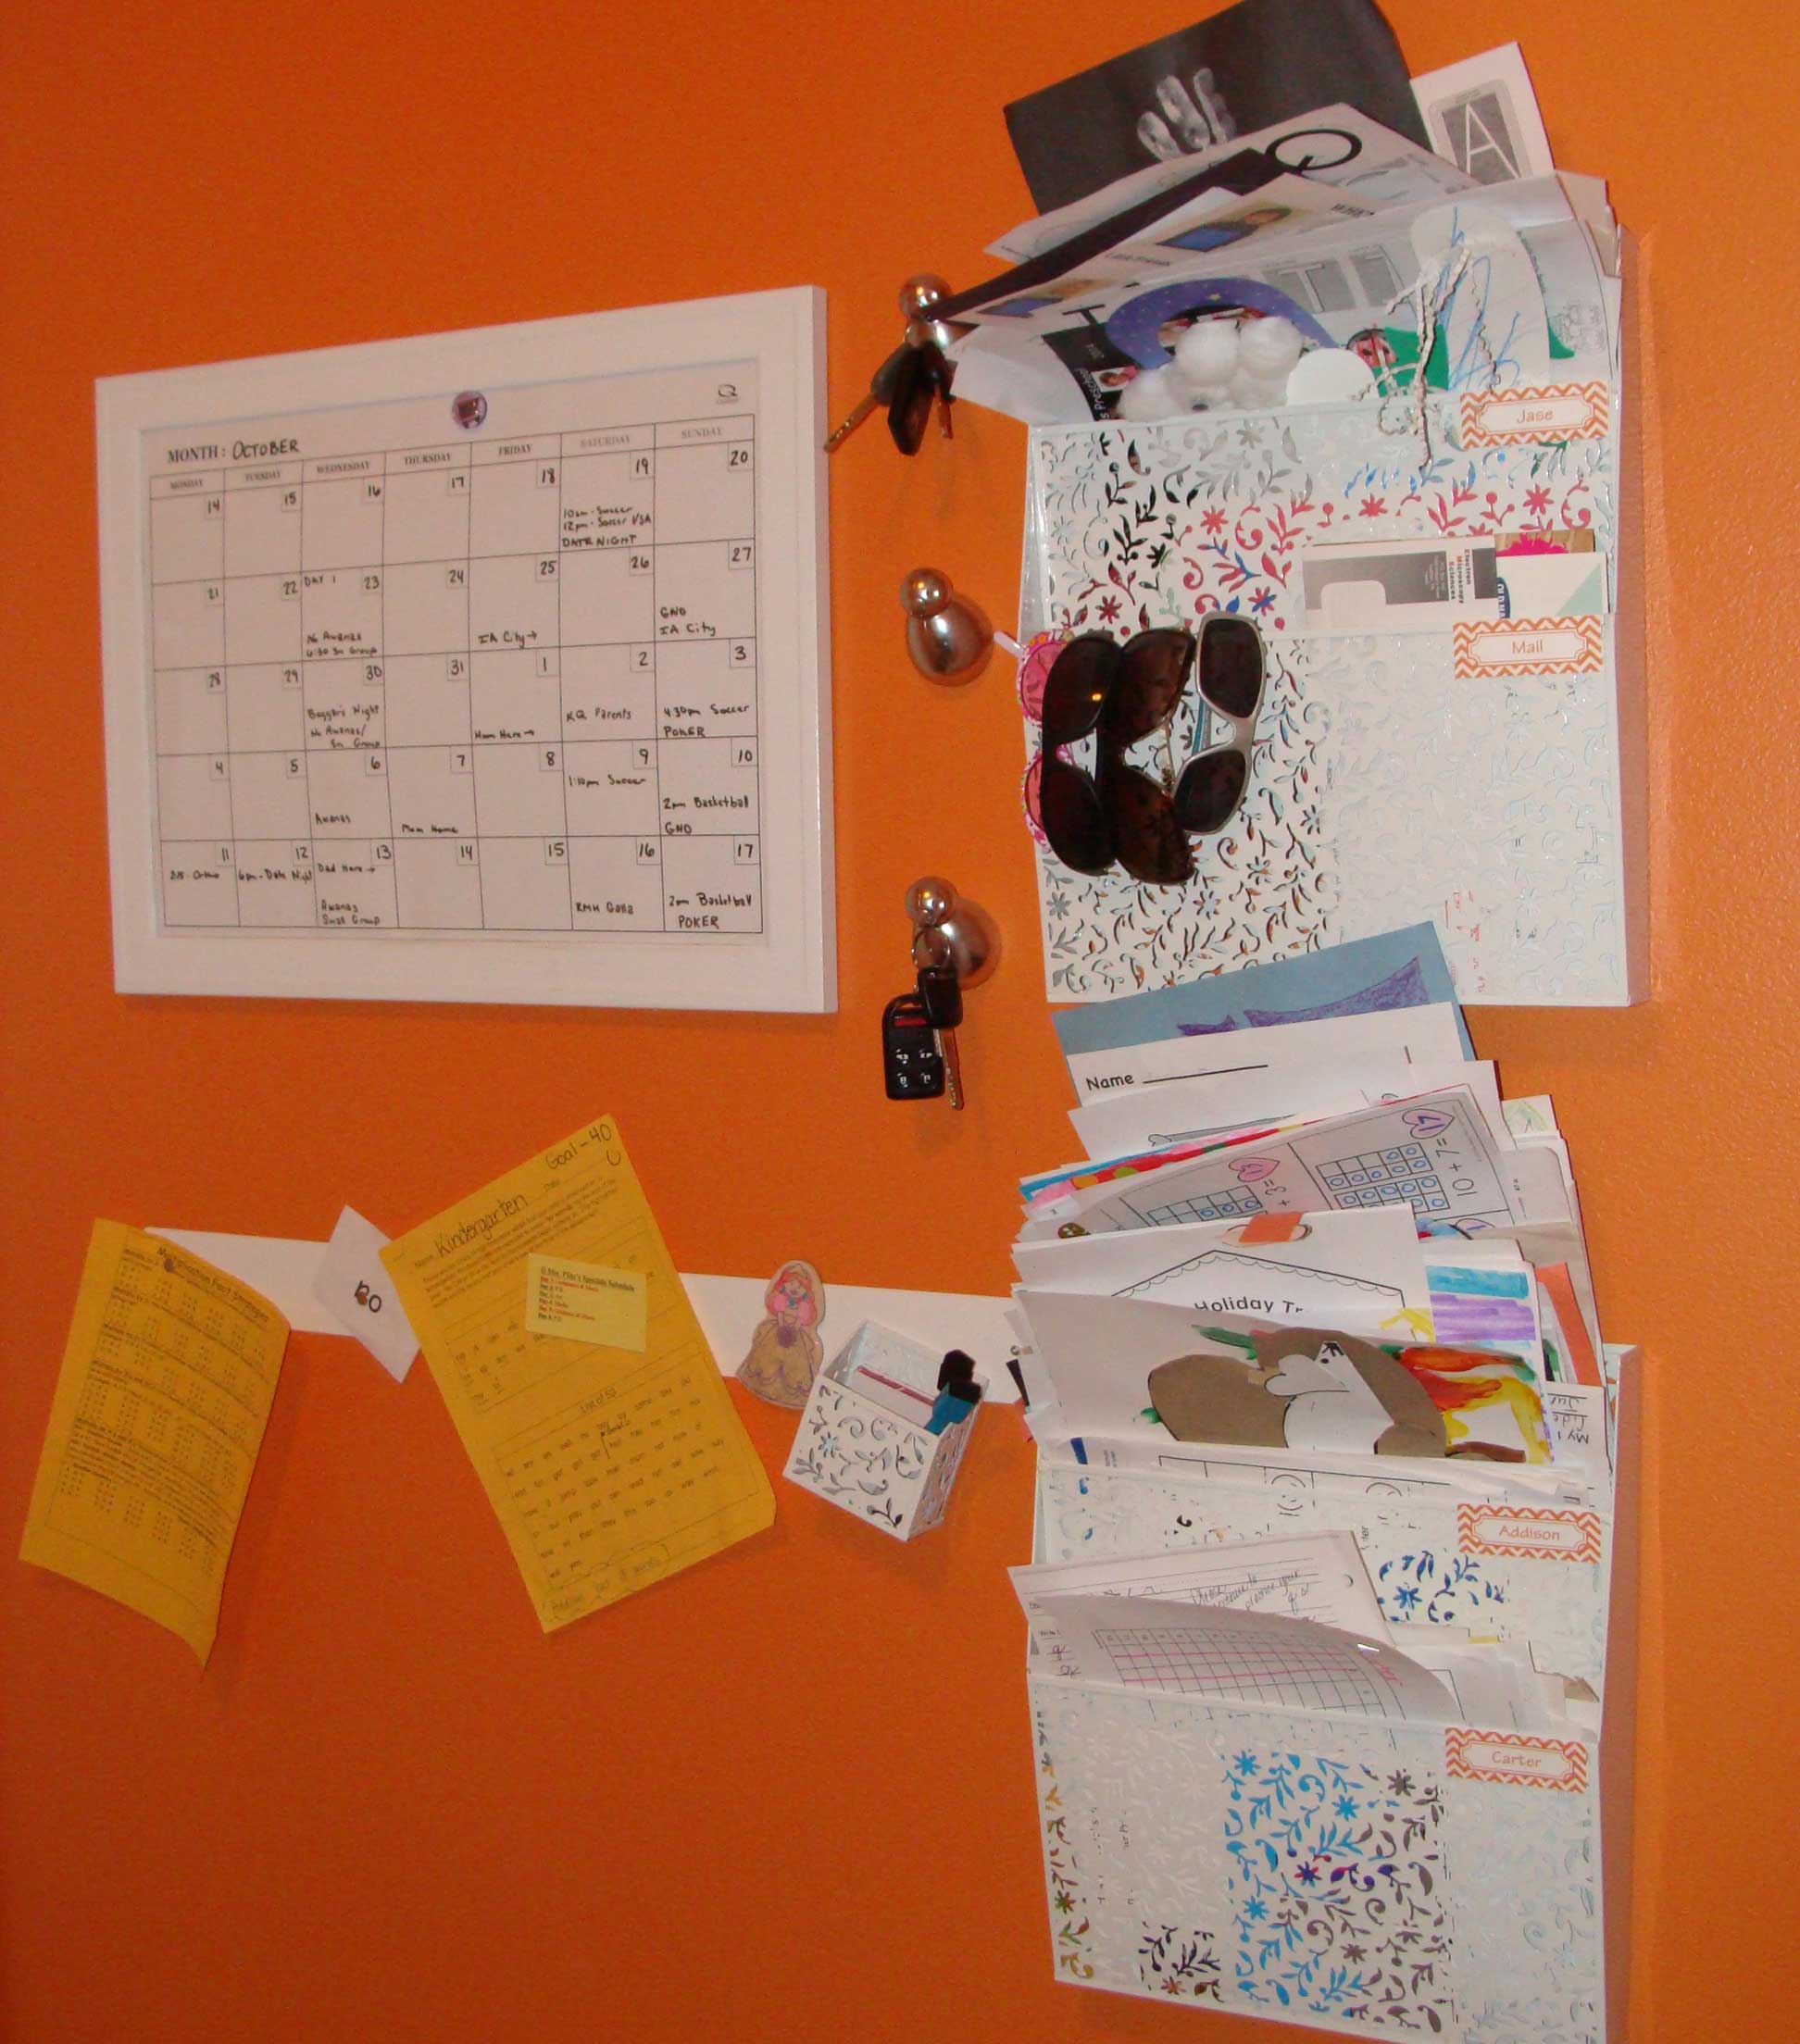
You know those really cute school files where I put my kids papers when they get home, this is a photo from my post about them last year…
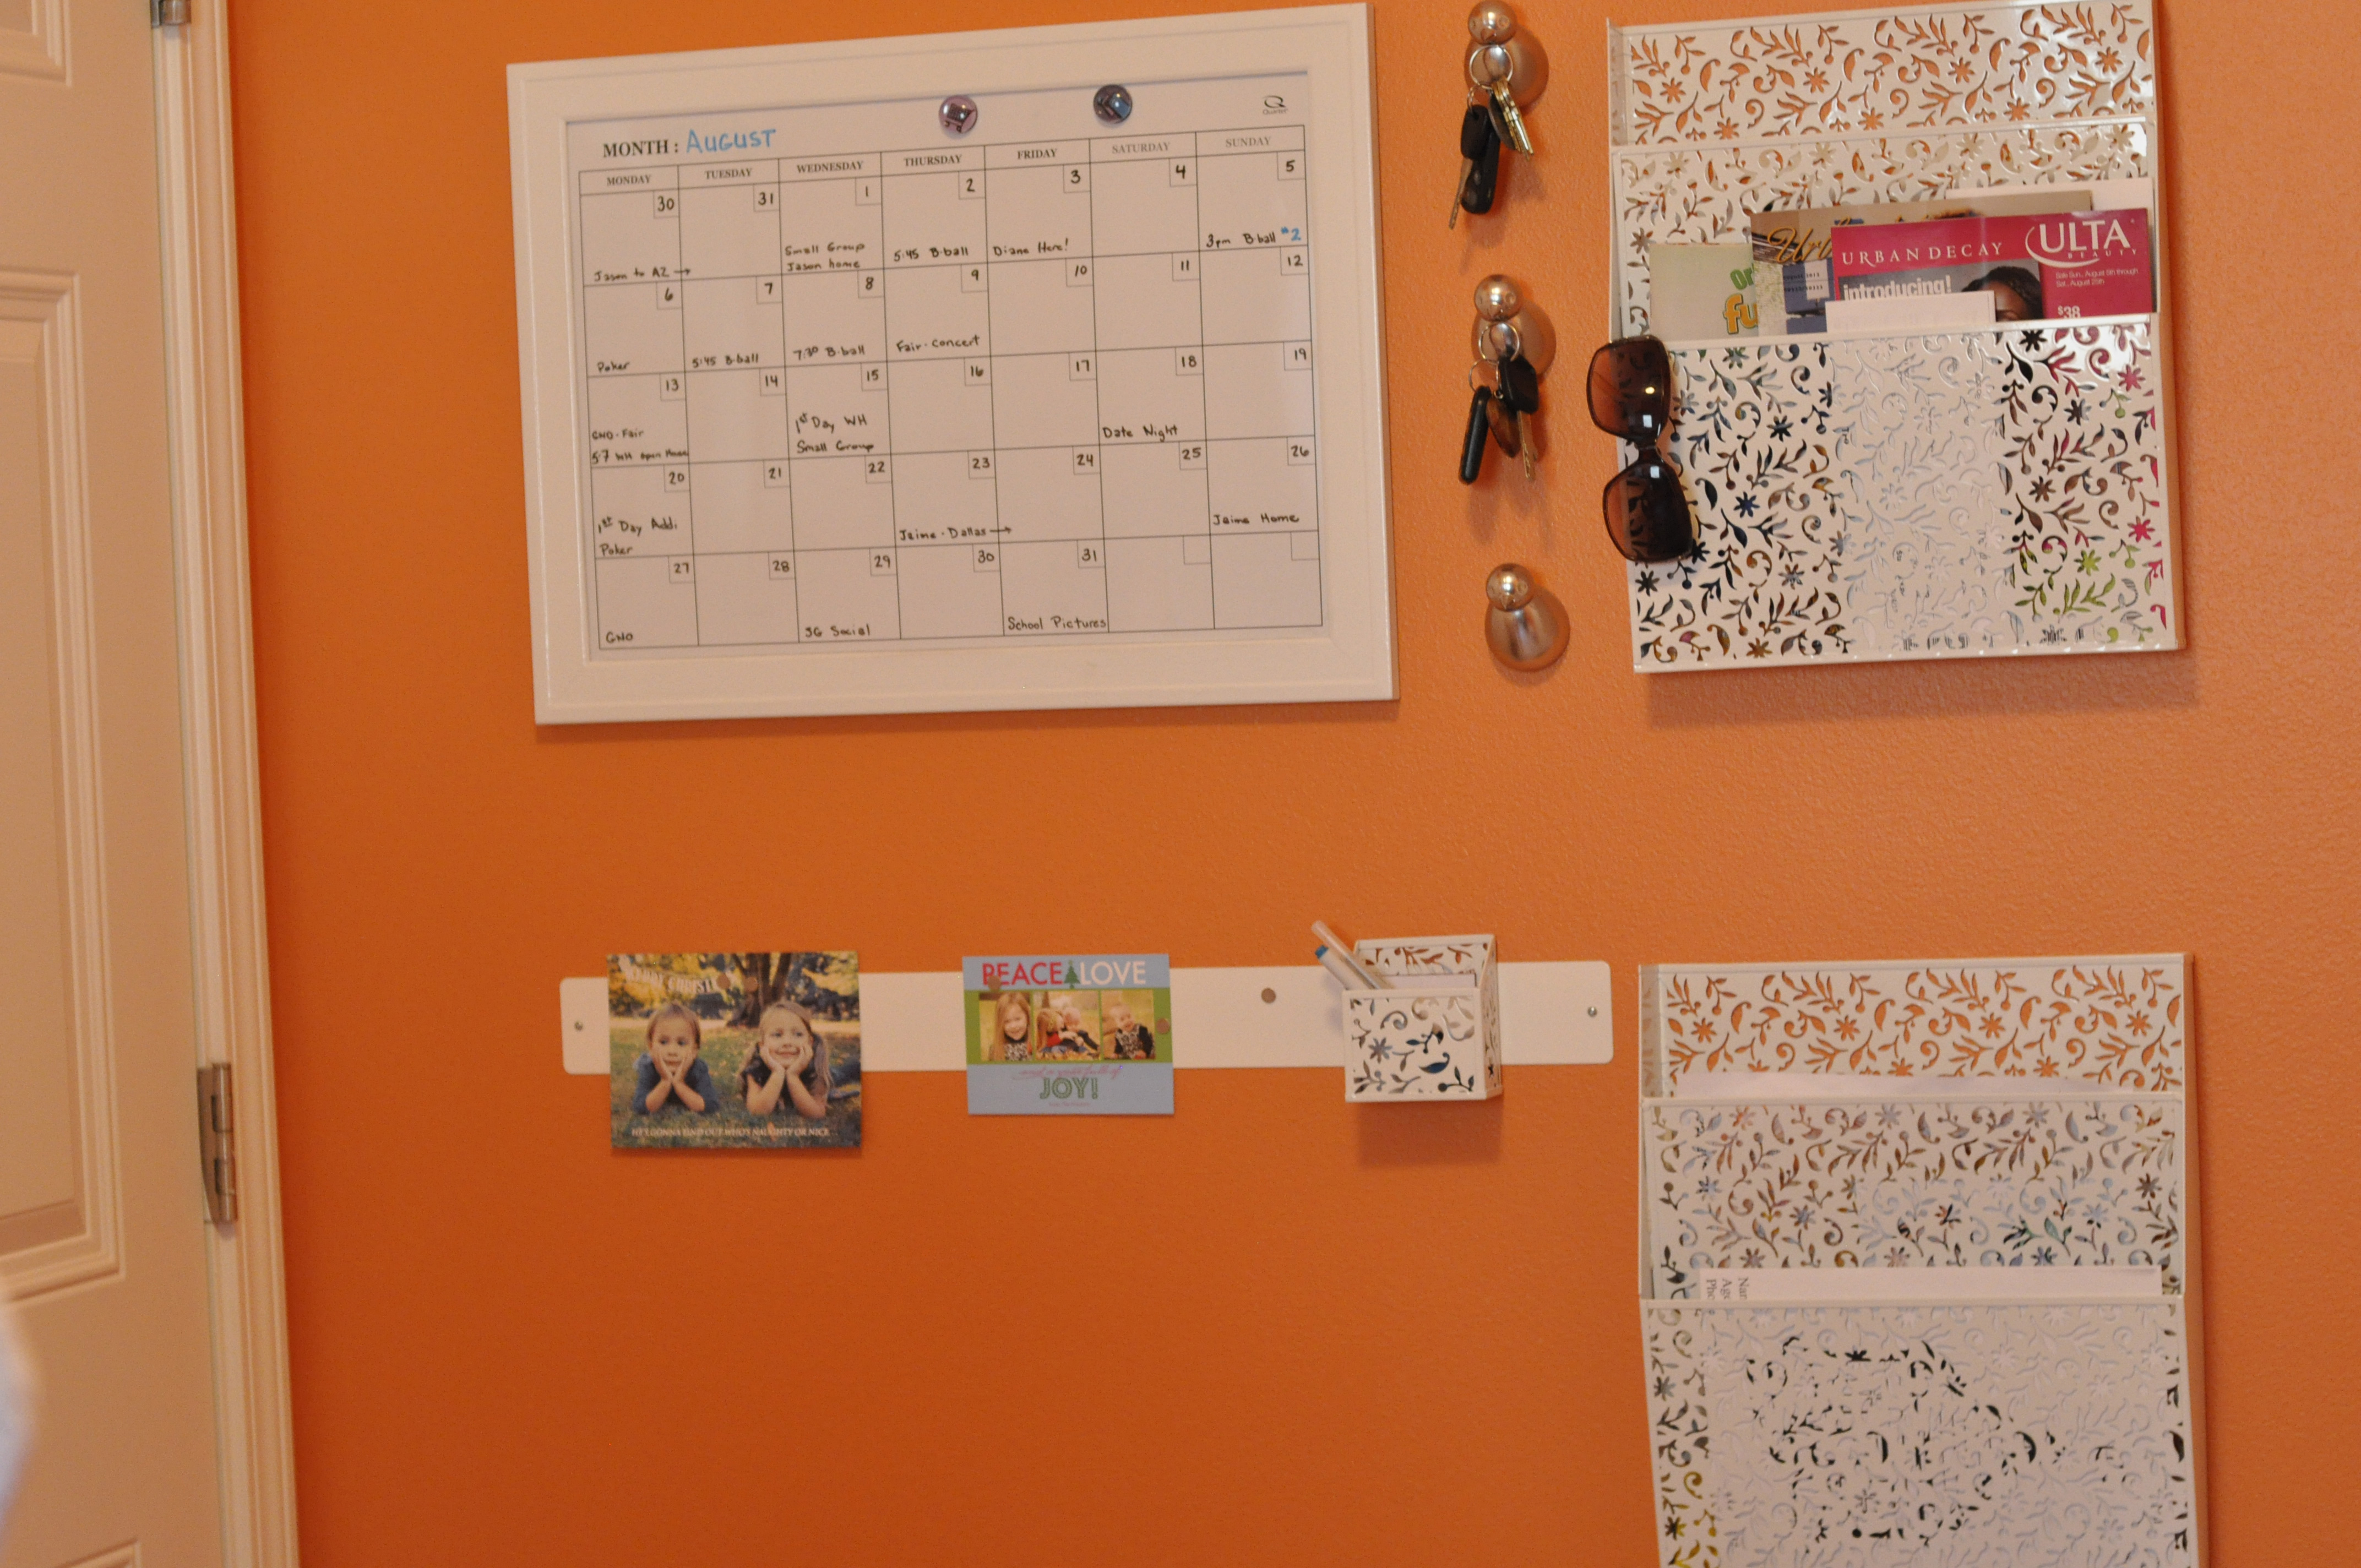
Well, I intended to sort all of those school papers over Christmas break or shortly after – needless to say that has still not happened! I would say I have exceeded my boundary, and need to sort, purge and store some things – don’t you think?!?!?
We also did a little baking and cooking while my friend was here. (An area I want her to start blogging about so I have yummy meal plans every month!) When I opened the oven to put a pan in, this is what she saw…

And when I showed her the wonderful, super-duper exciting progress we’ve made in the basement, she saw this… the temporary fallout of said progress! aka our storage room.

And, as I showed her my youngest son’s room and the fun upholstered headboard I made him (yes, pictures and post on that coming!) we both started dusting the top of it with our hand. Apparently it had not occurred to me in the last year that although his headboard is not wood, it will still collect dust! oops!
The good news about all of these not-so-organized spaces is that there is no shortage of content within my home to blog about!!! Keeping my home organized is a constant work in progress. And don’t worry, I will be working on these spaces… this week! (well except maybe the oven… honestly that doesn’t really bother me that much…don’t judge!!)
As we enjoy our home and our life outside of it, things just get messy! Systems must be maintained, and periodically I have to scrap a system and start over. Occasionally I even get to put a little time and money into upgrading an existing system to make it a little prettier or a bit more functional.
A little upgrade is the inspiration for this next organizational topic – the Master Closet! Our master closet is spacious and outfitted with plenty of shelves and hanging space. I don’t love the wire shelves, but I don’t hate them either. When we first moved in I bought translucent liners from The Container Store to prevent wire marks on folded clothes, and the shelves have functioned pretty well ever since.
The problem in our closet is that I’ve never had any drawers! We don’t have drawers in our closet system and I don’t even have a dresser. When we first moved in we bought some canvas bins to hold small stuff – socks, underwear, pajamas… The system worked to keep items in their “zone”, but I wouldn’t say I could always find what I was looking for. I also knew our closet had more potential!!!
So, I decided that after Christmas I would do a closet overhaul! The steps I took in my closet are the same steps I would recommend for anyone that wants to tackle their master closet – no matter how large or small the project seems. I’ll walk you through the project here on my blog for those that like to jump in and tackle a project in a day or two. If big chunks of time aren’t realistic for you, follow me on Facebook as I post two weeks worth of small tasks (requiring about 30 minutes each) that will leave you with a transformed closet before spring arrives!
One quick tip: (that I shared on Facebook last week) Simply removing all of your empty hangers makes such a huge difference in the amount of hanging space you have. I stash all of my empty hangers off to the side of my closet, placing them there immediately after removing a piece of clothing to wear. This little task takes maybe 3 seconds longer than just pulling the shirt off the hanger. It easily saves you that much time when you’re doing laundry or trying to hang something back up. When I do laundry I can quickly grab a handful of hangers from my “stash”.
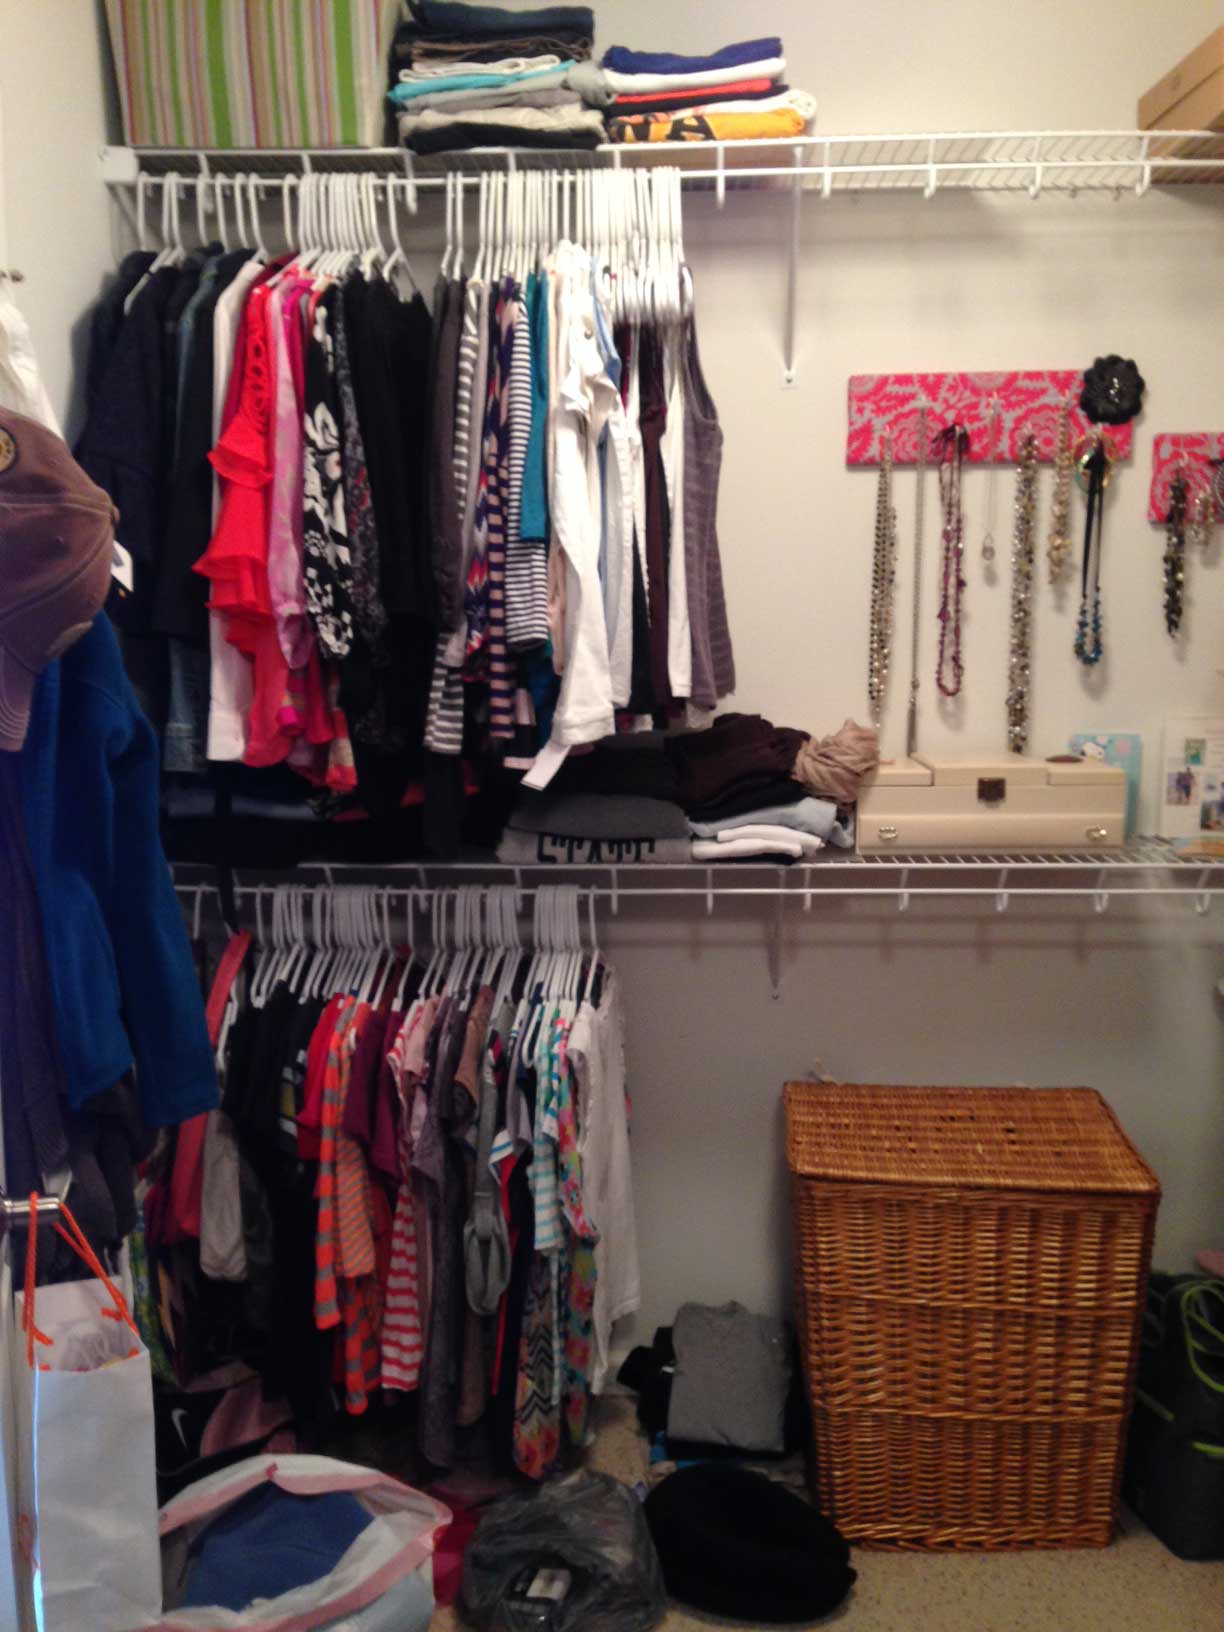
If you follow me on Facebook, you also saw before and after photos of a little closet refresh I did recently. This was my first step in reordering my closet using my current storage system. I didn’t want to put anything new in place before I could clearly evaluate what items I needed space for, what I have, and what I wanted to get rid of. The closet had gotten pretty out of control over the holidays!! Here are the before and after photos…
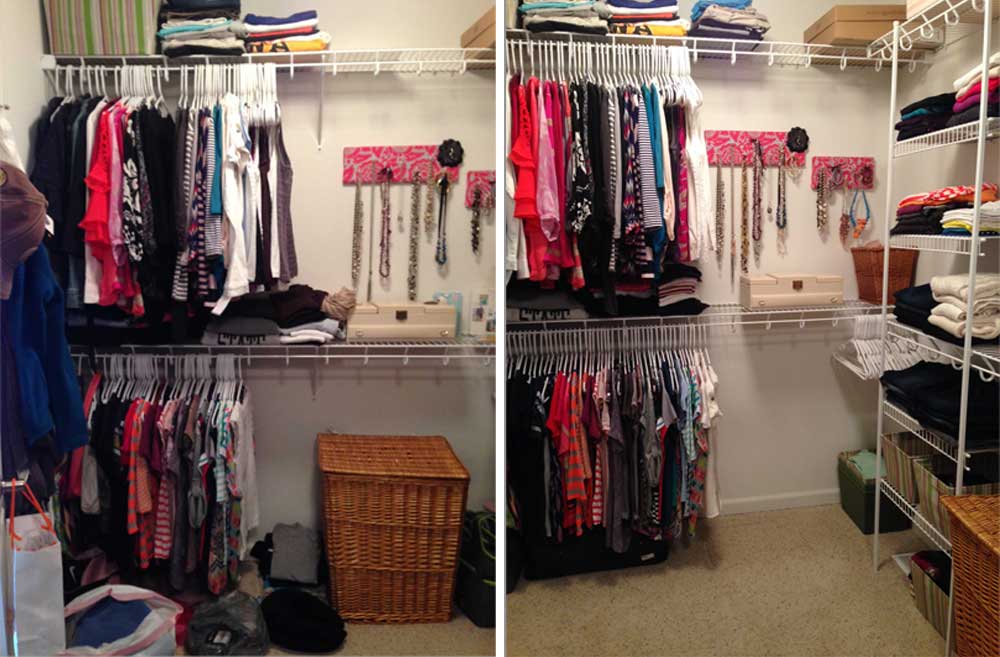
This project took me less than 2 hours, and totally changed how my closet functions all by itself! I always start a project by rounding up some basic supplies – vinegar water & paper towel (to clean), trash bags (one for trash and others for items I will donate), and a couple of canvas bags for miscellaneous items that are not going to a donation center.
I always remove empty hangers, so I got to skip that step! I started by quickly removing some items that I knew I needed to get rid of – they got tossed in a trash bag to donate. Don’t try anything on that you aren’t sure about. That is such a time consuming process for most of us, not to mention the emotional effect it often has. We get frustrated with all the things that no longer fit, feel guilty about that piece we spent too much money on and never wore, debate the sweater we hate but got as a gift… Don’t start your project with this emotionally draining process!!
I also grabbed a few things that were hanging, stacked on shelves, piled on the floor… oh my!!! that didn’t even belong in my closet and moved them to my room. There was a pile of returns, some things to give to other people, a couple of gifts, and some things that belong in my kids’ rooms.
Next, I sorted through all of my clothes and grouped them together by category. These are the categories I suggest… Sweaters and nice jackets, casual sweatshirts, long sleeve shirts, short sleeve shirts, tank tops, pants & dresses (I would put skirts with either pants or dresses.) While you sort categories make sure all of your hangers are hanging the right direction – you know, the easy way to get them off and on the rod!
Now it was time to get everything off the floor that needed to be folded or put on hangers. This was really rewarding for me! Look at all the craziness that had accumulated on my floor!!! I don’t know who lived in my house over the holidays, but seriously! She is kinda a slob!! 🙂
As you hang items that were on the floor (we both know it isn’t all dirty laundry!) hang it up within the correct category on your rod. Fold things that will go on your shelves, and then set them aside for later.
Now that you have all of your clothes together, sort each category of clothing by color – don’t stress this or worry about it being perfect. Simply move from white..to..cream.. to..pink..to..red..to..green..to..blue..to.. purple..to..gray..to..black Make it a rainbow, remember ROYGBIV?!? RedOrangeYellowGreenBlueIndigoViolet!
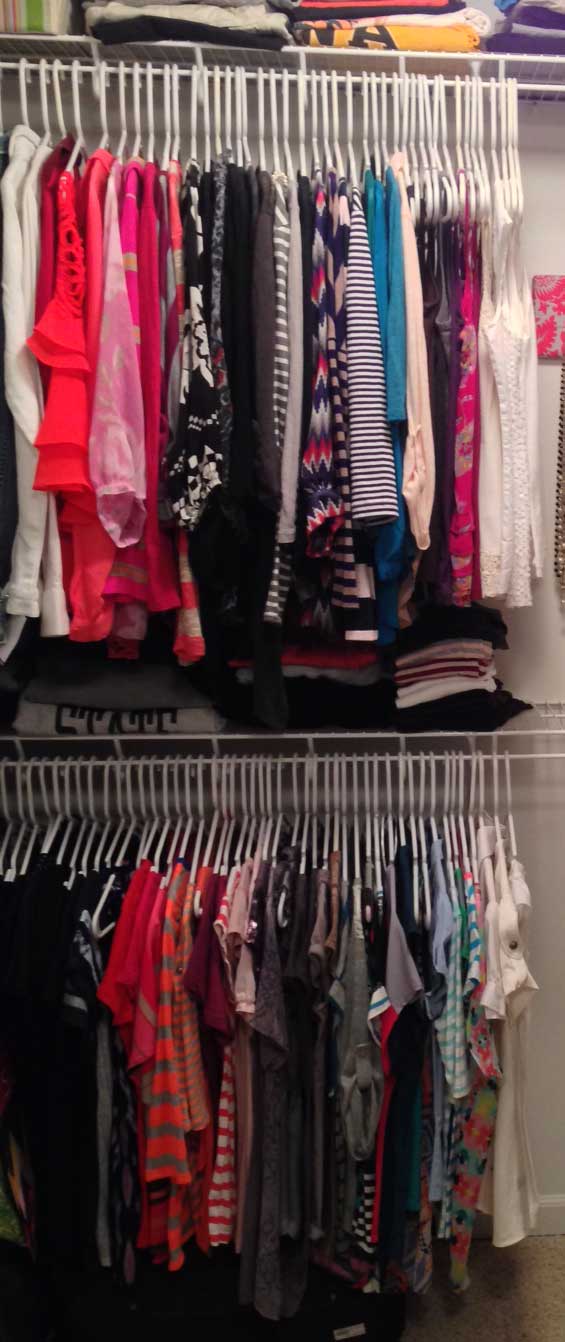
As you can see I separate by color, but don’t necessarily but them in the order of the rainbow. Jackets,long sleeve shirts and tank tops are on the top. Short sleeve shirts are on the bottom. Except as I just noticed their is one random 3/4 length shirt there too – don’t ask me!?!?!? 🙂
Once my hanging clothes seemed to be in good order, I began to re-fold and straighten piles of folded clothes on my shelves – again pulling out anything I knew I should get rid of. And let’s be honest, I had to re-establish some categories because my preexisting categories were really no longer distinguishable.
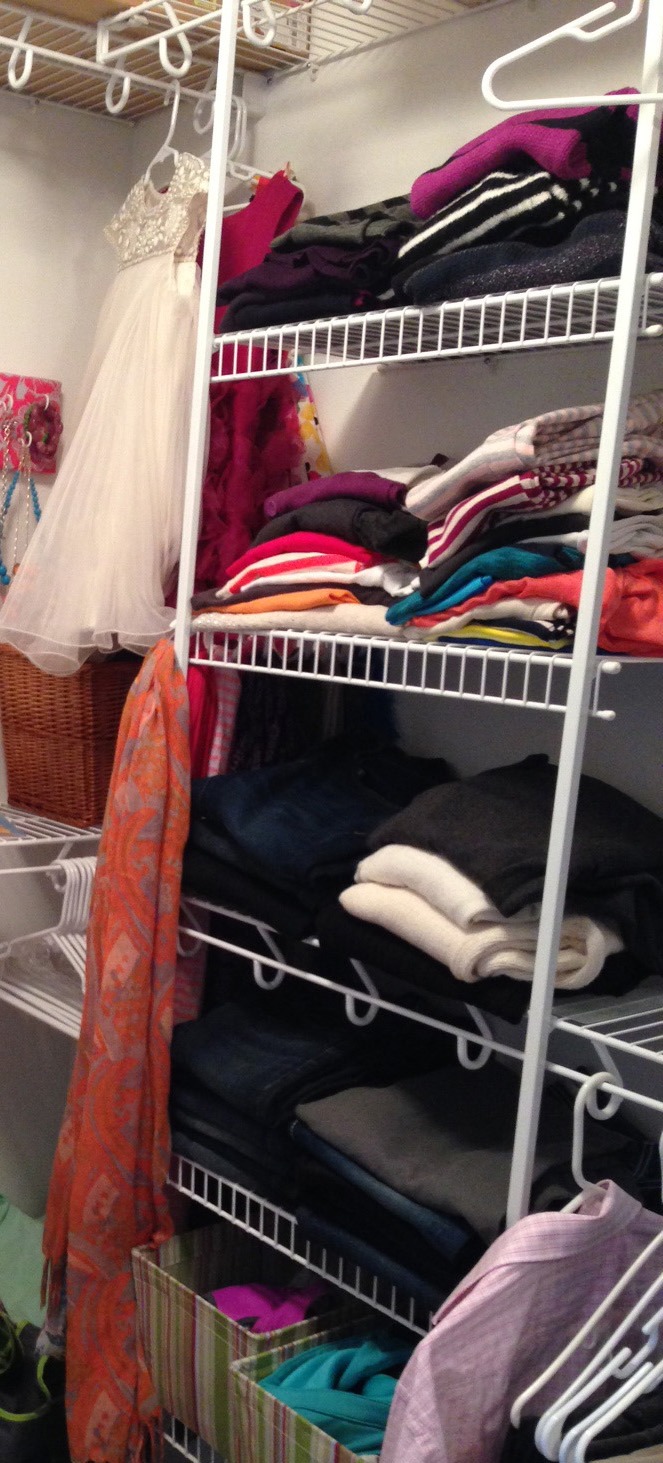
Put items you want to get rid of in your trash bag and put the rest of your folded clothes back on the shelves. I separate heavy sweaters, light weight and different sleeve lengths. This keeps stacks straighter, prevents heavy sweaters from crushing delicate ones, and just makes things easier to find. I also put like colors together because it generally looks better and it helps me find things faster. Much Better!!!!
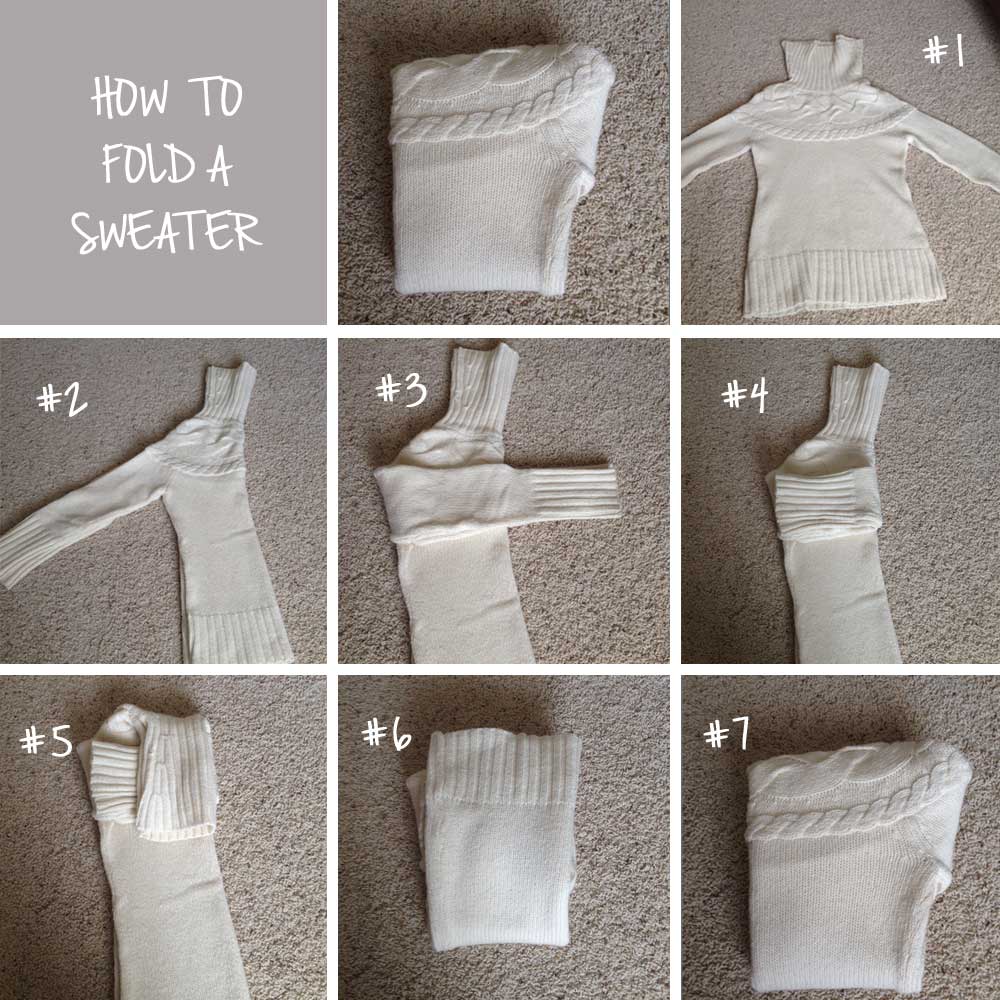
For those of you that find folding sweaters difficult, here is a little tutorial….
#1 – Lay your sweater flat. #2 – Fold your sweater in half, then #3 – fold the sleeves in along a straight line rather than at the diagonal. #4 – Fold the sleeve in thirds, and then #5 – fold the hood or collar on top of the sleeve, and #6 – fold the whole sweater in half again. #7 – Done! This makes for a nice, neat pile. I fold all sweaters this way – just omit step #5 if the sweater doesn’t have a high collar or hood.
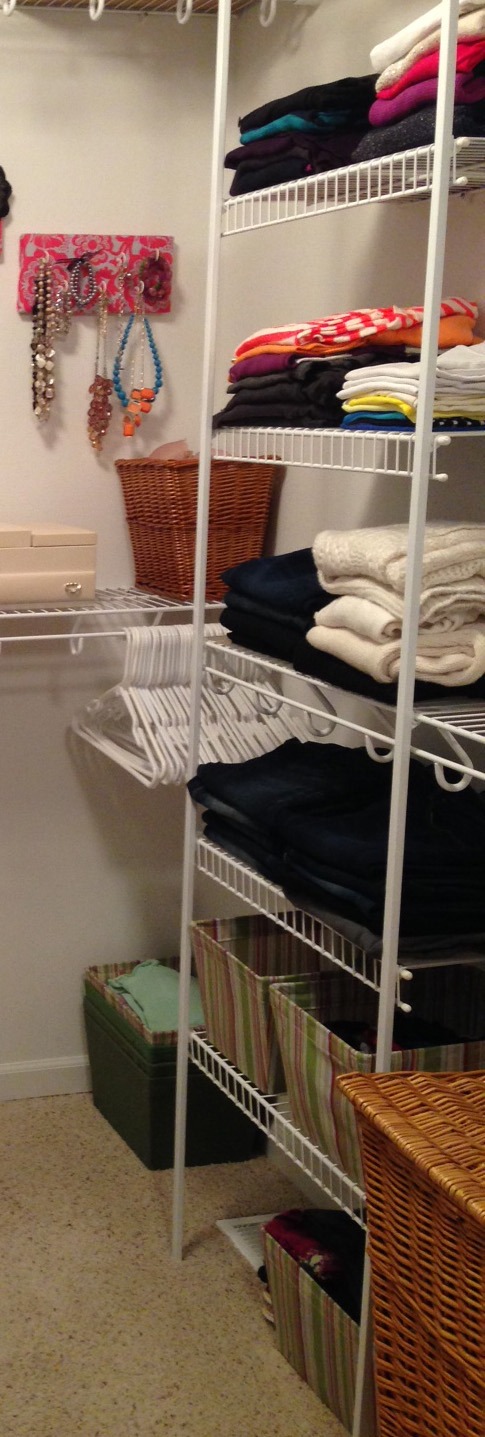
Here is the before and after again. You can see there are a few final things I did to get to my “after” photo….
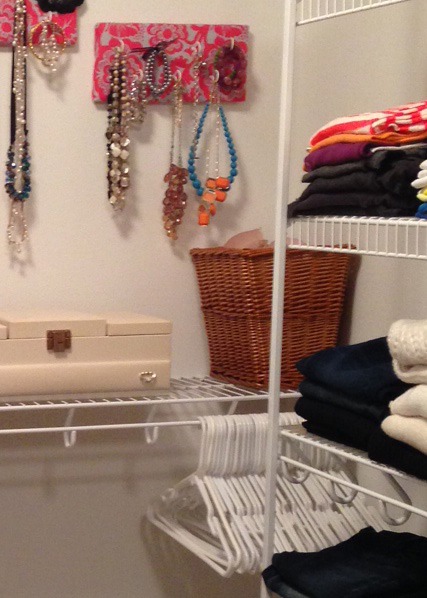
The biggest thing I did was simply relocate items to their correct home. Our swim bag had been sitting next to the hamper for me to re-order since swim season ended. (Yes, that was a REALLY long time ago!!) I concluded that there was really no good reason to store everyone’s suits in their own rooms at this point! I put paint clothes back on the top shelf, moved my scarves to the other side of the rod behind the door (a much better location), and put our hamper back where it was a year ago. Long story short, I moved the hamper to create visual space when you first walked into the closet. Well… that visual space became an unnecessary expansion of my husbands clothes – so back it went.
These steps won’t complete your closet, but in a very reasonable amount of time you will have made some serious progress!!! Trust me, you will get a happy flutter every time you walk in your new space! You may even find random excuses to bring people in your closet. 🙂
For me, the really exciting part was that these steps allowed me to step back and decide if my “want” would really solve my problem of no drawers. I decided to take the plunge and order my splurge! I used some of my birthday money for an Elfa system from The Container Store that I’ve wanted for a long time. Drawers!!!!!

Bonus: Elfa is 30% off around the first of the year. This little purchase has made a big difference in my closet!!! I’ll show pictures of the newest “upgrades” in my next closet post. And I know, some of you are thinking I’m forgetting a big category… accessories! I didn’t forget, I’m just not even going to try to tackle that in this post. I’m not sure if a blog post has a word limit, but I’m sure I would exceed it!!! I’ll spend a couple more posts on the master closet to help you finish clearing any piles that remain.
And if this post without accessories was even to long, and your head is spinning… just follow along on Facebook over the next couple of weeks as I walk through these steps in a simple “30 minutes a day” plan to Upgrade your Master Closet!