I’m super excited to share my “fancied up” pantry with you all, but I have to say I’m a little hesitant as well. Remember my first set of posts about my philosophy of organization? I must clarify that I by no means think everyone should have a “pretty pantry”. I think everyone should have a “functional pantry” – the stuff I talked about in my last post. If you find no delight in taking your pantry one step further, feel no guilt and walk away! I love to make closets, cupboards, drawers… function well, but also look good. I often times have to take a step back in my desire to make things look good and evaluate if the time, money and other resources it will require is reasonable for me and my family – I would encourage you to do the same.
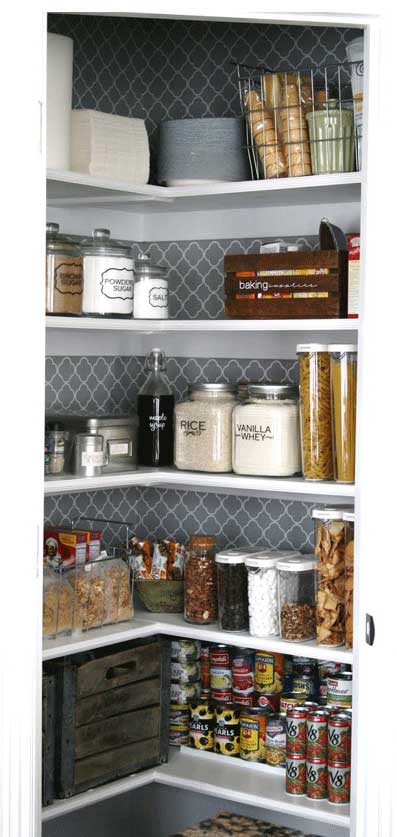
So, back to that beautiful inspiration photo from House of Smiths… Isn’t it gorgeous!!!
As soon as I saw that photo I began to dream about what I was going to do in my pantry. I started reading about this pantry to find out where she got the super cool gray quatrefoil paper, labels, and storage pieces… I quickly found out that for me to reproduce this super cool pantry it would not be cheap. She has an Etsy store where she sells the quatrefoil paper for $24 a roll, and I would need about 6 rolls. Ouch! I’m not saying that’s crazy – it is custom printed vinyl sheets – basically fancy custom contact paper, but it was not in my budget. She also custom prints her labels on vinyl – see those uber cute jars!
So, this pantry was reasonable for her because she prints her own stuff. And! she doesn’t have a door on her pantry so all the world sees her pantry all the time – wow! scary thought huh! So, this is where my expectations and reality adjustment had to start working. I reminded myself that this level of perfection did not need to be my goal. Actually I decided it shouldn’t be my goal! (Although I would not complain if this pantry magically appeared in my kitchen!)
Long story short, I searched high and low for pretty and reasonably priced contact paper, and just flat came up short! I have found options at TJMaxx – they sell higher end contact paper on occasion. The problem was that I wasn’t finding anything I liked for a price I would pay and I wasn’t really in the mood to be patient. When I find paper at TJMaxx that I like, it is usually from the last season’s “the MacBeth Collection”. The link will take you to their current collection, which shows how cute their stuff can be. And really, at $10 for two 10ft rolls, it is pretty reasonable at retail.
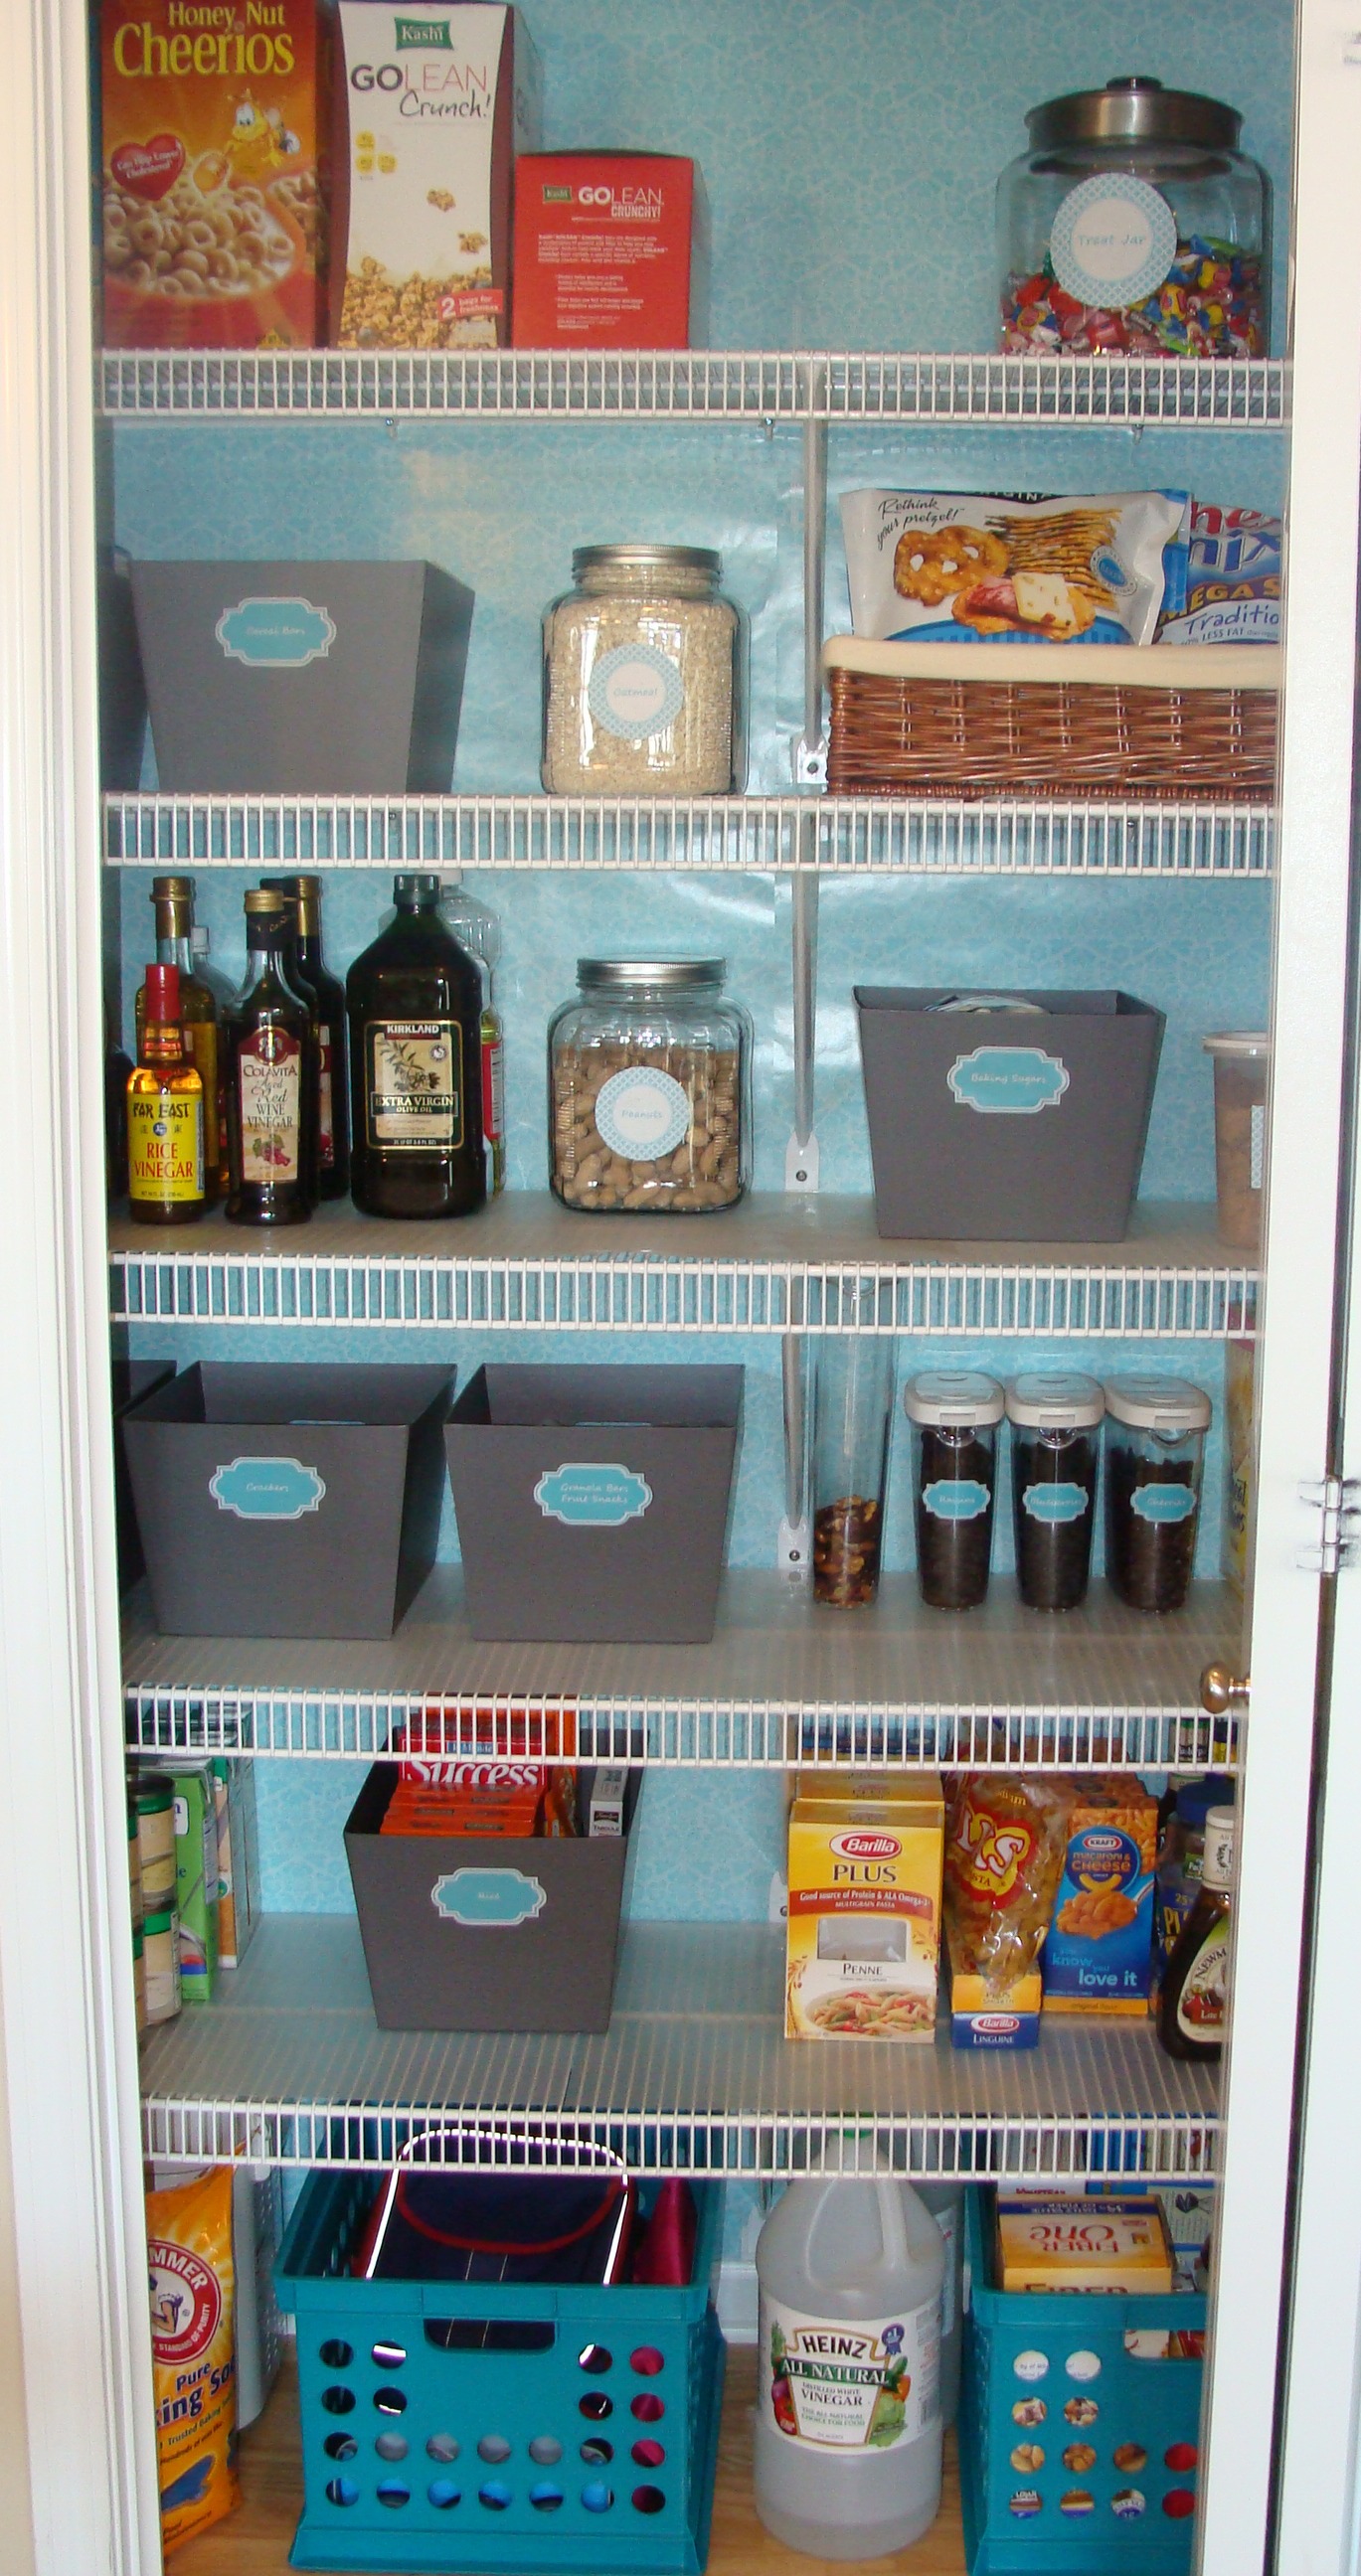
So, what did I use!?! I found some random, cute, and clearance! wrapping paper at Target in a slightly girlie blue pattern. This was perfect, because my husband really dislikes super girlie stuff – which I guess I’m kinda happy about! but he loves the color blue. I was pretty sure that he would let me do anything I wanted in the pantry, but I never want him to dislike what I pick. And yes, I said wrapping paper! I had read on blogs about people using wrapping paper as a cheap alternative to wallpaper in apartments, rented homes, kid spaces… so I decided to give it a try. I also snagged some fabulously economical gray boxes in the dollar bins. In one trip to target I went from seriously frustrated by this vision I had, to sooo excited!
One random afternoon I just started pulling everything out of my pantry and completely reorganizing my kitchen. This is how a lot of my projects start – I am fed up with a problem zone and just start tearing things apart until it is fixed. I had been using my lazy-susan style corner cabinets for food and I was hating it! Every time I turned the cupboard to open it, boxes fell out and it was on odd shape to make any order of groceries. To top off my frustration – food was located in all three corners of my kitchen – not smart on many levels! More on my cupboards in another post – which I am SO happy with now!
Here is what the food storage and pantry were like before. Not terrible – I could find everything, but definitely not great.
However, as I was tearing everything out of my pantry and making a disaster out of my kitchen, I realized what better time to put that pretty paper in place! It took some patience, but overall it went pretty smooth. I didn’t want to take down my wire shelves to hang the paper, because I was afraid I would strip the screw holes in the wall and weaken the integrity of the shelves. I cut strips of paper using my sewing mat, T-square and rotary cutter (I know, horrible of me to use my good sewing stuff when working with paper – but it worked so good!) and placed them between each set of shelves. I used double sided tape (I have said I am obsessed with that stuff!) to adhere the paper to the wall. I also used a few staples to ensure it would hold. I know staples seem to be an odd choice, but the old teacher in me came out as I hung a lot of paper on bulletin boards with staples back in the day! I must say the tape and staples have worked great, and the paper is still in place over 6 months later!
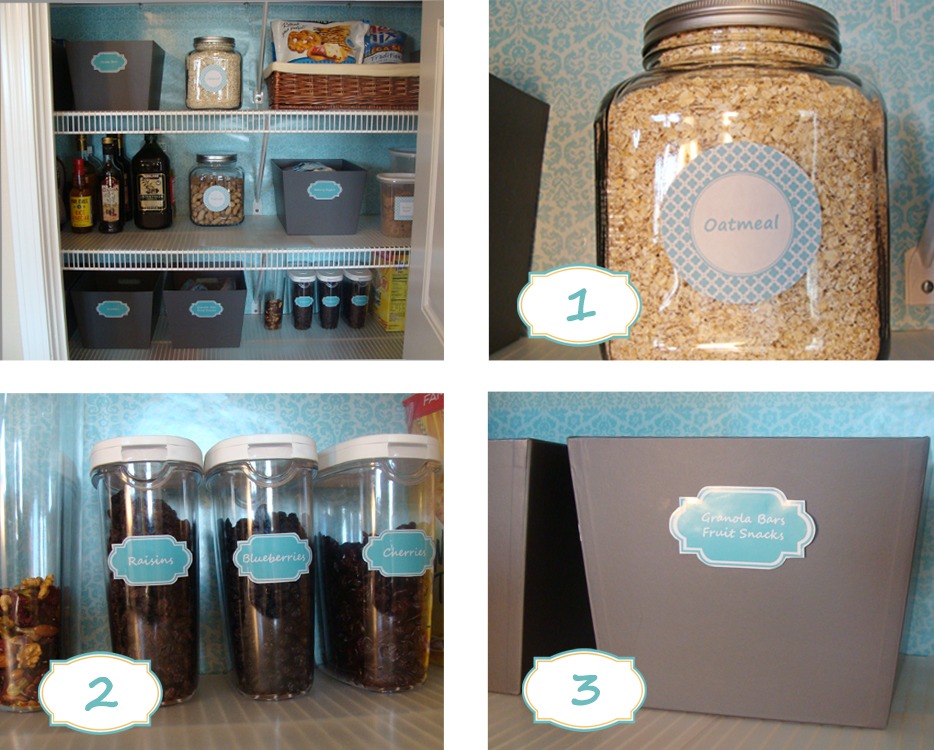
I went through all of those steps I talked about in my last post after hanging the paper. I re-evaluated what I had to put in the pantry, and sorted by food type. I also contemplated what items would look the most visually appealing and thus should be at eye level. I pulled out those fabulous find, gray boxes and started putting all of our food into the pantry. (Yes, I had to relocate some other stuff – more on that another time!) I found a basket from my basement stash (another obsession of mine!) for our chips, because it looked a lot nicer and added a little texture and variety with the gray boxes. I also used Photoshop to make custom labels, which I do often.
Now, I can’t mislead you into thinking that the pantry was done that first night! I got all of the paper up, and the boxes and food in place. It took me a few days to get the labels done, and I made a few changes over the following couple of weeks. I have to say though, that given the cost and time I am SO happy with how it turned out. Whata ‘ya think?!?!
To get all of the food stored in a functional and visually appealing way, I did incorporate more new pieces than just the gray boxes and pretty paper. I added some plastic crates, a basket for chips, some awesome Ikea containers….
Here is an inventory of the organizational supplies I used…
1. Metal top jars for oatmeal and peanuts.
($5.67 each from Walmart, but had in “before” pantry) 2. 4 plastic storage containers for dried fruit and nuts -LOVE these! I totally want to encourage my kids to have dried fruit and nuts as a snack, but they always left the ziplock bags open and they got hard and stale. Not a cheap snack to let go to waste! ($13 for all 4 at Ikea) 3. Seven gray buckets ($3 each from Target) 4. 2 Rolls of wrapping paper ($2.67/each from Target) 5. Chip basket. (pulled from my basket stash) 6. Large “treat” jar on the top shelf. (used in the “before” pantry, from Target) 7. Plastic crates for the floor – Love that my bulk food purchases and lunch boxes no longer go missing in the far corners of the closet. These crates are sturdy and super easy to pull in and out. I did put felt pads on the bottom to protect the floor. ($6/each at Target)
I won’t lie and say this was totally easy, but it really wasn’t that hard either! I love that it ended up being cheap too – for less than $60 I now have a pantry that looks pretty, and functions even better than before! Here are a few more thing I love about my “new” pantry.
1. It looks pretty! (oh, I said that!) 2. All of our food is in one place. 3. Healthy snacks are at kid height, and are labeled. I don’t alwayshave to help the kids get their snacks, and they get the lids back on! 4. Everything is labeled so sitters, extended family, guests,
(and the hubby!) know where to find things. 5. Stuff doesn’t get lost in the far corners of the pantry. 6. The order is easy to maintain.
So, what do you think – was it worth it? Here’s the before & after!


