
Does someone in your house love Legos? My son has been obsessed with them for a few years now, and of course wants more for Christmas! I must admit they are one of my favorite toys too! The problem is… storage!
I love the idea of all of my son’s Legos being sorted by type or color, and honestly we’ve tried that. The problem – it only lasts a month or so and then they are all mixed together again. Also, it seems to take too long to get everything out and clean-up between building sessions. So, a couple of years ago I went back to the storage solution my brother had decades ago – a big Lego bag!
I tried to find one online and even checked ebay, but couldn’t find one like my brother used to have. So I decided to make it myself, and it was not hard at all! I recently asked Carter if he wanted to try sorting pieces by color again – using drawers, but he said… “No, I love my lego bag!” Happy momma! my work is actually appreciated!
So, about the bag… It is a large round piece of cloth that lays flat as a play mat when kids want to build, and then ties shut with a rope when they are done. I find it is large enough that most of the Legos stay on the mat = in the bag = easy clean up!

Why we love the Lego Bag!
1. All the pieces are together, where you can find whatever you want.
2. 4 or 5 kids can easily play and reach all the Legos at the same time.
3. You can spread out the Legos to find things, but still easily pick them up when done.
4. The set-up and clean-up is super fast and easy!
If you have a Lego fanatic on your Christmas list, or you’re just tired of looking at and picking up Legos all the time…. here is a cheap and easy solution!
Materials:
– 1.5 – 2 yards of 54″- 64″ denim or other heavy material (duck cloth, canvas…)
– 2 dozen medium to large grommets
– 18 – 20 feet of heavy duty rope
Take your fabric and cut it into a circle. You will need 54″ – 64″ width fabric to make a bag large enough for a play mat. Note that your bag will only be as big as your fabric is wide to make it a circle. I’m not sure how the bag would close and work if you made an oval, so avoid the standard 34″ fabrics. If you use a half-off coupon, or wait until the fabric goes on sale at Joann’s or Hancock fabric, it should be $5-7/yd.
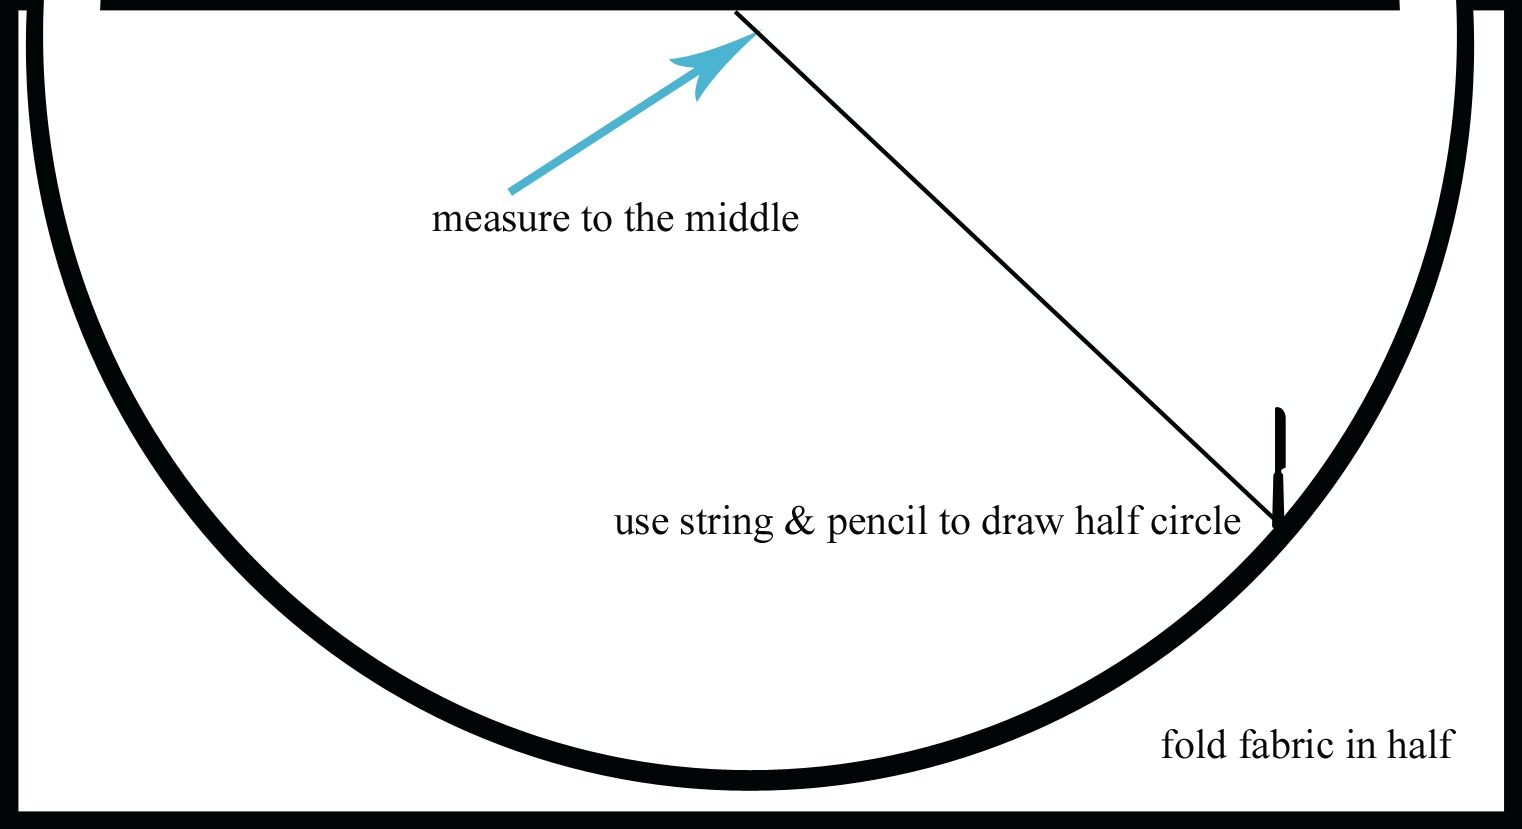
To easily cut the fabric in a circle…
1.) Fold the fabric in half, wrong side up
2.) Measure to the middle of your fabric.
3.) Tie a string to a pencil that is the length of your measurement to the middle of your fabric.
4.) Hold the untied end of the string at the center of your folded fabric, pull the string tight and draw a line with the pencil to make a half circle.
5.) Cut along pencil line, and unfold fabric.
You should have a large circle of fabric. Pin a 1 inch hem around the entire circle and sew it down. You could turn the hem under twice or use a zigzag stitch to keep it from unraveling. I used a zigzag stitch to maximize the size of the bag, and it has held up very well.
Grommets:
Once you have a finished edge, place grommets every 6-8inches. I did not make a round hole for the grommets, but simply cut a slit in the fabric. I used a basic grommet kit, with a hammer. I did not buy grommet pliers, or the fancy tools you can get. (Note: make sure your grommets are big enough for your rope to slide easily through.)
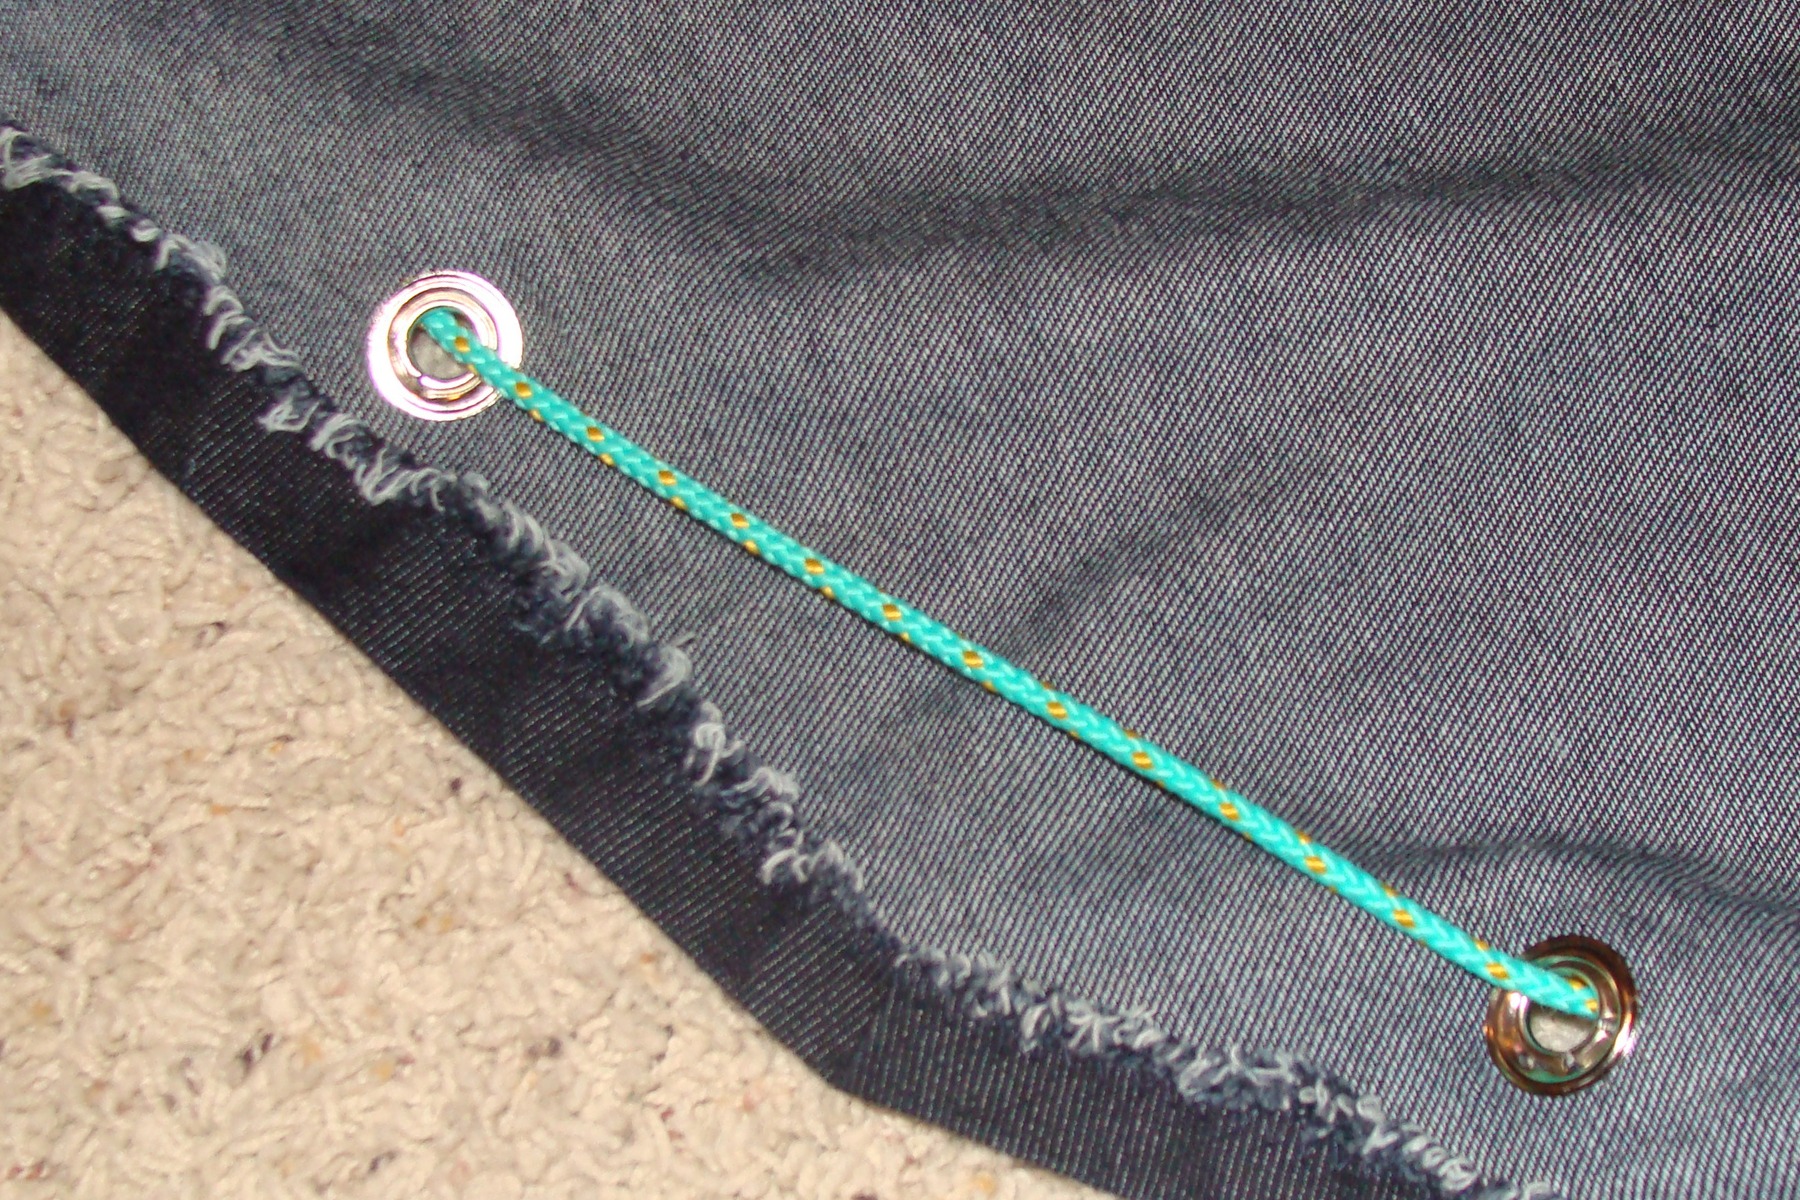
Adding the Rope:
Note that you will want to use a strong and durable rope so it is not cut by the metal grommets. I used durable construction type poly rope from Home Depot. You can purchase it by the foot. Take rope and thread it in and out of the grommets, with the bag open and flat. You will want enough rope to have about 2 feet of rope left when the bag is fully open. Make sure your excess rope is even and then tie the very end of the two sides of the rope together. This will prevent the rope from getting pulled out of the grommets, and will help the rope stay evenly distributed when kids open and close the bag.

That’s all – you’re done! Simply pull the bag closed with the rope when not in use, and spread it out again to make the play mat. You could store the bag in a closet, a wheeled tote, or even hang it on a hook. If you hang the bag you will need to anchor the hook in a stud – as the bag gets a bit heavy!
I’m just getting used to the step-by-step instructions. So, if a step is unclear email me, or post a comment for me to clarify the directions.